You need to select the paper size correctly before printing. If you set the wrong paper size, your printer may print black pages or show printer errors.
There are various ways to change the paper size on an HP printer. In this guide, we will show you how to change the paper size on an HP printer and customize it as per your needs and preferences.
How To Change The Printing Paper Size on HP Printer?
Follow the methods below to know how to change paper size on HP DeskJet printers or other HP printers.
1. Change the Paper Size from The HP Printer
The below-given steps to change the paper size can vary depending on your HP printer model, but the basic process is usually similar. Here is how to change the paper size on your HP Printer:
- First of all, load the paper you want to use for printing into the printer’s paper tray and ensure that the paper orientation is correct and the papers are not bent. Also, make sure the printer is connected to a stable network.
- Next, open the printer’s control panel or menu.
- Navigate to the “Paper Size” or “Paper Settings” options. Depending on your printer model, you will find this under the Preferences or Print Settings menu.
- Scroll through a list of the paper sizes, or you can manually enter the dimensions of the paper. Save the changes.
2. Change the Paper Size on the HP Smart App
Here is how to change the paper size on the HP Printer app:
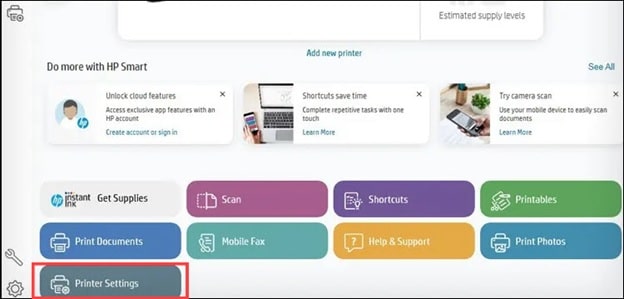
- Open the HP Smart app on your PC using the Search Menu.
- Go to Printer Settings.
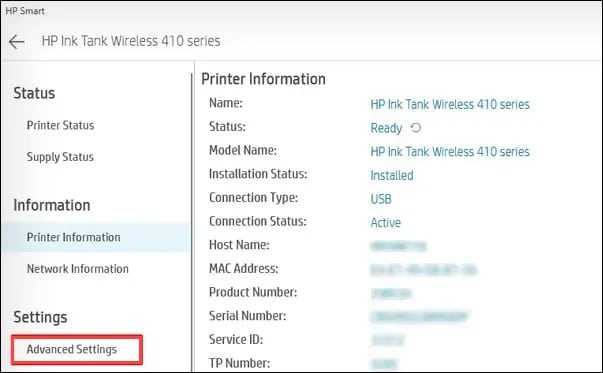
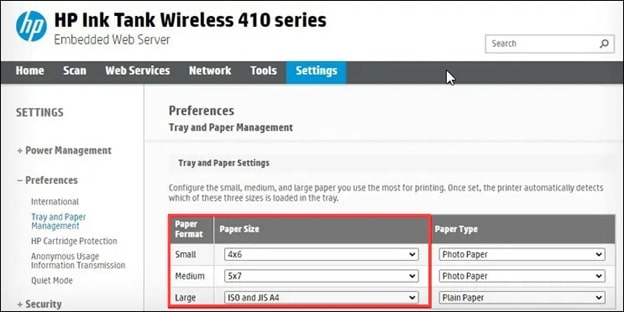
- Select Advanced Settings. This should redirect you to the printer’s Embedded Web Server.
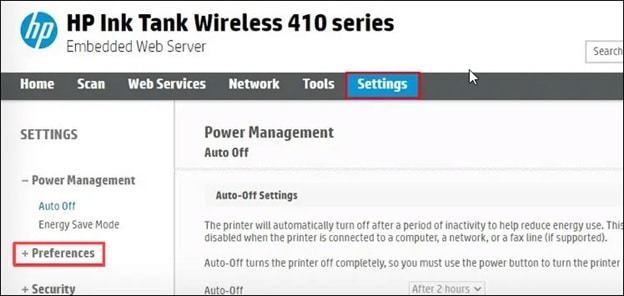
- Navigate to Settings > Preferences.
- Select the Tray and Paper Management option.
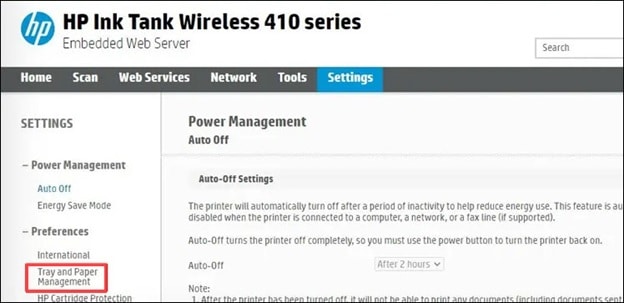
- You need to select the paper size from the drop-down menu and click Apply.
3. Change The Paper Size Using Printing Preferences
You can also change the printing paper size from the Control Panel. Here is how to do it:
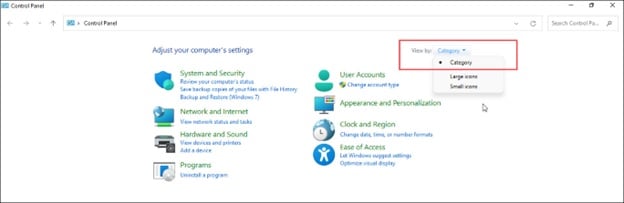
- Open the Control Panel on your PC using the Search menu.
- Set the view by the option to Category.
- Select Hardware and Sound.
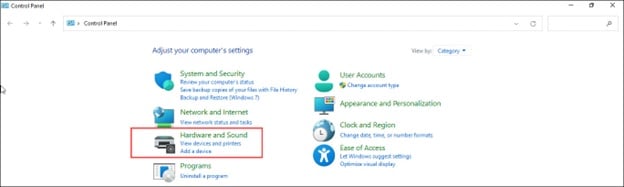
- Next, select Devices and Printers. From the list of devices & printers, right-click on the HP printer icon and select Printing Preferences.

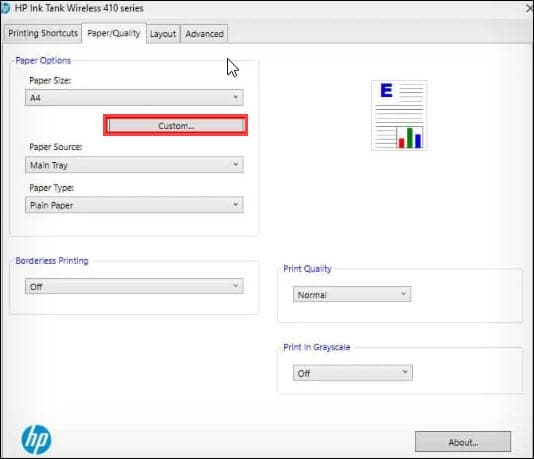
- Go to the Paper/ Quality tab.
- Select your preferred paper size from the Paper Size drop-down menu.
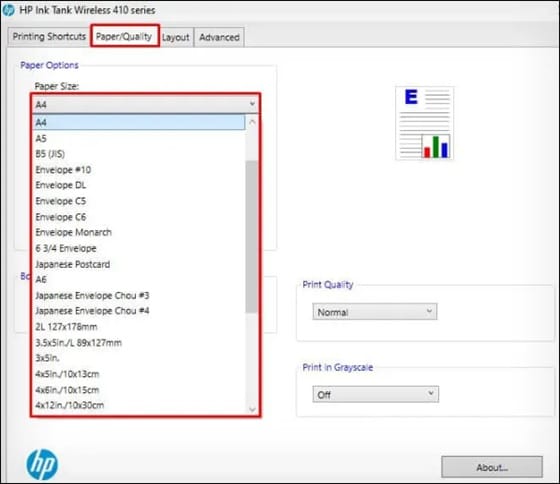
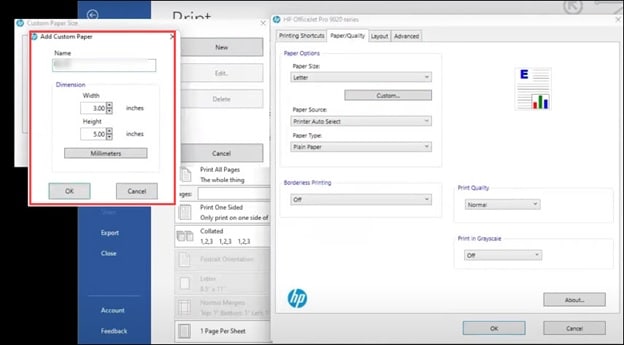
- For Custom Paper size, click on the Custom button.
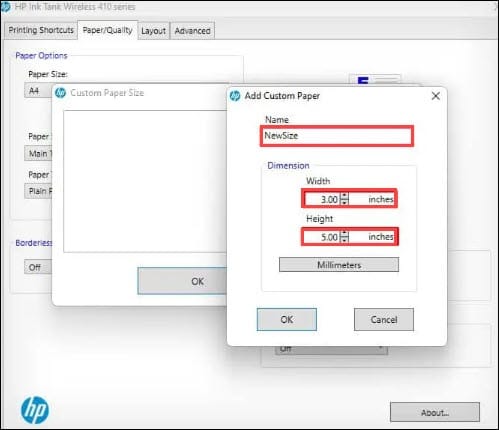
- Choose New.
- Give a name for the new paper size. Make sure not to choose from the existing list of sizes.
- Define the Dimensions of the paper in Width, Height, and Inches, and click on OK to save the changes.
4) Change the Paper Size Via MS Word
To change the printing paper size from MS Word, follow the below steps:
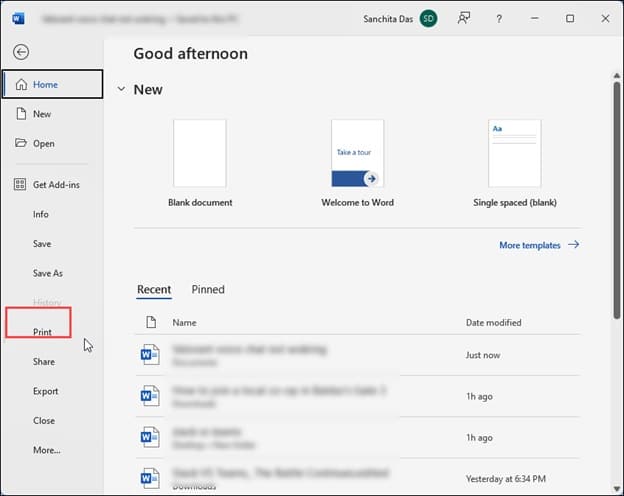
- Open the Word document you want to print.
- Go to the File tab & select Print.
- Choose your HP printer from the Printer drop-down menu and select Printer Properties.
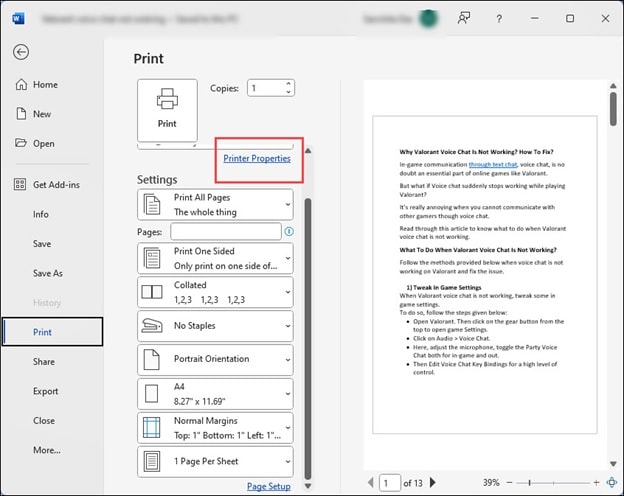
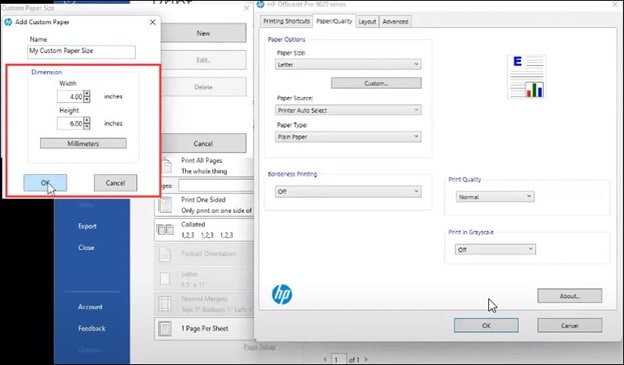
- Go to the Paper/Quality tab and click on Custom.

- Click on New and type a name for the custom paper size. Select the width and height of the paper.
- Click on OK to save the changes.
- From the Paper size drop-down menu, set the paper size you have customized and then click on OK.
If you do not see the custom size you created, your printer doesn’t support that size.
Then, you have to go through the printer manual or visit the manufacturer’s website to check the supported paper sizes.
5. Create Custom Paper Size From The Page Setup Menu on Mac
If you are using a MacOS, then follow these steps to create custom paper sizes to print from the page setup menu:
- Load the paper in the printer tray properly. Then, on your MacOS, open the document you want to print.
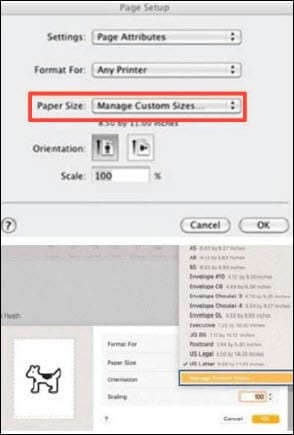
- Go to File > Page Setup.
- From the Paper Size menu, choose Manage Custom Sizes.
- Click on the Plus sign to customize a new paper size.
- Type a name for the new customized size. Set the width and height and click on OK.
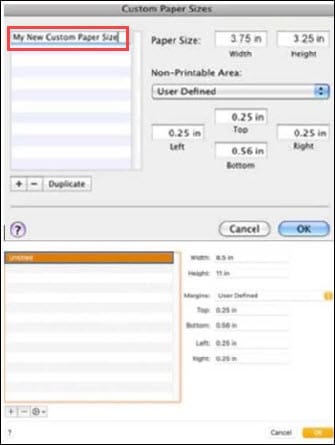
- Now go to the Page Setup window and select the new customized size. Click on OK.
- Then go to the File tab and click on Print. The printout should be in the new size you have created.
6. Create a Custom Paper Size From the Print Menu on Mac
You can customize a preferred paper size from the Print menu on MaOS. To do so, follow these steps:
- Open the document you want to print. Go to the File tab & select Print.
- From the Paper Size menu, choose Manage Custom Sizes.
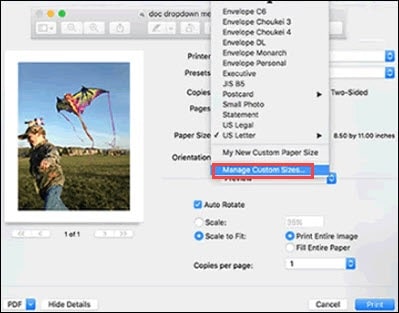
- Click on the Plus icon to create a new paper size.
- Name the size and set the dimensions. Then click on OK to save.
- From the Print Preview window, select the new customized size and click on Print.
If you need any assistance in changing the paper size on your HP printer, you can go through the user manual or contact the HP customer care unit.
You should use compatible paper for your printer, as utilizing paper that is too huge or too small can affect how well the printer performs.
Frequently Asked Questions [FAQs]
- How can I get my printer to eject the paper?
You can slowly pull the paper from the Rear Tray or Output Slot. If the paper tears, you can open the Top Cover and remove it.
- Why is my printer not printing?
If your printer is not printing, then check that there are enough papers in the paper tray and that there is enough ink in the cartridges.
- Can I use water to clean the printhead?
Yes, you can take out the printhead carefully and soak it in a bowl of water for a few minutes. Then dab the printhead on a paper towel and insert it back after it is completely dry.
Wrapping Up
So, that was how to change the paper size on an HP Printer.
If you have any further queries, ask us in the comments section, and we shall soon revert with answers.
