Thumbnails show you a glimpse of the contents of the folders stored on our computer.
With thumbnails, you can easily identify the files without opening them.
But what if Windows 10 thumbnails not showing? It mainly happens when the thumbnail cache gets corrupted over time and stops showing you the preview of the contents of the folders.
Sometimes due to misconfiguration in the settings, you may also find the thumbnails are missing.
Now, in this article, I am going to how you can get to see the thumbnails again.
Also read: How Do I Restore My Thumbnails On Google Chrome?
Windows 10 Thumbnails Not Showing: How To Fix?
Follow the processes shown here when Windows 10 thumbnails not showing and fix the problem.
1) Enable Show Thumbnails Instead Of Icons Option
When the thumbnails not showing on Windows 10, follow the steps given below and change some settings:
- Enter File Explorer in the Windows search box and choose the top option.
- Scroll down to find My PC and right-click on it. Choose Properties from the given options.
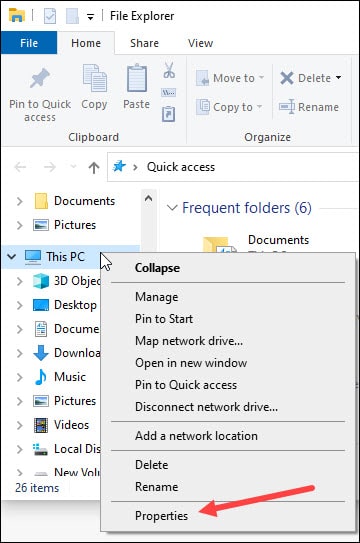
Or you can simply right-click on This PC desktop icon and select its properties.
- Select Advanced System Settings.
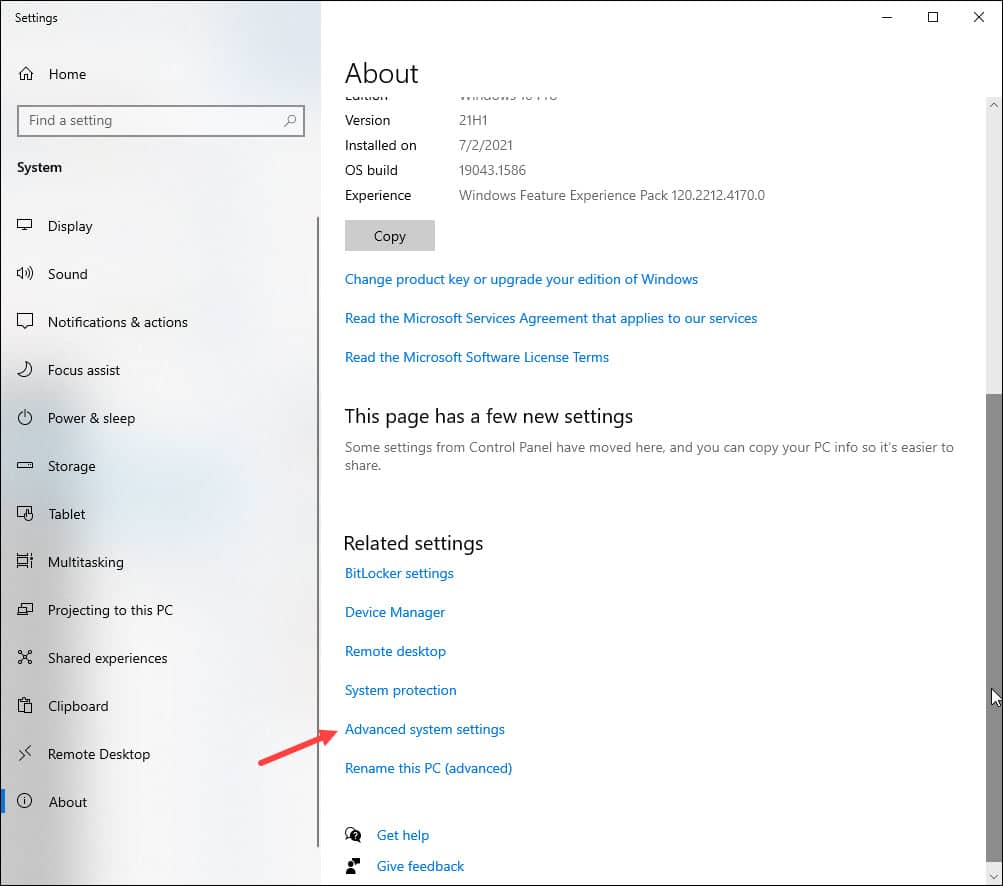
- Next, go to the Advanced tab and from the Performance section, click on Settings.
- Check the box for Show thumbnails instead of icons.
![]()
- Save your changes by clicking on the Apply button followed by OK.
Restart your computer and check if this has solved the problem or else o to the next step.
2) Tweak File Explorer Settings
Now to disable the feature, follow the given steps:
- Enter File Explorer Options in the Windows search bar and click on the first option.
- From the File Explorer Options window, click on the View tab.
- See if the checkbox for Always show icons, never thumbnails is unchecked. If not, do so, and then go to the next step.
![]()
3) Revert To Default File Explorer Settings
Some misconfiguration in the File Explorer settings can be the reason why Windows thumbnails not showing.
So, restore the File Explorer Settings to its default and check if this helps. Follow the steps to do so:
- Open File Explorer options and click on the Restore Defaults option as shown in the picture below.
- Next, go to the View tab and click on the Restore Defaults option.
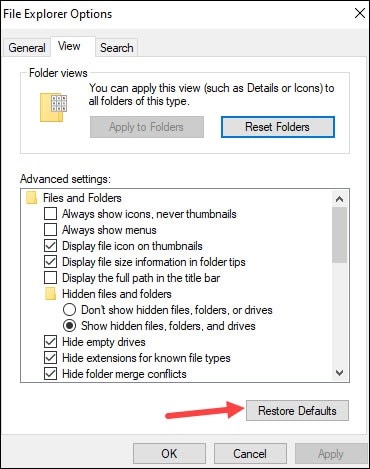
- Save your changes by clicking on the Apply button followed by OK.
4) Remove Thumbnail Cache
Sometimes the Thumbnail cache may be corrupted and this may be the reason why Windows thumbnails not showing up.
To resolve the problem, delete the thumbnail cache following the steps given below:
- Enter Disk cleanup in the Windows Search menu and select the top option.
- Select the drive that you want to scan and click on the OK button.
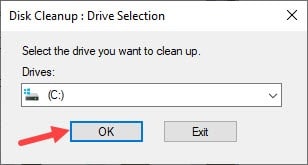
- Wait till the process gets completed. From the Disk Cleanup window, click on the checkbox for thumbnails and click on the OK button.
You can also click on the temporary files to remove those. A window will clear the thumbnail cache and generate those again. Now, this should solve the problem.
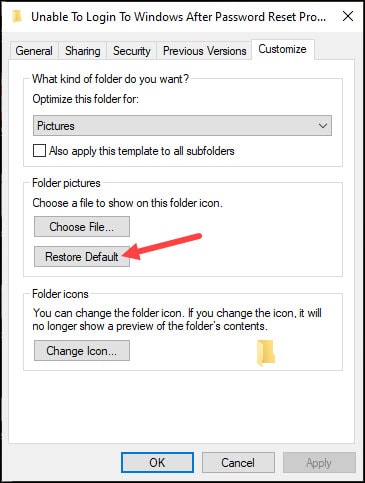
5) Restore Default Folder Setting
If you still cannot see the thumbnails after performing the above steps then revert to the default settings of the particular folder.
The steps are simple and relatively easy to follow:
- Right-click on the problematic folder and expand its Properties.
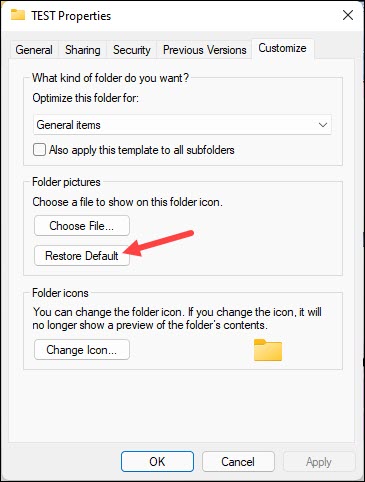
- Go to the Customize tab and click on the Restore Default option.

- Click on the Apply and then on OK. Now check if this solves the problem.
6) Run SFC Scan
If after performing the above steps, still, Windows Explorer is not showing thumbnails then run SFC and DISM scans.
If you are getting this problem due to corrupted system files then an SFC scan will fix it.
A DISM or Deployment Image servicing and management scan will repair the Windows image.
After running the scans check if you can see the thumbnails, else go to the next step.
7) Uninstall Third Party Applications
Sometimes the third-party apps installed on your computer can be responsible for the missing thumbnails.
So, if you are getting the problems soon after installing any software program, uninstall it. To do so follow the steps given below:
- Press Windows + I keys to open Settings.
- Select Apps from the settings window.
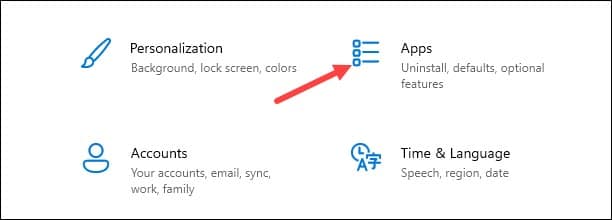
- Scroll down to find the third-party software you have installed recently and right-click on it. Select Uninstall as shown below.

Restart your computer after uninstalling the software. Check if the problem is solved or move on to the next step.
8) Change Default File Viewer For The Particular File
If you cannot see a thumbnail for a particular file type, then change the default app for that particular file. Now if this sounds confusing, perform the steps as directed:
- First of all, find the file type for which you are not seeing the thumbnails.
- Right-click on that particular file type and click on the Open With option. Select Choose another app option.
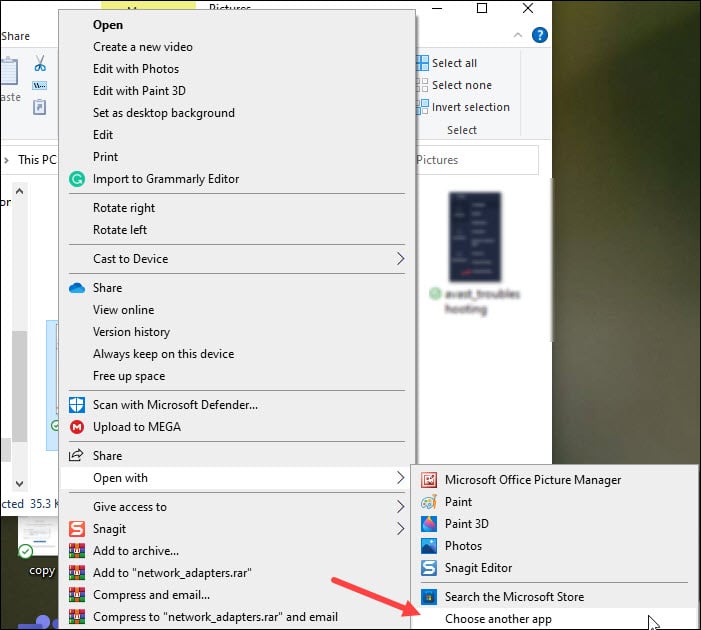
- Click on the proper file viewer for the file type.
- Make sure to check the box for Always use this app to open….files option.
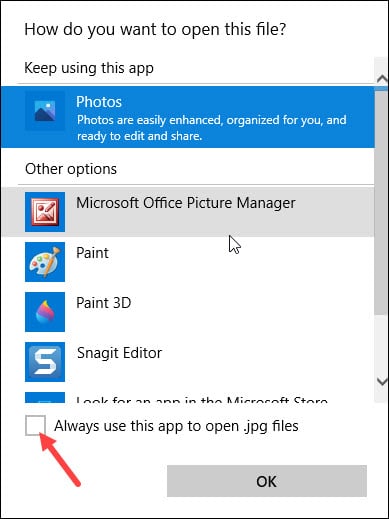
Save your changes by clicking on the OK button. Now, this should fix the issue.
Closing Up
So, those were the steps that you should perform when Windows 10 thumbnails not showing.
For any related queries, ask them in the comments section below.
