While Google Chrome is definitely one of the most popular web browsers in the market right now, the browser is filled with some bugs as well. These bugs can sometimes hamper the user experience, but the Chrome development team works constantly to repair the browser.
One such bug that affects many users in one in which the mouse disappears in Chrome. This is noted mostly by Microsoft Surface users, where they can’t see cursor in Chrome. However, many desktop users have also reported this issue.
Here I shall discuss some easy methods in which you can solve if you see that the mouse disappears in Chrome.
[Solved] Mouse Disappears In Chrome
There are many reasons why you may see the mouse not showing up on Chrome. This can be because of outdated drivers, stored up cache, your peripherals misbehaving or even missing or corrupt system files. Here are some simple solutions that you can use to diagnose and solve the error where the mouse pointer disappears in Windows 10.
Solution 1: Update Google Chrome
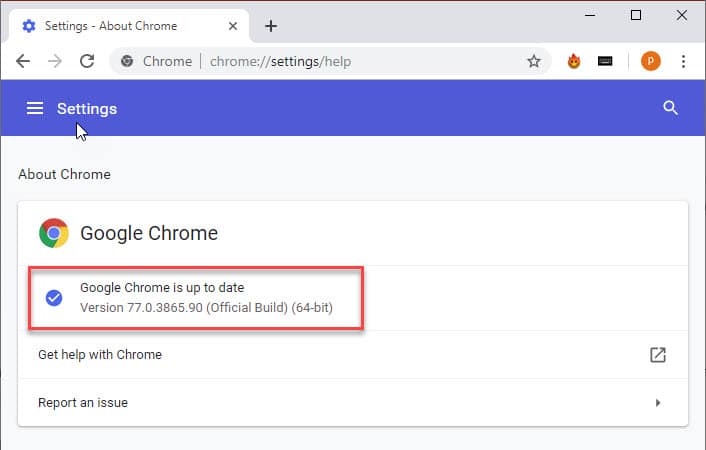
One of the primary reasons why the mouse disappears in Chrome is because of an outdated browser version. With every new version, many bugs are fixed along with new security features being implemented. If you are on older versions of Chrome, you may be stuck with older Chrome bugs that cause the cursor disappears in Chrome error.
Update Google Chrome to the latest version. You can do so by clicking on the menu button and selecting Help > About Google Chrome.
If updating the browser does not help you in solving the mouse disappearing issue, here are some other solutions that you can follow.
Solution 2: Check If Your Device Is Stuck In Tablet Mode
Tablet mode (or Continuum) was designed as a bridge between PC and tablets. When the tablet mode is enabled, all modern apps open in full-screen mode, and this can sometimes lead to an error where the mouse disappears in Chrome.
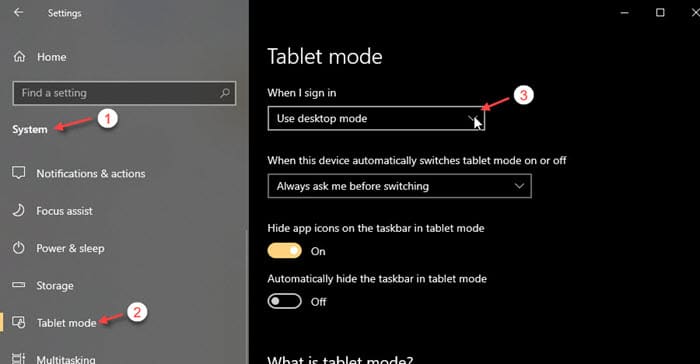
To turn off tablet mode, follow these steps:
- Open the Windows Settings You can use the keyboard shortcut Win + I.
- From the available options, click on the System menu.
- From the left pane menu under System, click on Tablet mode.
- In the right pane, change the setting to Use Desktop mode under the When I sign in drop-down menu.
- Reboot your device.
Upon restart, your device should start in Desktop mode, and the Chrome error should be resolved.
Solution 3: Update Mouse Drivers
The system configuration files that facilitate the communication between your hardware and operating system are referred to as the drivers. If the device drivers go missing or get corrupted for some reason, your hardware can misbehave. This is also true for incompatible and outdated drivers.
To update your drivers, you can follow these steps:
- Open a Run dialog by pressing Win + R.
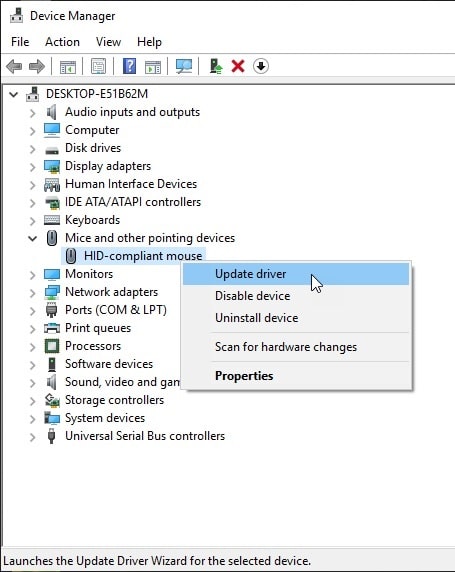
- In the editor, type devmgmt.msc and press Enter to launch the Device Manager console.
- Here, you need to look for any outdated drivers. You can easily identify the outdated drivers by observing the yellow exclamation mark next to the driver.
- Next, expand the Mice and other pointing devices section by clicking on the arrow next to the option.
- From the list of available devices, locate your mouse.
- Right click on your selected mouse, and select Update driver from the context menu.
Then follow the onscreen instructions to download and install the latest drivers for your device.
Solution 4: Disable Hardware Acceleration
Hardware acceleration if referred to the feature, where your computer hardware is specially made to perform some functions more efficiently than possible in a software running on a general-purpose CPU.
If your hardware is used to smoothen the performance, the resources tangled in doing so can create compatibility problems and hence cause the mouse disappears in Chrome error.
To toggle hardware acceleration, follow the solution 4 in our article that deals with Chrome keeps flickering.
After you restart your browser, you will see that the issue does not occur anymore.
Solution 5: Check For Other Connected Mice
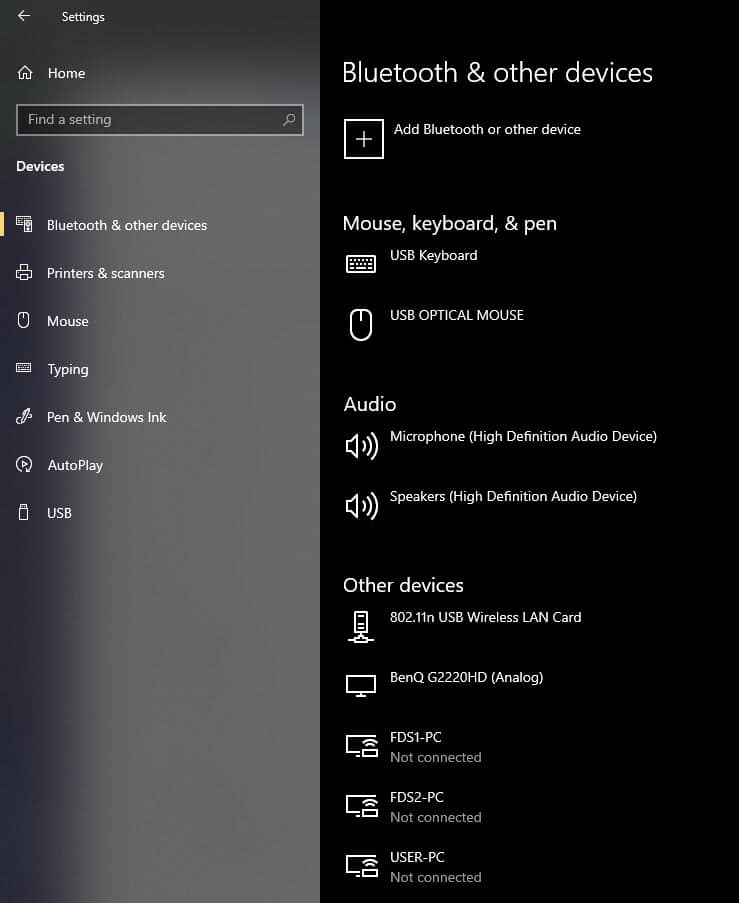
Sometimes, when more than one mouse is connected to a device, Windows ends up not recognizing any of the mice, and the mouse disappears in Chrome and other applications.
You need to check for any Bluetooth mice connected to your device. If there are any other mice connected to your device, these may cause your mouse not showing up on Chrome and other applications. In Windows 10, you can access the Bluetooth settings either from the action center or from the settings apps (quick shortcut Win + I).
If you are using external mice, try using a different port, as a damaged port can also cause this error on your device.
Solution 6: Scan For Malware
Many users had also reported that a malware hiding in plain sight was the culprit behind the mouse disappearing error on their browsers. This was the reported reason which was causing the mouse cursor disappears in Chrome error.
You can choose to invest in a third party premium antivirus software, which will automatically check your device for any hidden malware and Ransomware. Alternatively, there also exist many other free options like Malwarebytes, which will help you in checking malware and other threats for free.
Solution 7: Run DISM And SFC Scans
A System File Checker scan is used to scan for any broken or missing system files on your computer. In Windows 10, you need to run a Deployment Image Servicing and Management (DISM) scan before the SFC scan to completely repair your computer of any broken files.
Note: DISM and SFC scans use the Windows Update to replace the corrupted files. You have to use a different command if the update client is also broken. You can use that command to redirect the scans to the repair location.
Caution: Do not interrupt the scans until the verification is complete. The scans do take time, but interrupting the scans may break your system.
- Open an elevated command prompt. To do so, search for cmd in search and select Run as Administrator from the right-click context menu.
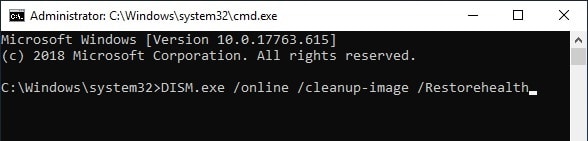
- Type the following command to run a DISM scan and press Enter:
DISM.exe /Online /Cleanup-image /Restorehealth
- If the repair source that you intend to use is an external media, you will have to use a different command for the same. Type the following command if you plan to use a removable repair source:
DISM.exe /Online /Cleanup-Image /RestoreHealth /Source:C:\RepairSource\Windows/LimitAccess

Note: Replace C:\RepairSource\Windows with the location path of your repair source.
After this scan finishes, you need to run an SFC scan.
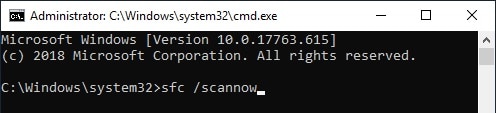
- Next, type the following command in order to run a System File Checker (SFC) scan in the same admin command prompt window and press Enter.
sfc /scannow
After the scan finishes the problem should be resolved. If there are some corrupt files, the scan will show results as a message. A message like “Windows Resource Protection found corrupt files and successfully repaired them. Details are included in the <CBS.Log windir>\Logs\CBS\CBS.log e.g. C:\Windows\Logs\CBS\CBS.log. Note that logging is currently not supported in offline servicing scenarios” will be displayed.
At last, you need to restart your computer if this command prompt has repaired any file.
If the SFC and DISM scans did not find any broken system files and you still see that the mouse disappears in Chrome, the issue will probably be resolved with reinstalling Google Chrome.
Solution 8: Reinstall Google Chrome
After following all the solutions provided above, if the issue still persists, you will need to the reinstall the Google Chrome browser on your computer to solve the mouse disappearing issue.
To reinstall Google Chrome, uninstall the browser from the control panel. Also remove the residual files for the browser from the AppData folders.
Next, download the installer from the official website of Google Chrome. Follow the onscreen instructions and wait for Chrome to be installed on your computer.
Now check if the issue still persists.
Wrapping Up
So there you have it. Now you know how to solve if the mouse disappears in Chrome. Did you find this useful? Comment below if you did, and to discuss further the same.
Thank you!
My cursor appear right after I tried with Solution 1.
Solution 2 was needed for my Thinkpad X1 Carbon with touch screen. Windows needs to be told to always treat it like a desktop computer, not a tablet. Thank you for the only solution that works for me!
Glad it worked out for you!
solution #4 worked for me, thanks!
I have no friggin cursor to do anything.