 Not all users know the detailed information related to computer and its wireless network connection. But it is imperative to have knowledge of common issues and how to fix them.
If you are using Windows 10 operating system and running a wireless network, you might come across a error message that says WLAN Extensibility Module has stopped. It means that you won’t be able to access the internet until you don’t fix this issue.
Before discussing the solution, let’s get a brief on why WLAN Extensibility Module has failed to start while using the internet-
An Introduction to WLAN Module Problem
Remember that when you use wireless network connection using adapter, it obtains an address to access the network from the server.
Your router and WLAN card drivers need to be up to date along with you need to check the laptop manufacturer’s website for firmware update related to the adapter.
If it is not up to date, this could lead to show error messages like WLAN Extensibility Module has stopped. In case you don’t find firmware update here, you can check the official site of wireless adapter manufacturer.
It has also been noticed that malware could lead to such errors. So, you need to run your antivirus scan to remove any such files from your computer.
In case your internet service keeps on disconnecting and comes back periodically, you have two options left. I have discussed them in the next section.
How to Solve the WLAN Module Issue?
Not to mention, you need to start with the basics to deal with the Wi-Fi adapter problem.
Method 1: Disable and Enable Wireless Network Connection
- Type ‘Control Panel’ in the search box
- Click on the control panel desktop app
- Go to ‘Network and Internet’
- Click on ‘Network and Sharing Center’
- Select the Wi-Fi connection to manage
- Click on ‘Disable’
Now, you need to ‘Enable’ the connection and check whether you can access the internet or not. In most of the cases, it works for the users. You can also reboot the system and give it a try.
Suppose you still get an error message, you can use Method 2 and solve the problem on WLAN Extensibility Module has stopped in Windows 10.
Method 2: Restart WLAN AutoConfig Service
- Press Windows key + R to get the Run box
- Type ‘services.msc’ and press ‘Enter’
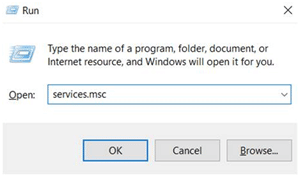
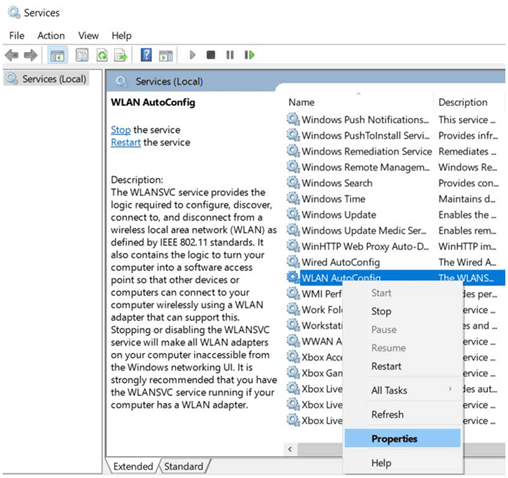
It will open the service dialog box. You need to scroll down and find WLAN AutoConfig
- Right click on ‘WLAN AutoConfig’
- Select ‘Properties’ option from the drop-down menu
- Select ‘General tab’ on Properties
- Choose ‘Startup type – Automatic’
- Click on ‘Start’
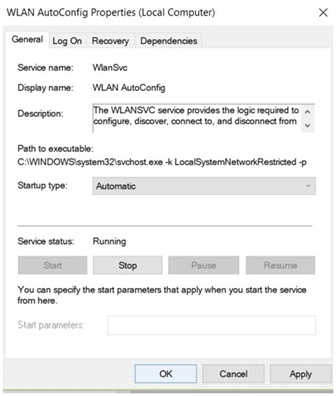
- Select ‘Apply’ and Click on ‘OK’
It’s done. Now, you need to access the internet to check the connection. Hopefully, this will work on your Windows 10 operating system.
Additional Method – Power Management
Follow these steps-
- Go to ‘Control Panel’
- Select ‘Device Manager’
- Go to ‘Network adapters’ and choose the Wireless Network
- Right click on ‘Wireless Network Adapter’
- Choose ‘Properties’ and select ‘Power Management’ tab
- Untick ‘Allow the computer to turn off this device to save power’
- Click on ‘OK’ to enable it
Once you apply this property, your computer will not turn off any program automatically and let you choose what you want to run.

Conclusion
No need to get panic or depressed when you get an error message related to your network connection. You have to keep patience and follow the steps discussed above. This will surely help you out and let you access the internet properly.
For any query and more details, you can drop your messages here.


It was already ‘auto’ for me, and switch off power was disabled too.
But my internet still periodically disconnects and then automatically reconnects with yellow warning sign near wifi bars, and internet not working. I need every time to manually unplug wifi from USB and reconnect, every time this happens.
Thank you Anu.
On your article “WLAN Extensibility Module Has Stopped! Know How To Fix.”, you helped me understand why I occasionally need to reinstall my wifi driver. I had found another troubleshooter that recommended to reinstall it to get it working, but later wanted to know why. 😊🙏🤞