The most popular Operating System like Windows 10 may sometimes give you a bit of headache.
Although the latest versions have solved many issues that have afflicted Microsoft till date but it’s not possible to solve everything in one iteration.
Windows 10 wake from sleep black screen is one of such problems that many users have been facing. In this article, I am going to search for the best solutions to solve this problem easily.
How To Fix Windows 10 Wake From Sleep Black Screen?
There are some solutions that I may offer you to solve the Windows 10 wake from sleep black screen problem.
Sometimes the hibernation file may be corrupted, and you may get Windows 10 wake from sleep black screen. Turning off hibernation is a smarter way to solve the problem.
Check your network settings and in case there is something wrong you can mend it by some alterations.
You can restart your graphics driver by using keyboard shortcuts. Other feasible solutions may try to resolve the issue. Let us now discuss the solutions in detail.
Fix 1: Disabling Hibernation Mode In Windows 10
Sometimes the hibernation file may be corrupted, and you may get Windows 10 wake from a sleep black screen problem. So, you should try turning off the hibernation.
It is a remarkably simple procedure to turn off the hibernation mode on your Surface. You can apply this pretty easy method using your Command Prompt.
Follow the steps:
Step 1: Go to the start button and open an elevated Command Prompt.
Step 2: Now type powercfg.exe/hibernate off and press the Enter button.

Now, this will turn off hibernation in your Windows 10 and this process will remove the hiberfil.sys file from the hard drive.
After you have accomplished the entire procedure give your system a fresh restart.
Read Also: How To Enable Hibernate In Windows 10?
Fix 2: Making Some Changes In Power Options
There are some alterations that you may make in the power options to get rid of the black screen after sleep windows 10 problem.
Here I am describing the process. Follow the steps:
Step 1: Go to the Start button and enter Power Options there. Now when the options are displayed, select Choose What The Power Button Does option.

Step 2: After that, move on to Change settings options that are not currently available.
Step 3: Search for Turn on Fast Start-up and as you find it Uncheck the option.

Step 4: Save your changes and then close the window. Remember to restart your system twice. It is one of the most important step. So, do not quit it.
Fix 3: Checking The Network Settings
There are many variables in your operating system, and these may cause problems sometimes like you are facing one.
So, make sure you check the network settings and make some alterations there. Here, I will show you how to do that. Have a look.
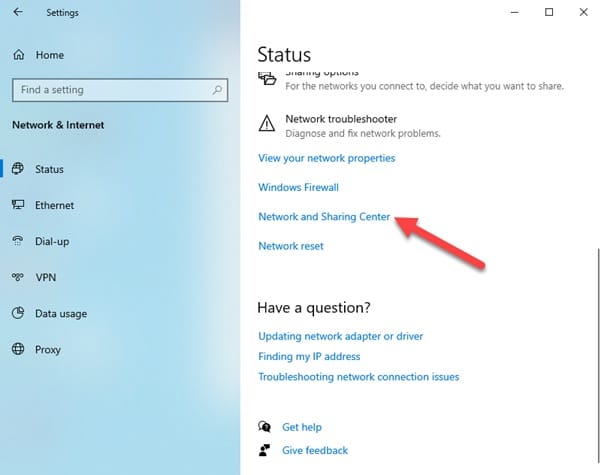
Step 1: Go to the search menu and enter Network and Sharing and this will take you to the Network and Sharing Center.
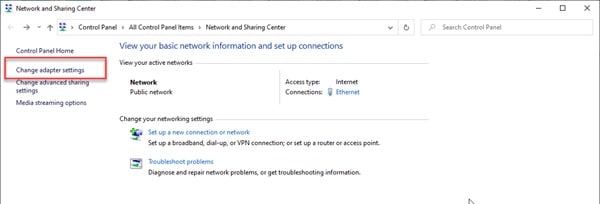
Step 2: Then from the given options, choose the Change adapter settings option and right-click on your Internet adapter.
Step 3: Now this will open up the options and choose Properties from there.
Step 4: Next move on to the Configuration button and open then go to the Advanced tab.
Step 5: You will find here Wake on Magic Packet & Wake on Pattern Match options. Now disable both the options.
Save your changes by hitting the OK button and then restart your Computer twice as I have mentioned before.
Fix 4: Update Or Reinstall The Problematic Driver
Sometimes the driver installation may get interrupted and, in this case, you will be facing the monitor won’t turn on after sleep problem.
This suggests that the problem creating device is having problems functioning.
To solve the problem, I would recommend you force Windows for the reinstallation of the driver. You can go for updating or uninstallation.
Here I am describing to you the procedure for updating or reinstalling the problematic driver with the help of the Device Manager.
Step 1: First of all, open Run by holding the Windows key and pressing the R button. Now enter devmgmt.msc in the given box and press the Enter button.

Step 2: This will lead you to the Device Manager for further assistance.
When you get into the Device Manager, identify the device and right-click on it that is generating the issue, and select Update Device from the displayed menu.
Step 3: Now, after right-clicking on the device and then select choose Install Driver.
Now choose to search automatically for updating the driver from the next screen.
This will help you to search for a new driver signature automatically.
Step 4: After finding the latest driver version, you are required to follow the instructions given on-screen for installing it.
After you finish the installation, restart your computer.
Step 5: In case it cannot find the recent driver version, let us see how to compel Windows for reinstalling the driver.
Step 6: When you right-click on the problematic device, from the displayed menu choose Uninstall Device. Now choose Uninstall for completing the uninstall procedure.
After installation, give your Computer a fresh restart and this will allow the Operating System to complete the installation process for the missing driver.
After the next start-up gets completed, revert to the Event tab and check if the entire procedure could solve the issue.
Fix 5: Updating BIOS
Your BIOS firmware may be outdated and because of this, you may face issues with the sleep mode.
Many of the users have reported performing years after years without updating their BIOS and this may bring lots of unwelcomed troubles like this one.
The updating procedure is not that complicated, and you can easily handle it if performed carefully.
Check your motherboard and go for an update if needed.
Fix 6: Restarting The Graphics Driver Using Keyboard Shortcut
When there is a black screen after sleep mode windows 10 and you have tried many solutions to fix this, try this workaround and check if it does any sort of improvement.
You may have tried several times to shut down and restart your PC several times to fix issues.
Try this keyboard shortcut instead to restart your Graphics driver .
The HP users got benefited from using this step. Hold your Windows key and then press Ctrl + Shift + B keys.
Now this will restart your graphics driver automatically and you will find the screen turning on from the sleep mode.
Fix 7: Disable All The Background Programs
Often some programs that are running in the background can consume a lot of energy which in turn may cause some problems to the system and you might experience the monitor won’t turn on after sleep.
The programs may be power-intensive as we have discussed before but along with that, some programs may also hog on the RAM.
So, it is highly recommended if you are running such resource-consuming programs in the background proceed to disable those.
Here I am providing you a complete guideline of how you will execute that step by step:
Step 1: First of all, go to the Task Manager and then choose the Startup Tab.
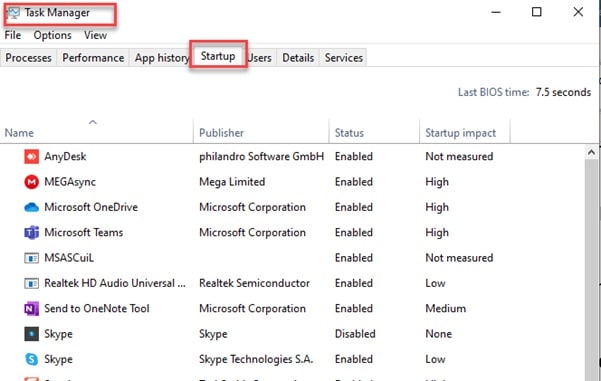
Step 2: Proceed to disable all the energy-consuming programs that you suspect may generate the problem.
Step 3: When you can check and cease all the programs, give your computer a fresh restart.
Fix 8: Disabling The Onboard Graphics
Nowadays you might be accustomed to laptops having dual-GPU configurations.
The dedicated graphics usually run only when it is needed but you use your onboard graphics adapter for idle work.
The integrated cards may have some problem with the Sleep mode.
So, here I suggest you disable the onboard graphics adapter and use the dedicated graphics instead.
Follow the steps to do it:
Step 1: Go to the Start menu and open your Device Manager. Now choose to expand the Display Adapters.
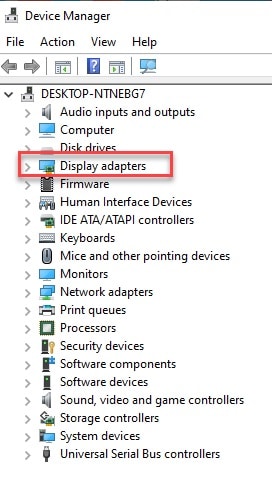
Step 2: Now from the displayed options, right-click on the Onboard GPU and then choose to Disable the option.
After that, give your system a fresh restart and check whether this has solved the problem with your Sleep Mode.
Fix 9: Disabling Sleep mode
When you have already tried all the options from the above-mentioned solutions try this out. Disable your Sleep mode.
Follow the below-mentioned procedure to do it.
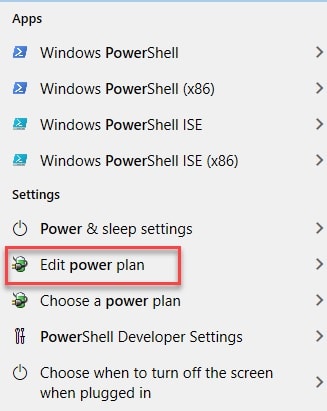
Step 1: Go to your search bar and enter Power. When you will get the options displayed, choose the Edit power plan option.
Step 2: Now choose the Never option for both On battery & Plugged in for Put The Computer To Sleep Setting option.
Step 3: Save your changes and this will disable the computer from going to sleep mode.
Step 4: There may be random data corruption, and this may prevent your system to perform the sleep mode properly.
Step 5: For checking this put your PC to sleep mode and check if the indicator of the hard disk is turning off.
Step 6: In case you see the light is still on then this may be generating the problem.
It is recommended to install your windows as repairing this may be a bit complicated and wash away some of your important data.
Read Also: How To Fix – Windows 10 No Sound After Sleep?
Winding Up
So, I hope by now, you can find out the best possible way to solve the Windows 10 wake from sleep black screen issue from the given article.
If you still have queries related to the recording software, please communicate with us in the comments section provided below.
Feel free to shoot us a mail with your ideas or suggestions. We always look forward to hearing back from you.
