Most of the gamers and PC enthusiast prefer to overclock their RAM to enhance the performance.
As RAM comes with various frequencies and speed, but at default configuration you will not be able to enjoy that speed level.
For fully utilizing the specific speed you must overclock your RAM. But before you overclock your RAM, make sure that the PSU is good enough for overclocking.
Before you overclock make sure to keep two things in mind. First of all, check the current RAM frequency and choose the suitable speed properly. Now let us discuss the steps in detail.
Checking The Current Speed Of The Ram Before Overclocking Gigabyte A320M-S2H Motherboard
Before you proceed to overclock Ram, you must check the current RAM speed available. We are using Gigabyte A320M-S2H Motherboard, so the steps we show for our BIOS may differ a bit for you. Now let us see the process to accomplish the task.
Step 1: For finding this out, go to the start menu and enter: Task manager. Now when the window opens, select the Performance tab.
Step 2: Check out the performance of your CPU, Memory, Graphics, etc. Here you need to relate to the memory configuration.
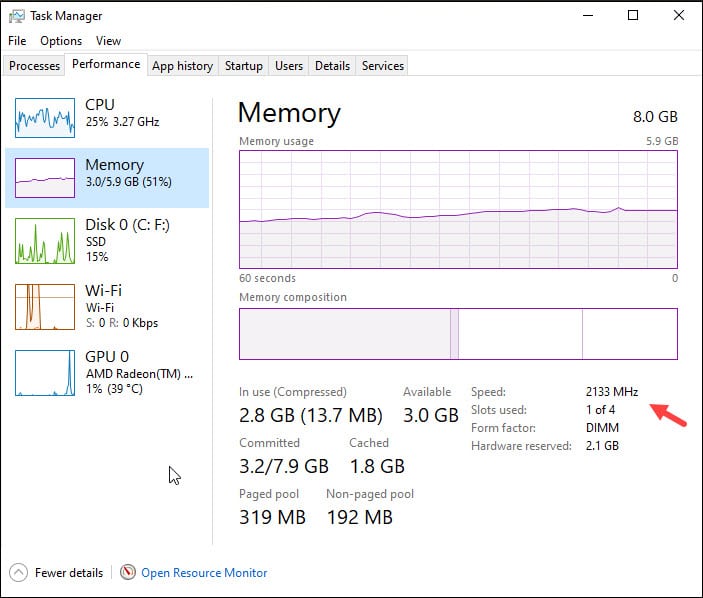
Step 3: For this, click on the Memory option and the current RAM speed will get displayed there. As you can see in the picture above that the RAM speed is 2133 MHz.
Choosing The Suitable RAM Speed To Overclock
Before we choose a suitable RAM speed, we should keep in mind that the RAM can be overclocked than the rated speed.
The Corsair Vengeance 8 GB RAM we are using here has a rated speed of 3200 MHz. But the speed we see here is 2133 MHz. So, to get 3200 MHz, we need to overclock it. Here, we are going to overclock the RAM to 3200 MHz.
Overclocking RAM on Gigabyte A320M-S2H Motherboard
Now let us directly check the process how to overclock RAM on Gigabyte A320M-S2H Motherboard. Follow the steps as I am mentioning below:
Step 1: First restart your PC. As it shuts down, keep pressing the Delete key.
Step 2: When the PC restarts, we will boot into BIOS. Now we will commence the process to overclock the RAM.
Remember that in BIOS as you cannot select with your mouse, you need to use the arrow keys to navigate.
You can use the side arrow keys will change the tabs, the up and down arrow keys will change the options in every tab. For selecting options, you will have to use the Enter key.
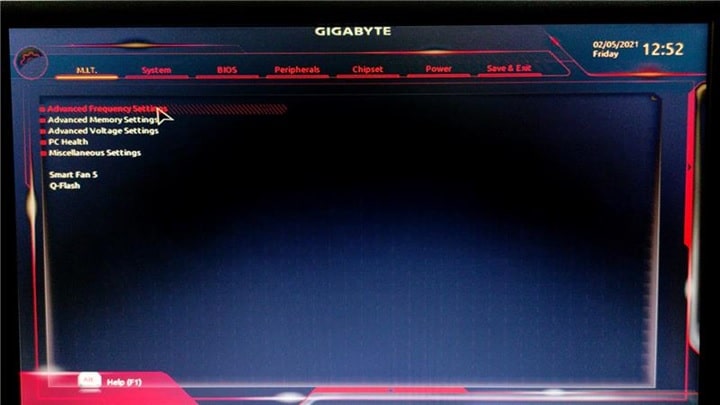
Step 3: Now, make sure you have selected the M.I.T tab. Use the arrow keys and select Advanced Memory settings.
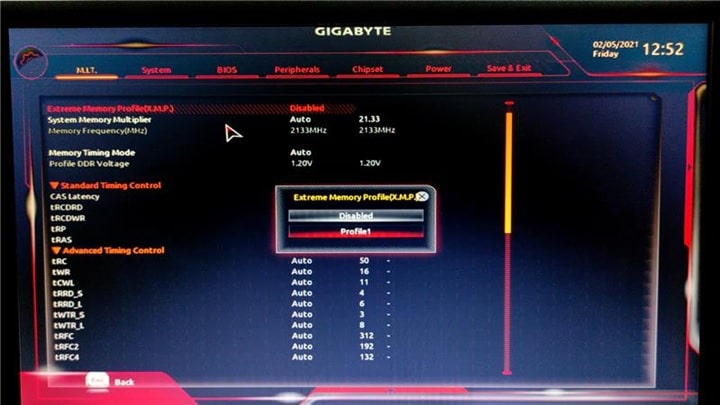
Step 4: You can see in the given picture that the Extreme Memory Profile (X.M.P) is disabled.
Step 5: The memory frequency as you can see is 2133Mhz and for overclocking the RAM, we need to enable XMP or set it to Profile 1.
Now you can clearly see that some things have changed. First, the System Memory Multiplier has increased from 21.33 to 32.00.
Step 6: In Memory Frequency, it shows 3200Mhz and then 2133Mhz. This indicates that the previous speed was 2133Mhz and the current speed is 3200Mhz as you can see in the picture below.
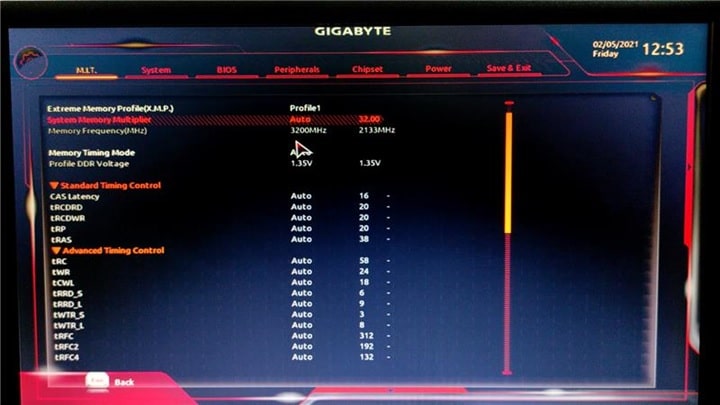
Step 7: Now you are done. But along with the RAM speed you can see that certain things have also changed like the Voltage has changed from 1.20V to 1.35V.
Step 8: Save the settings made by using the arrow keys for the Save and Exit Setup.
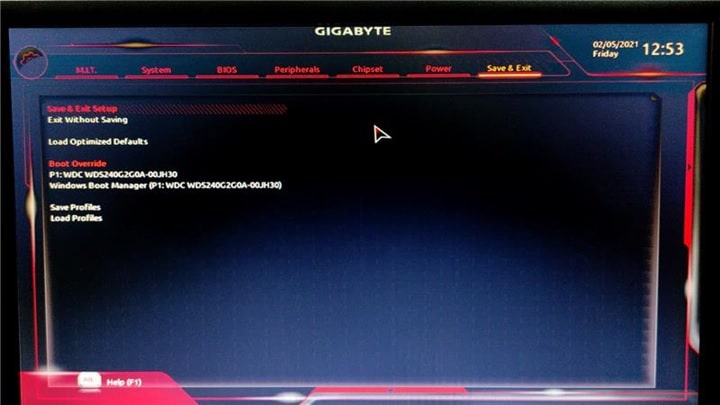
Step 9: Hit the Enter Button and give your PC a fresh restart.
Step 10: When your PC restarts, go to your Task Manager and head over to the Performance tab once again.
Step 11: Now check whether the RAM speed is 3200Mhz, when you check the speed you can get sure that the overclocking procedure is successful.
Winding Up
So, there you are! Hope the above process has helped you to overclock RAM on Gigabyte A320M-S2H Motherboard.
If you have any more ideas or suggestions related to this topic, please feel free to use the dedicated section below.
You can also shoot us a mail if you have any further queries. We always look forward to hearing from you.
