All of us were excited about the release of Windows 11, only to find that many of our older devices could not run it. Yes, we still found other ways to install Windows 11, but it didn’t change the fact that it wasn’t made for those PCs.
So, it led to bugs, crashes, and a hundred different issues that forced us back to Windows 10.
If only Microsoft made Windows 11 for low-end PCs, something like Windows 10 light.
Well, Microsoft might not hear us, but NTDev did. Introducing Tiny 11, a lightweight version of Windows 11 for PCs not compatible with Windows 11.
Also read: Unlock Hidden Windows Features Installing ViVe Tool GUI
What Is Tiny 11?
Windows 11 comes with many requirements. 4 GB of RAM, 64 GB space, TPM, Secure Boot, and 1 GHz CPU are some of the minimum requirements which most old PCs don’t have.
Tiny 11 is a project from NTDev based on Windows 11 Pro 22h2 and comes with most of the better elements of Windows 11 while leaving out the clutter and bloat, making the OS much lighter for low-end PCs.
It only requires 2 GB of RAM and 8 GB of Storage to run efficiently and doesn’t require TPM or Secure Boot. It also has the Microsoft Store integrated, allowing users to install apps.
But how does it do all that?
How Does Tiny 11 Work?
Tiny 11 leaves out all the clutter and bloat that comes with the actual Windows 11, which surprisingly makes a huge difference in performance.
Here are the apps and features Tiny 11 removes from Windows 11:
• Clipchamp
• News
• Weather
• Xbox
• GetHelp
• GetStarted
• Office Hub
• Solitaire
• PeopleApp
• PowerAutomate
• ToDo
• Alarms
• Mail and Calendar
• Feedback Hub
• Maps
• Sound Recorder
• Your Phone
• Media Player
• QuickAssist
• Internet Explorer
• LA57 support
• OCR for en-us
• Speech support
• TTS for en-us
• Media Player Legacy
• Tablet PC Math
• Wallpapers
• Edge
• OneDrive
• Windows Defender
• Microsoft Teams
To highlight a few important ones, Windows Defender, Microsoft Teams, OneDrive, and Edge, are removed, and the default screenshot shortcuts don’t work.
It keeps the UI and experience of Windows 11 the same. Visually you won’t find much difference.
But…there are some tiny issues.
Is Tiny 11 Safe To Use?
Well, I lied. Tiny 11 has some major issues (I only said tiny for the pun).
First, it’s neither developed nor supported by Microsoft, and they are definitely not okay with it.
So, there can never be a dependable place to download the Tiny 11 iso. You always have a risk of downloading malware or viruses because you cannot guarantee the file’s safety unless you specifically run tests on it.
Also, Tiny 11 doesn’t allow Windows updates, which is very understandable. Still, you are stuck with the build version of Windows 11 Pro 22h2 unless you reinstall a newer version of Tiny 11 every time they are released…if they are released.
Windows Updates are vital for bug and error patches and security updates (which isn’t a major concern because Tiny 11 doesn’t have Windows Defender to defend anything in the first place).
The errors and bugs are a big setback for Tiny 11. I have seen many user reviews reporting crashes and system-breaking bugs. I have also read reports of apps like the Adobe Suite not working.


But no one plans to run Adobe Premiere Pro on a PC with 2 GB of RAM…right?
This is normal because Tiny 11 is unstable, and the devs never said it would be stable. So, I won’t recommend it to anyone without prior troubleshooting experience.
How To Install Tiny 11?
Now let’s come to the meat of the topic, how to download and install Tiny 11 on your PC. Follow as given below.
Download Tiny 11
As said earlier, Tiny 11 is not hosted on any official or dependable website. For the moment, it is available on Internet Archive. You can visit here and download it easily, but we cannot guarantee that it will be safe for your PC.
Once you open the website, navigate to the Download options and expand the ISO image section.
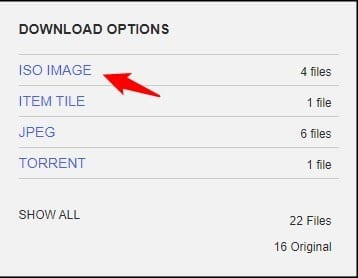
Download the 22h2 Beta2 (no sysreq) version.
Downloading Rufus and Creating An Installation Media
Next, you need to create an installation media from the iso and use it to install Tiny 11. But the official media creation tool won’t work here.
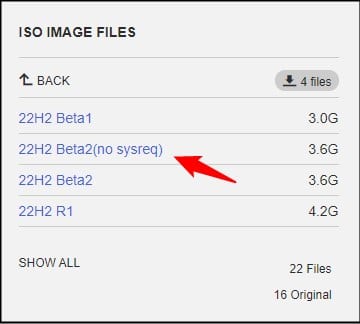
So, you will need Rufus.
Visit here and download and install Rufus.
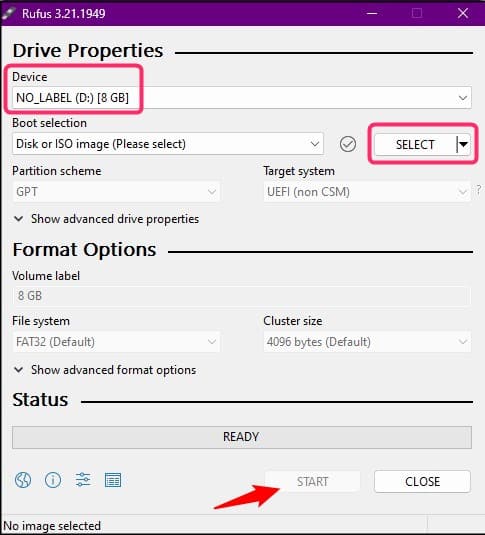
Now connect an empty flash drive. Launch Rufus and set your flash drive in the Device drop-down menu.
In the Boot Select section, click on Select.
Browse to the Tiny 11 iso image file and open it.
Click on Start and select OK to start the process. Wait for Rufus to finish.
Install Tiny 11
Once you have finished creating the installation media, restart your PC while keeping the flash drive connected.
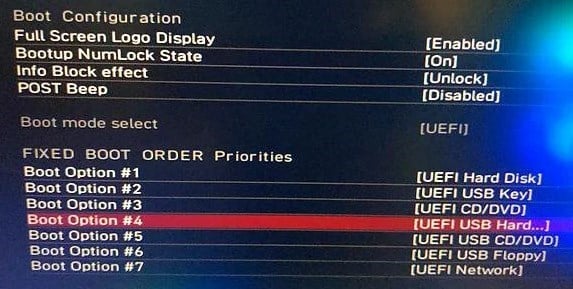
Press the BIOS key on Boot to enter BIOS.
Go to the Boot section and change the Boot order to place your Flash Drive on number one.
Now save and exit the BIOS. You should see the Install Windows screen, but if you don’t, restart your PC, and that should correct it.
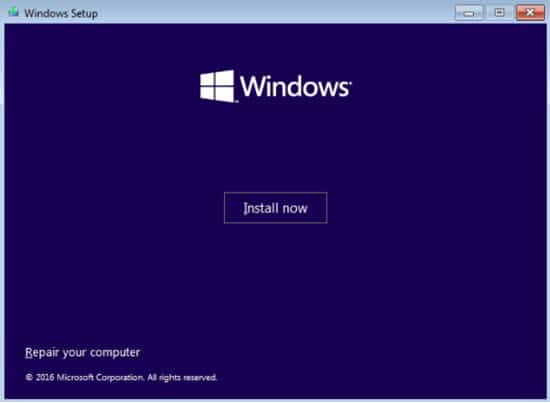
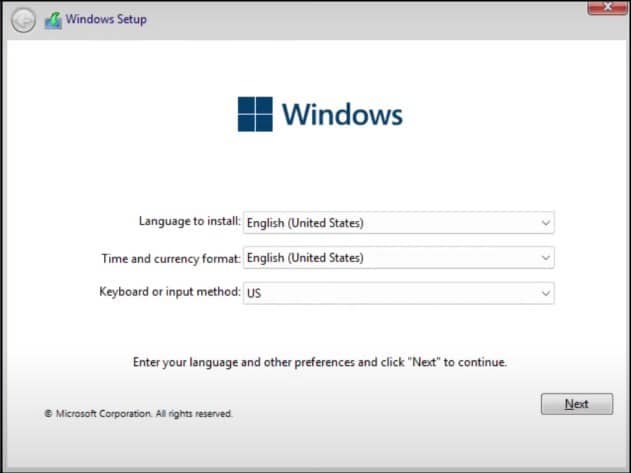
Click on Install Windows and next select the language.
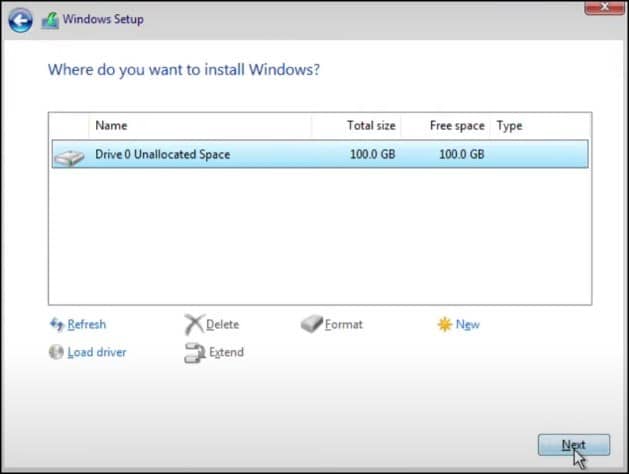
Create a partition and select it to install Tiny 11.
Now wait for the installation to finish. Next go through the prompts and setup Windows.
Wrapping Up
So, there you have it. This is how you can install Windows 11 lite or Tiny 11. We recommend it only for users experienced in troubleshooting errors and suggest others wait for Microsoft to release an official lite version of Windows 11.