If you’re looking forward to adding a personal touch to your invitations, creating them on MS Word will help you incorporate a unique style that will reflect and set the tone for your event.
With a few simple clicks, you will have the complete authority to select the perfect template for customizing your Text into an eye-catching invitation.
Let the creativity soar with different fonts, colors, and layouts into the world of invitation creation with MS Word as your trustworthy companion.
Want to know How To Indent In Microsoft Word? Then read this detailed guide.
Step By Step Tutorial For Making An Invitation On Microsoft Word
Here is how to make an invitation on MS Word:
- Open a blank Word document.
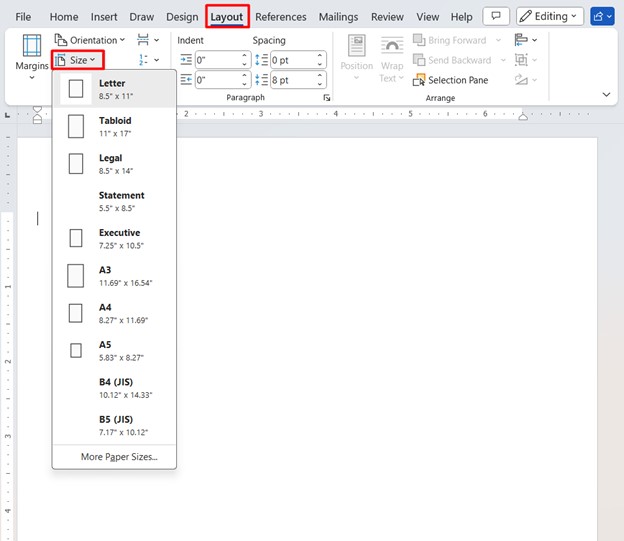
- Click on the Layout tab.
- Click on the drop-down menu for Size.
- Select a preferable size.
- Now, you can create graphics for your invitation card that will appear behind the Text.
- Depending on your invitation, you are free to select an image from your PC or browse the Internet to find a suitable one.
- You can search for royalty-free images on the net, like Unsplash or Pixabay.
- Download the image. Then save it on your desktop.
- You can drag and drop the image to your Word page where you are creating the invitation.
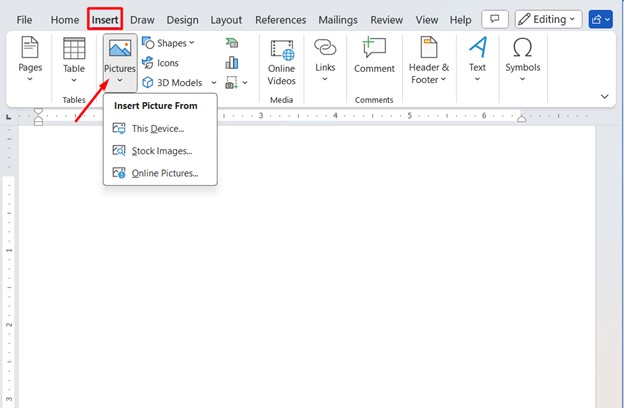
- Or you can click on the Insert tab, select a picture, browse to the image location, select the image, and then click on Insert.
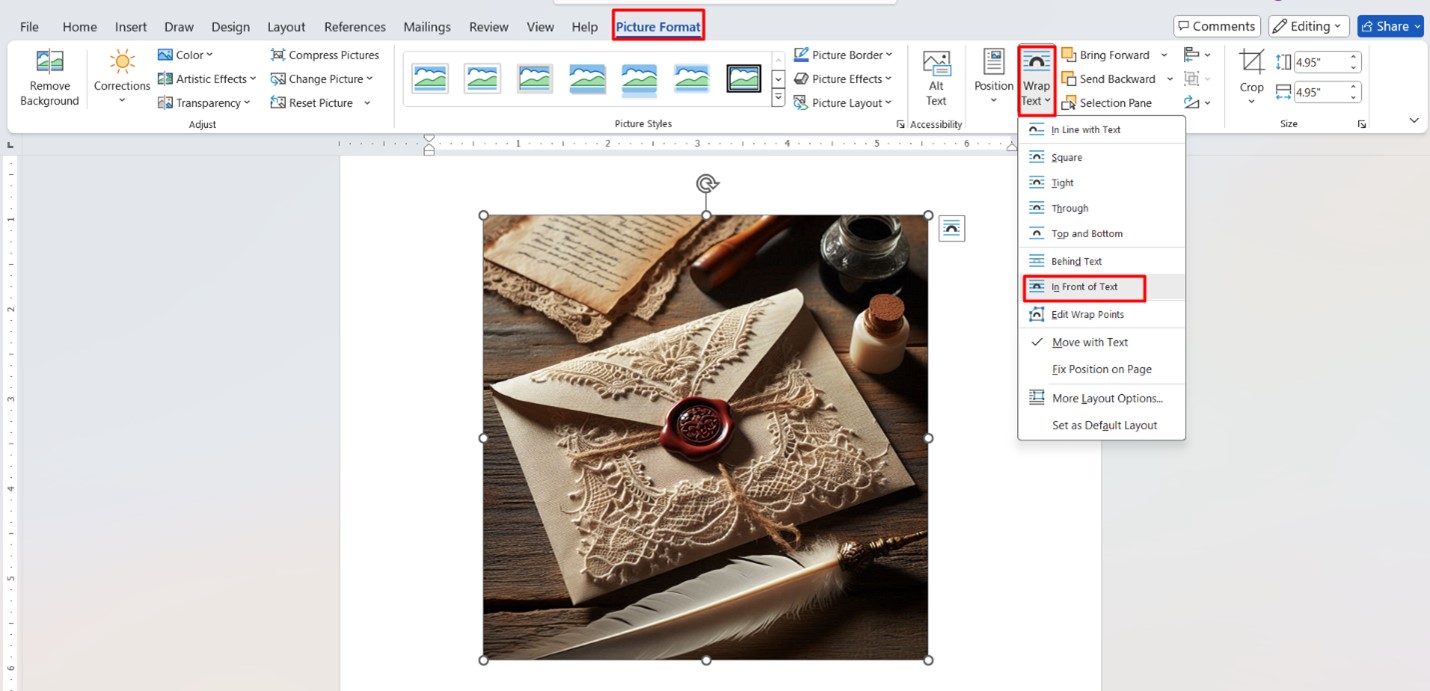
- Select the image, then click on Picture format. Click on the Wrap text icon and expand the drop-down menu.
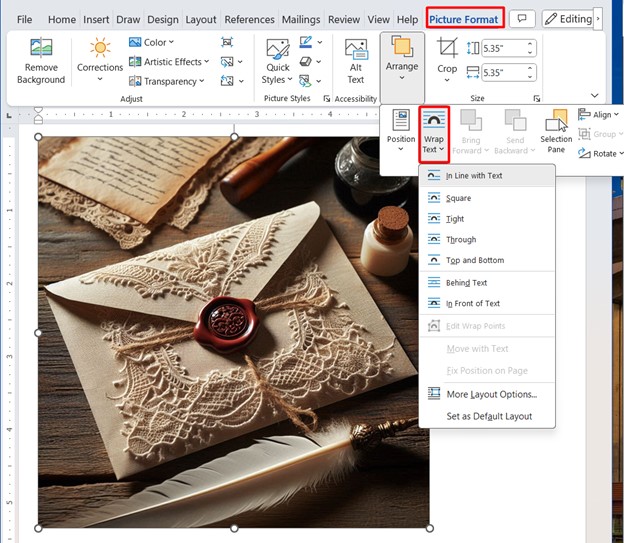
- Select “In front of text,” then rotate the picture.
- You can also stretch the corners of the picture to resize it.
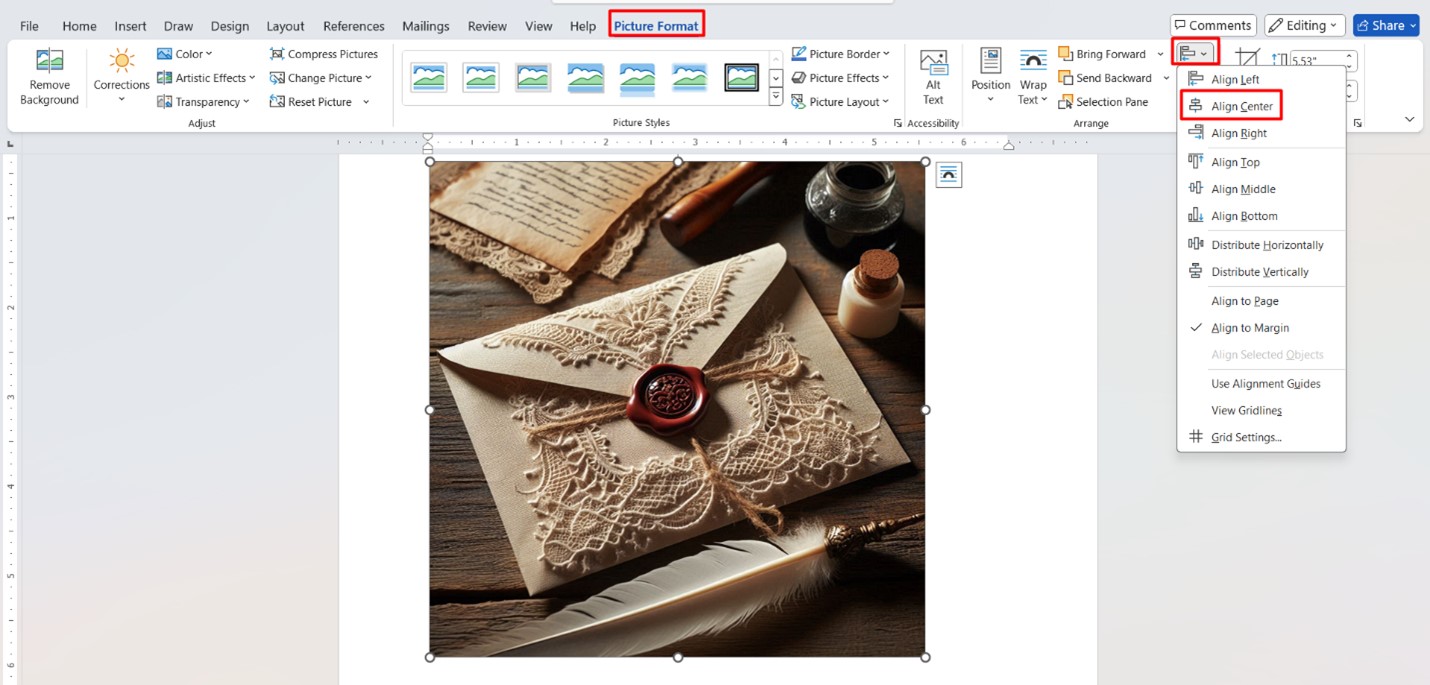
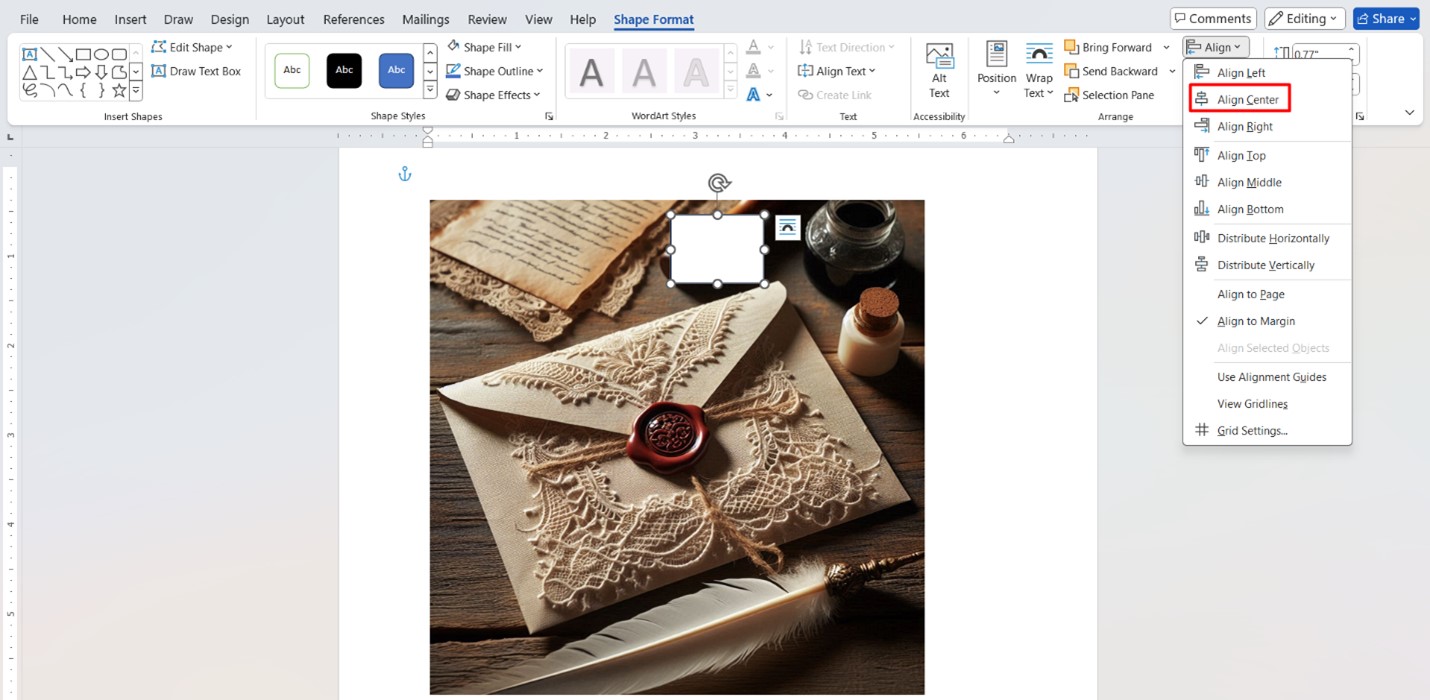
- Once you have set it to a preferred size, click on Picture format and select Align. Then, select the Align to the Center option.
- Next, to Insert Text, select the Insert tab. Click on the drop-down menu for shapes.
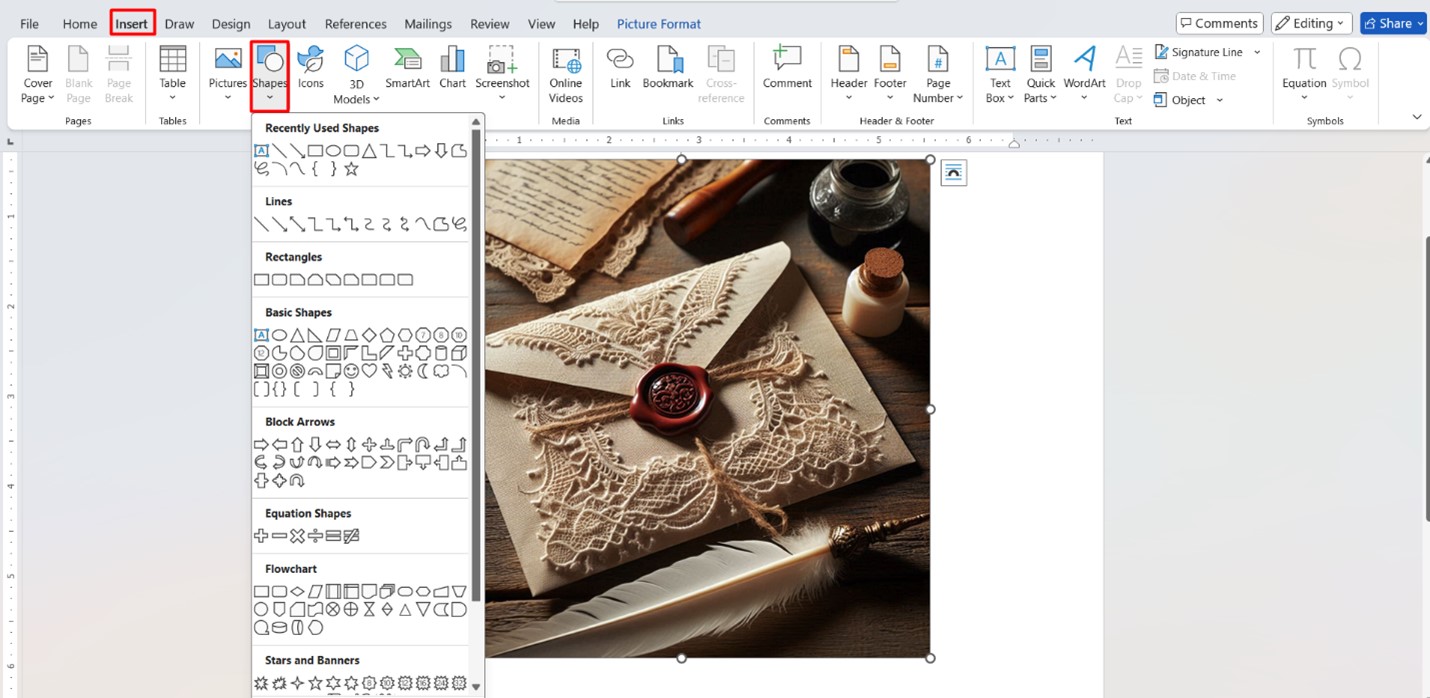
- Select Square or any shape you want. Then click and drag the shape on the image where you want to insert the Text.
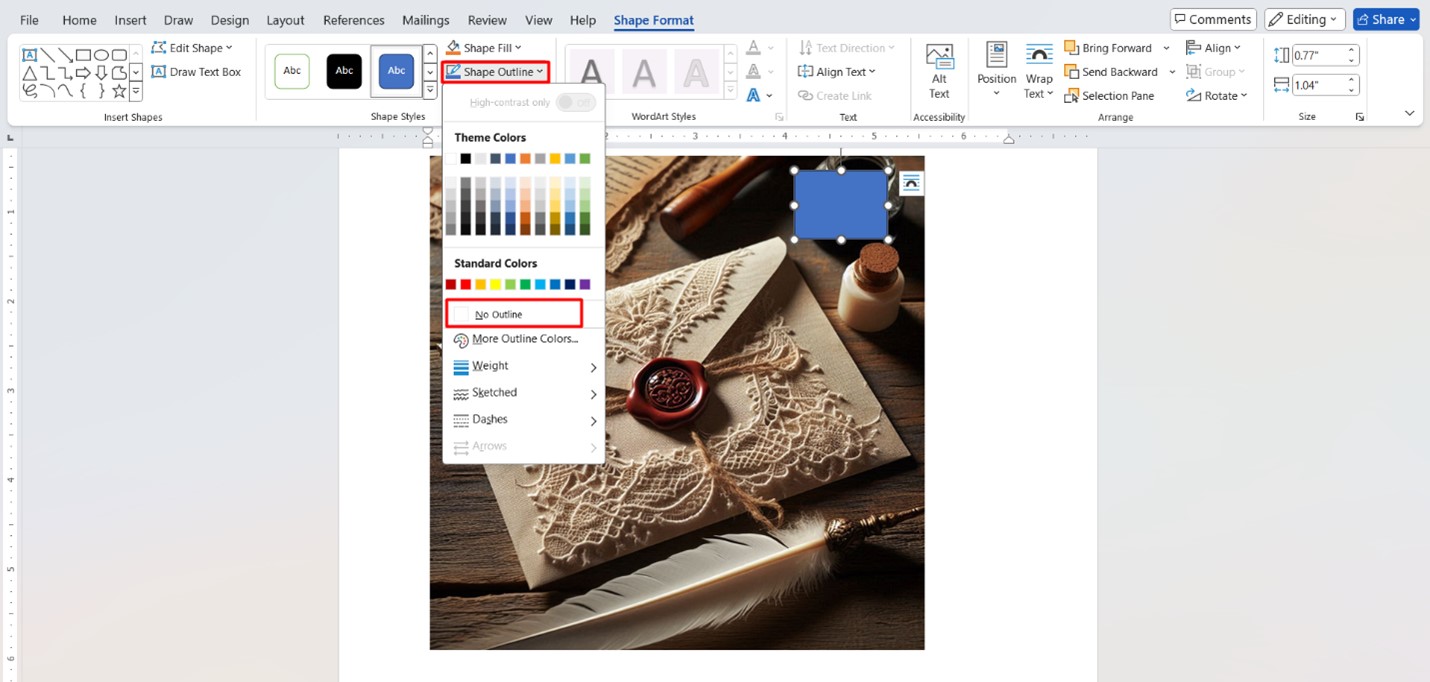
- Select the shape, and go to the Shape format option.
- Select Shape Outline. If you do not wish to have any outline, select No Outline.
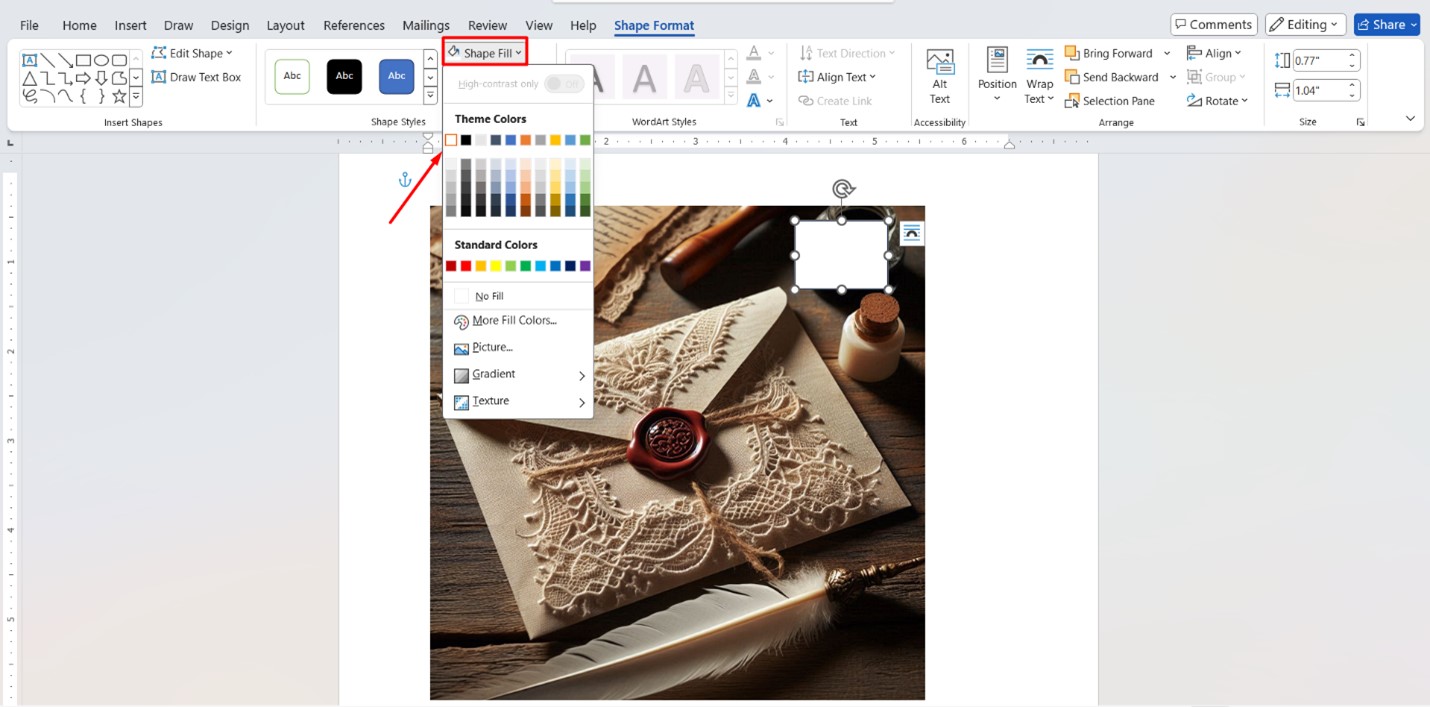
- If you want to keep the center white, then click on the drop-down for fill and fill in with the color white.
- To make it appear in the center, select the shape, go to shape format, then select Align, and choose the Align to Center option.
- To insert some text, go to the “Insert” tab and select Text Box.
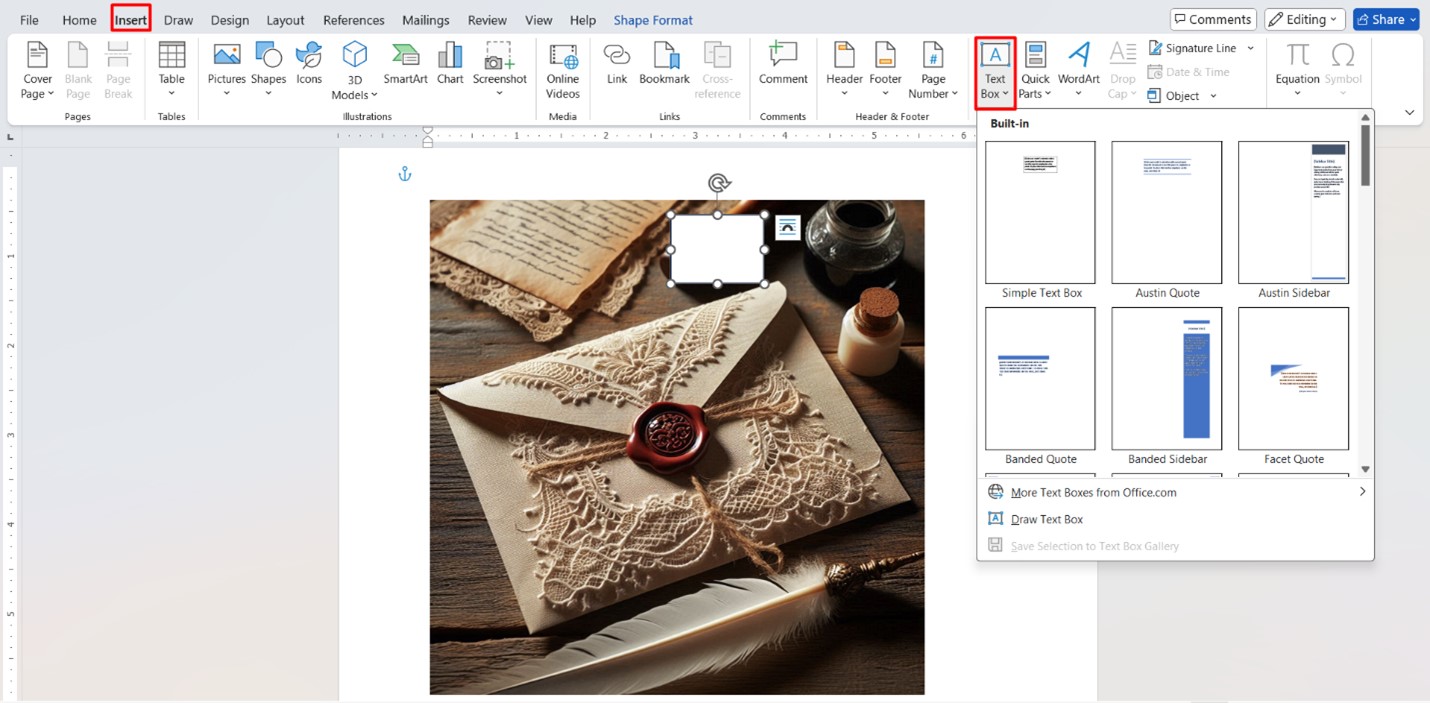
- Click and drag the text box on the picture. The text boxes usually come with a white background and black border.

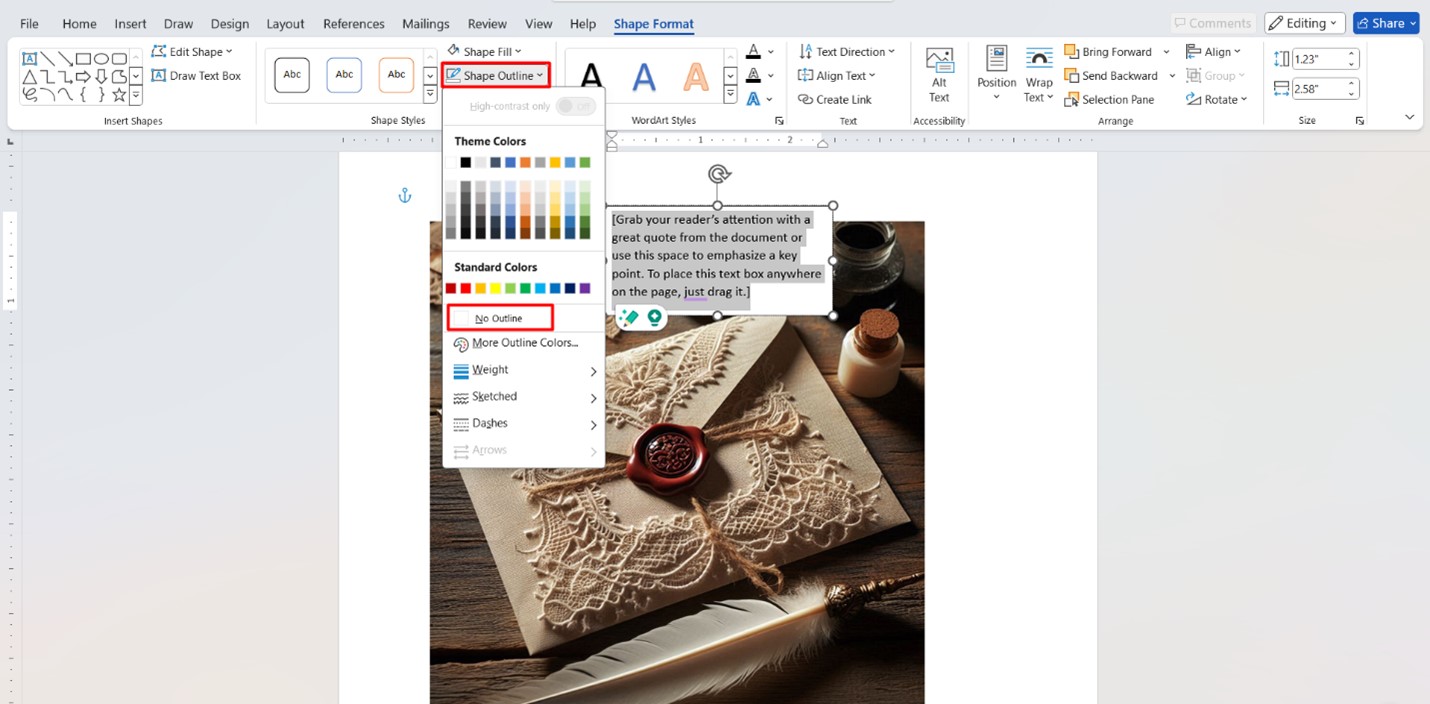
- If you want to deselect both, select the text box, then go to Shape Format.
- Click on Shape Outline > No Outline.
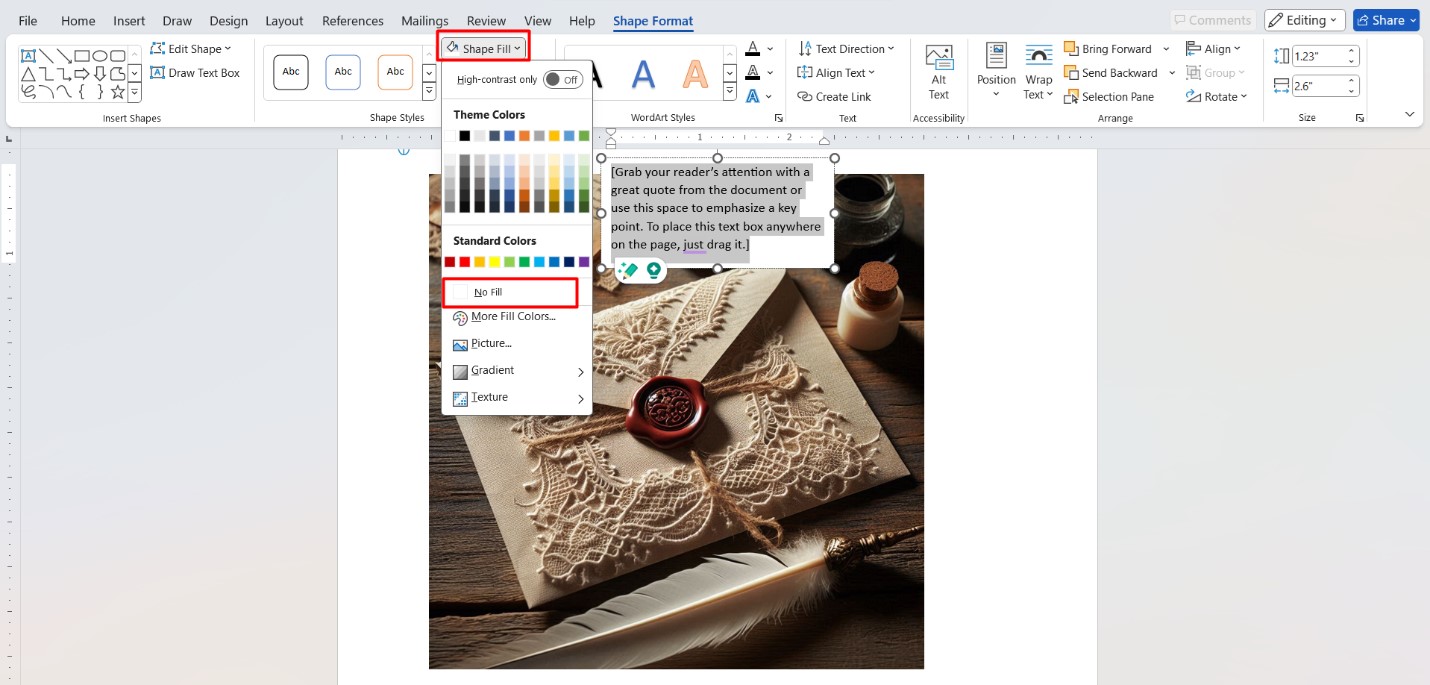
- Then select Shape Fill. From the drop-down, select No Fill.
- Enter your desired Text.
- To customize the Text, go to the Home tab. Select the desired font, choose color and style, and adjust the Size.
- Once you are happy with the Text, you can align it to the center-left or right.
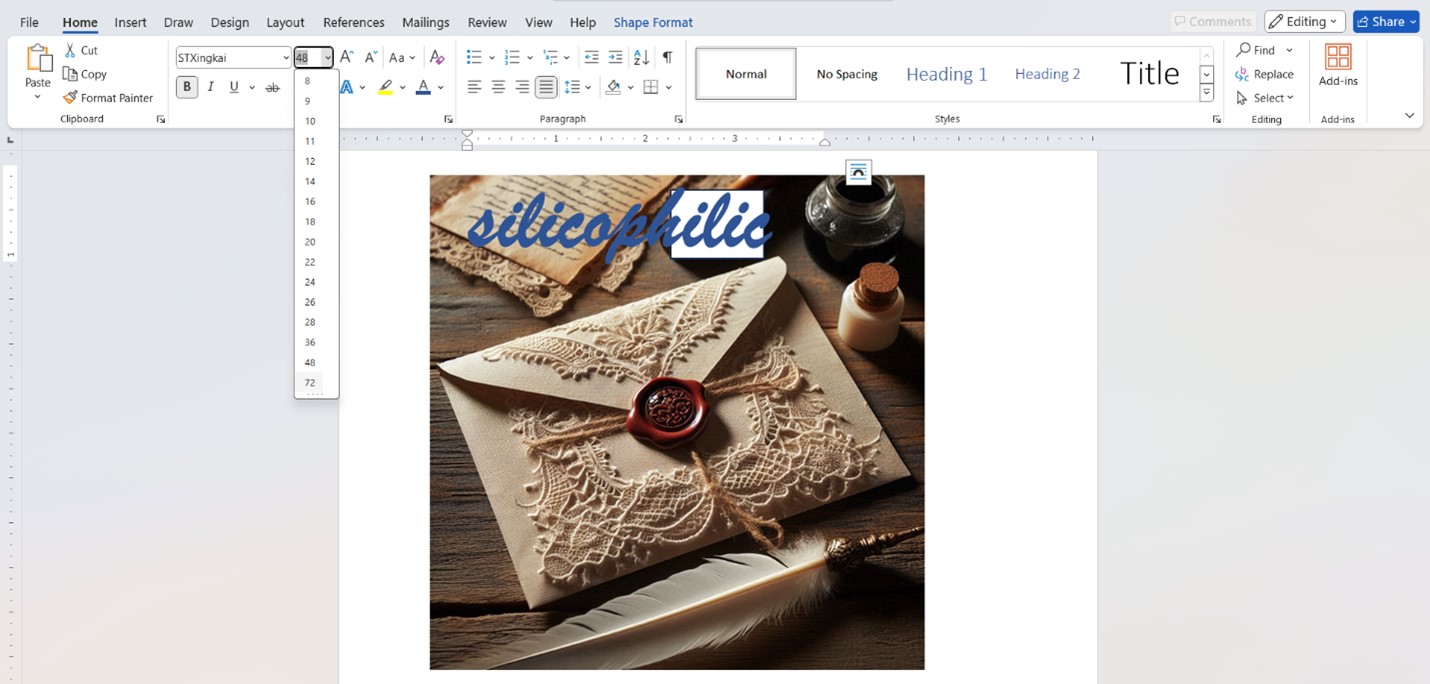
- Make sure you have adjusted the space between each character uniformly. You can make the Text bold if you want.
- Once you are satisfied with the invitation card, it’s time to print it.
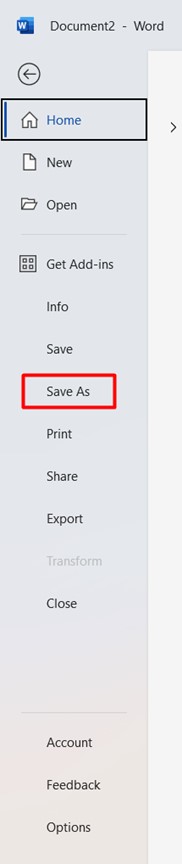
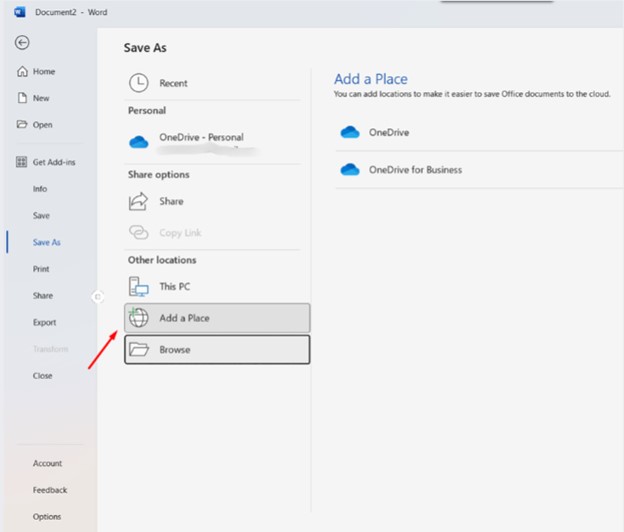
- First, save the card. To do so, click on File, then Save or Save As.
- Choose a location for the card and format it for your convenience.
- You can choose pdf and then select best for printing.

Common Mistakes To Avoid While Designing An Invitation Template
Here are some of the common mistakes to avoid while designing an invitation in Microsoft Word:
- Make sure the design reflects the brand’s style and color consistency if you are creating an invitation for a business event.
- Avoid overcomplicating the design
- Keep the invitation layout clean and uncluttered
- Proofread the invitation carefully before finalizing the design
- Avoid using high-resolution images
- Make sure to include all the details related to the invitation, such as event time, hostnames, dates, time, location, venue
Frequently Asked Questions (FAQs)
- Can I Save My Invitation Design In Word For Future Use?
Yes, you are free to save your invitation design as a template or as a Word document for future use. Doing this will make it easier for you to customize it for upcoming events.
- How Can I Share My Invitation Created In Word With Others?
You can share your invitation with others by printing it, saving it as a PDF, or emailing it directly from Word.
- Is It Possible To Create A Unique Design For My Invitation In Word?
Yes, you can easily create a unique design by combining different elements such as shapes, borders, and text boxes and experimenting with various features in Word to craft invitations.
Closure
With a dash of innovation, transform your ordinary documents into extraordinary works with MS Word, and let your creativity soar. So, go ahead and create an eye-catching invitation that will leave an everlasting impression on your loved ones and friends.
Update us with your inputs or comments if any.
