Every Windows 10 update comes with bug fixes, security patches, and the latest drivers or features. It is essential and it allows the operating system to download and install the latest version automatically. But if you are unable to download and install the latest Windows 10 updates, there is another option how you can reset Windows update and fix the issue.
How To Reset Windows Update?
It is a common occurrence of Windows 10 update components. If there is a problem with the update service or cache is corrupted, you might face this type of error and the Windows update components must be repaired to get rid of such a problem. Sometimes, when Windows cannot find the required components, it shows the same error message,’ Windows Update not being able to connect to the Microsoft servers’.
Some solutions are discussed below to help you update your Windows 10 system if you have this specific error message on your screen while updating.
Now we will discuss the processes one by one and help you to repair the Windows update by doing the same carefully.
1. Reset Windows Update Using The Troubleshooter Tool
We will use the built-in troubleshooter tool from Microsoft to figure out the problem automatically. To reset Windows update using Troubleshooter tool, do the followings:
- Download the Windows Update Troubleshooter from Microsoft. You can also download it from clicking on the Download link.
- Now Run the Troubleshooter tool.
- In the menu, you can see the option named ‘Windows Update’. Click on it.
- Select ‘Try troubleshooting as an administrator’ option if you have the administrator’s permission. Otherwise, click on Windows Update and then click on the Next
- The troubleshooter will search for the problem and will automatically fix it if there is an error.
- Close the Utility tool after the troubleshooting is completed.
- To ensure that there is no network related issue, click on the menu option and select ‘Windows Networking Diagnostics’.
- The Troubleshooter tool will again search for errors in the system network. It will be fixed automatically if the tool finds any error. After resolving, close the troubleshooter tool.
Now restart your computer and check if the Windows update component is working properly.
2. Reset Windows Update Using Command Prompt
If the problem still continues, try this solution. Follow the steps below to manually reset the Windows update using command prompt:
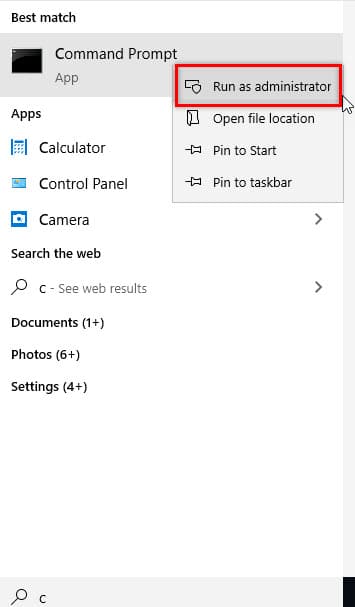
- Click on the Start icon and type CMD in the search box. You can see an app named ‘Command Prompt’ appears in the search result.
- Now right-click on the Command Prompt option present in the search result and select Run as administrator option.
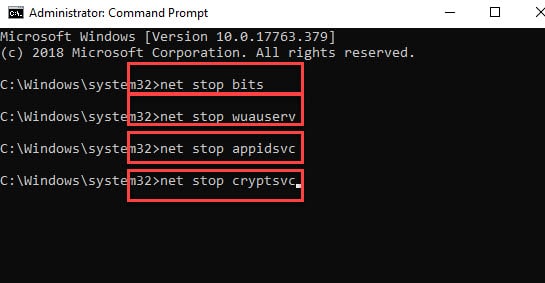
- Carefully type the following commands and press Enter key to stop various unwanted background running programs, such as Background Intelligent Transfer Service (BITS), Windows Update Service, Cryptographic service, etc:
net stop bits
net stop wuauserv
net stop appidsvc
net stop cryptsvc
- Now, type the following command to delete the qmgr*.dat files which are residual files left by BITS:
Del “%ALLUSERSPROFILE%\Application Data\Microsoft\Network\Downloader\*.*”
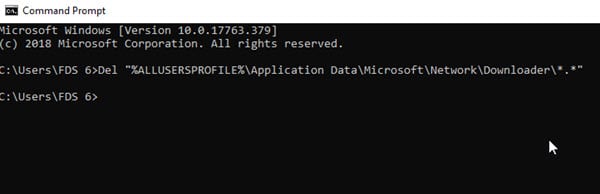
- Press Enter from keyboard and type Y to confirm to delete.
- After successful deletion, type the following commands and press the Enter key:
rmdir %systemroot%\SoftwareDistribution /S /Q
rmdir %systemroot%\system32\catroot2 /S /Q
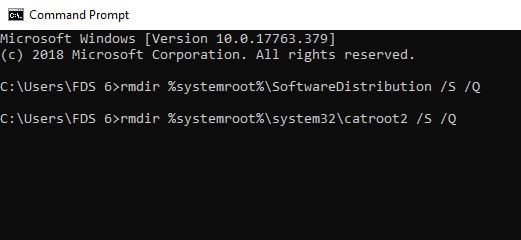
This process will clear the Windows Update cache and allow Windows to re-download the updates.
- Now type the following commands and press Enter key:
sc.exe sdset bits D:(A;;CCLCSWRPWPDTLOCRRC;;;SY)(A;;CCDCLCSWRPWPDTLOCRSDRCWDWO;;;BA)(A;;CCLCSWLOCRRC;;;AU)(A;;CCLCSWRPWPDTLOCRRC;;;PU)
sc.exe sdset wuauserv D:(A;;CCLCSWRPWPDTLOCRRC;;;SY)(A;;CCDCLCSWRPWPDTLOCRSDRCWDWO;;;BA)(A;;CCLCSWLOCRRC;;;AU)(A;;CCLCSWRPWPDTLOCRRC;;;PU)
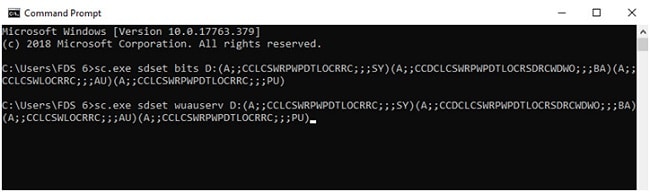
This process will reset the BITS and Windows update services to default.
- Type the following command:
cd /d %windir%\system32
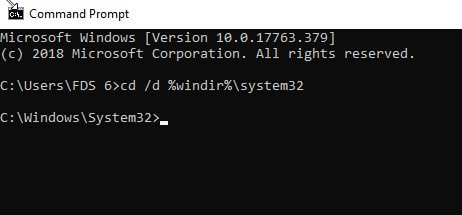
- Press the Enter This will redirect you to the System32 folder.
- Now, type the commands below and press Enter key after each command:
regsvr32.exe /s atl.dll
regsvr32.exe /s urlmon.dll
regsvr32.exe /s mshtml.dll
regsvr32.exe /s shdocvw.dll
regsvr32.exe /s browseui.dll
regsvr32.exe /s jscript.dll
regsvr32.exe /s vbscript.dll
regsvr32.exe /s scrrun.dll
regsvr32.exe /s msxml.dll
regsvr32.exe /s msxml3.dll
regsvr32.exe /s msxml6.dll
regsvr32.exe /s actxprxy.dll
regsvr32.exe /s softpub.dll
regsvr32.exe /s wintrust.dll
regsvr32.exe /s dssenh.dll
regsvr32.exe /s rsaenh.dll
regsvr32.exe /s gpkcsp.dll
regsvr32.exe /s sccbase.dll
regsvr32.exe /s slbcsp.dll
regsvr32.exe /s cryptdlg.dll
regsvr32.exe /s oleaut32.dll
regsvr32.exe /s ole32.dll
regsvr32.exe /s shell32.dll
regsvr32.exe /s initpki.dll
regsvr32.exe /s wuapi.dll
regsvr32.exe /s wuaueng.dll
regsvr32.exe /s wuaueng1.dll
regsvr32.exe /s wucltui.dll
regsvr32.exe /s wups.dll
regsvr32.exe /s wups2.dll
regsvr32.exe /s wuweb.dll
regsvr32.exe /s qmgr.dll
regsvr32.exe /s qmgrprxy.dll
regsvr32.exe /s wucltux.dll
regsvr32.exe /s muweb.dll
regsvr32.exe /s wuwebv.dll
This process will register all corresponding BITS as well as Windows Update DLL files on Registry.
- Now type the following commands and hit enter:
netsh winsock reset
netsh winsock reset proxy
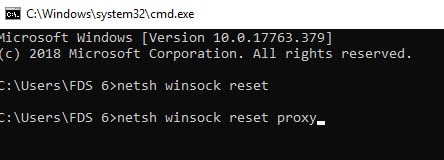
This process is for resetting the network configuration.
- Again type the following commands and press Enter key:
net start bits
net start wuauserv
net start appidsvc
net start cryptsvc
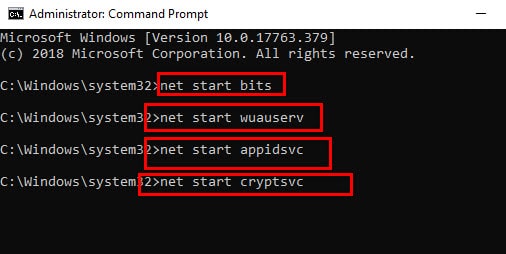
This process will restart the BITS as well as Windows Update and Cryptographic services.
- Finally, restart your computer.
After you complete all the steps successfully, the Windows update components must be repaired and it should be working again.
3. Reset Windows Update Installing Latest Servicing Stack Update
Follow the steps below to install the latest Servicing Stack Update in order to reset Windows update on Windows 10:
- Open the Settings app by clicking on the Start icon and typing ’Settings’ in the search box.
- Click on the System menu.
- You can see an option named About. Click on it.
- Check whether the Windows version is 32 bit or 64 bit under the ‘System type’ section.
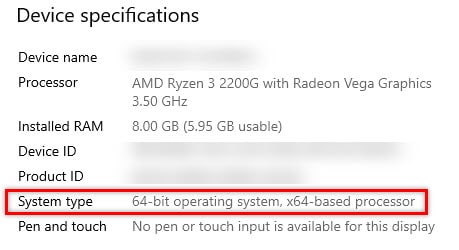
- Now open the Microsoft Update Catalog website to download the latest Servicing Stack Update for your version of Windows.
- Install the file on your system.
- Now restart the computer.
After you perform the Windows 10 update repair, your problem should be fixed and you should now be able to download the Windows update.
4. Reset Windows Update Installing Latest Update Manually
If the problem still persists, we’ll try to fix it by installing the latest update manually. Follow the steps below to update the latest version:
- At first, you should visit the Windows 10 update history Here you will find the previous Windows update history logs.
- Here you’ll get the KB number which you should note down for the future purpose.
- Now open the Microsoft Update Catalog website and search for the latest updates for your specific Knowledge Base (KB) number.
- Download the update depending on your Windows version.
- When the download completes, select Open to start the update and restart your computer after you have successfully updated your system.
As you already have installed the latest update successfully, this should also have fixed your problem with Windows update. You can check for updates by clicking on the button on the update section of the settings page.
5. Reset Windows Update By Repairing Corrupted System Files
You can reset Windows update by repairing the corrupted system files. To perform a repair, read how to check for broken system files using DISM and SFC scans.
Conclusion
Well, now you know the solutions how to reset Windows update when you encounter any error while updating your Windows 10. Your problem should be resolved by using any of the fixes discussed above. All you need to do is stay focused and careful while applying the steps on your computer and you can see the problem is gone easily. If you found this article helpful, let us know by commenting below. Still have queries regarding Windows update repair? Feel free to ask here.

