Recently you must have heard of many Ransomware attacks that target the internal protocols to propagate. These include the WannaCrypt and NotPetya Ransomware. These malicious software targets a specific protocol called the SMB protocol. Here I shall discuss why and how to disable SMBV1 in Windows 10!
What Is The SMB Protocol Service?
The Server Message Block (SMB) is a network file sharing protocol that is used to share files, printers, etc. among computers on a local network. SMBv1 is the old version of the Server Message Block protocol, which has been replaced by SMBv2 and SMBv3.
The older SMBv1 protocol is enabled in Windows 10 only because some older applications have not been updated yet to make full use of the newer SMBv2 and SMBv3. Microsoft maintains a lift of the products that still use SMBv1. However, most casual users do not use the applications that still use the older SMBv1 protocol, and hence, you are better off disabling the protocol to protect your device from these vulnerabilities.
Should I Disable SMBv2 And SMBv3?
Note: It is not recommended to disable SMBv2 or SMBv3, as disabling them removes many functionalities, which include the following:
- Request compounding – allows sending multiple SMB 2 requests as a single network request
- Caching of folder and file properties – clients keep local copies of folders and files
- Improved message signing – HMAC SHA-256 replaces MD5 as the hashing algorithm
- Client oplock leasing model – limits the data transferred between the client and server, improving performance on high-latency networks and increasing SMB server scalability
- Large MTU support – for full use of 10-Gigabyte (GB) Ethernet
- Transparent Failover – clients reconnect without interruption to cluster nodes during maintenance or failover
- SMB Direct – adds RDMA networking support for very high performance, with low latency and low CPU utilization
- Encryption – Provides end-to-end encryption and protects from eavesdropping on untrustworthy networks
- Directory Leasing – Improves application response times in branch offices through caching.
How To Disable SMBv1 Protocol On Windows 10?
If you too were wondering how to disable SMBv1, here I shall discuss three easy ways in which you can do so.
Method 1: Turn Off SMB Protocol Via Control Panel
The control panel for a long time has been one of the hubs that store the toggles to many important windows settings and apps. You can also disable SMB from the control panel. Simply follow these steps:
- Open control panel either from the desktop icon or from a Run window by typing control panel and pressing Enter.
- Change the view to Large or Small icons if you find it set to Categories.
- Click on Programs and Features.
- Locate and click on Turn Windows features on or off.
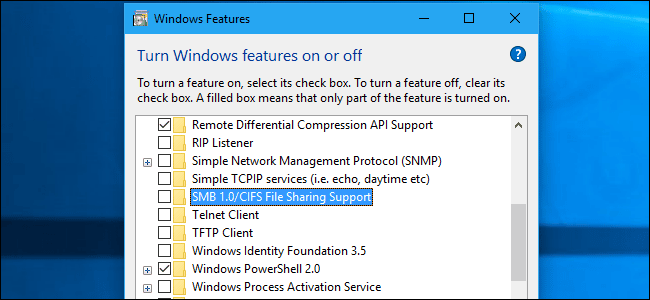
- In the list of options available, locate the following entry:
SMB 1.0/CIFS File Sharing Support - Uncheck the checkbox associated with it and press OK.
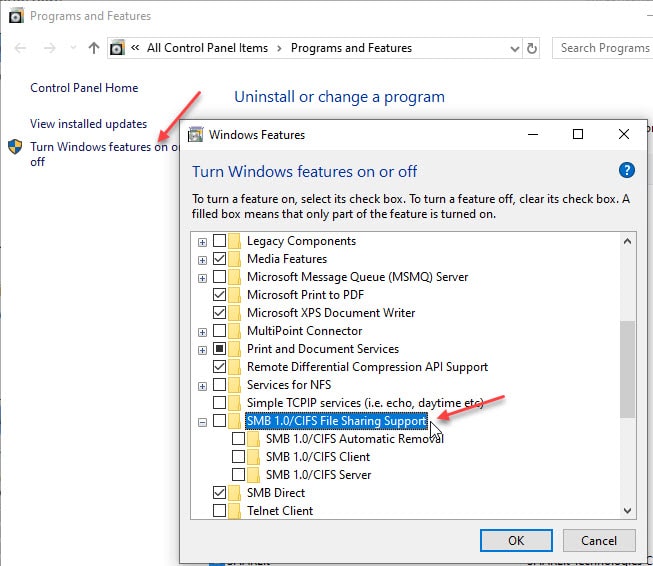
- Restart your PC.
This shall turn off the SMBv1 feature from your computer.
Method 2: Disable Or Enable SMBv1 Windows 10 Using PowerShell
PowerShell is a task-based command-line interpreter that can help system administrators and power users to automate tasks that manage operating systems and their processes rapidly. PowerShell is very powerful and can be used to turn off SMBv1, SMBv2, and SMBv3 if needed.
- Open an elevated PowerShell window. To do this using Run, open a Run dialog by pressing Win + R, type powershell and press Ctrl + Shift + Enter to launch PowerShell with administrative properties.
You can also open this from the WinX menu, which can be accessed by right-clicking on the start menu icon or pressing Win + X together. - Type the following command to disable SMBv1:
Set-ItemProperty -Path “HKLM:\SYSTEM\CurrentControlSet\Services\LanmanServer\Parameters” SMB1 -Type DWORD -Value 0 –Force

- If for some reason you also need to disable SMBv2 and SMBv3 temporarily, you can use the following command in the same admin Windows PowerShell.
Set-ItemProperty -Path “HKLM:\SYSTEM\CurrentControlSet\Services\LanmanServer\Parameters” SMB2 -Type DWORD -Value 0 –Force
Note: When you enable or disable SMBv2 in Windows 10, 8 or in Windows Server 2012, SMBv3 is also enabled or disabled. This behavior occurs because these protocols share the same stack.
Enable SMBv1 Windows 10
You can also enable SMBv1 in windows 10 using admin PowerShell. Use the following commands in PowerShell (Admin):
For enabling SMB1:
Set-ItemProperty -Path “HKLM:\SYSTEM\CurrentControlSet\Services\LanmanServer\Parameters” SMB1 -Type DWORD -Value 1 -Force
For enabling SMB2 & SMB3:
Set-ItemProperty -Path “HKLM:\SYSTEM\CurrentControlSet\Services\LanmanServer\Parameters” SMB2 -Type DWORD -Value 1 –Force
Method 3: Disable SMBv1 Using Registry Editor
You can also make the same changes using the Windows Registry as well. To do this, you need to access the correct registry entry, and change the value for Windows 10 SMBv1 enable or disable.
- Open a Run dialog by pressing Win + R.
- Type regedit and press Enter to launch the Registry Editor.
- Navigate to the following location by pasting the path in the address bar of the registry editor:
Computer\HKEY_LOCAL_MACHINE\SYSTEM\CurrentControlSet\Services\LanmanServer\Parameters\FsctlAllowlist - In the right pane, you should find a DWORD 32-bit entry called SMB1. If you do not find this entry, you will have to create it. Right-click the Parameters key and choose New > DWORD (32-bit) Value. Name this value SMB1.
- Double click to modify the entry if it was already present. Change the value data to 0.
- If you created the DWORD, it will be created with a value of “0”. “0” means SMBv1 is disabled. You do not have to edit the value after creating it.
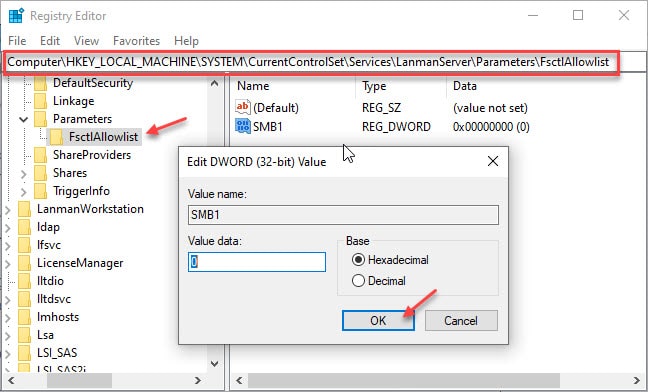
- Restart your PC.
If you ever wish to re-enable SMBv1, you can do so by deleting the DWORD from the Parameters key.
Wrapping Up
So there you have it. Now you know why the SMBv1 protocol is flawed, and how to disable SMBv1 using the methods provided above. Comment below if you found this useful, and to discuss further the same.