Windows memory compression helps to improve the system’s performance and store more data in the memory of your system.
The memory manager compresses the infrequently accessed memory pages.
This lowers the read and write to the page file, and improves your system’s responsiveness.
In Windows 10 and 11, memory compression can be enabled and disabled. Here we will discuss how to do both and also explain memory compression in detail.
Also read: Fix: Desktop Window Manager (dwm.exe) High Memory Usage
What Is Memory Compression?
Memory compression is a technique to manage the memory of your system.
It reduces the size of the inactive data in the RAM and frees up the unused space.
With memory compression, you can use the total available physical memory of your device and run more programs.
With memory compression, you can compress some pages in RAM and optimize RAM utilization.
This way you will be able to keep more processes in the physical memory without paging the data out to disk and reading them from the page file.
When Was Memory Compression Introduced On Windows 10/11?
Windows memory compression was introduced in Windows Server 2016 and Windows 10 1507.
It was first introduced to run as a background process, but with Windows 1607 it became a separate process.
Memory compression is only available for Windows 10, 11 and not for Windows 7, 8 or other prior Windows versions.
Can Memory Compression Lead To High Usage Of RAM?
Windows uses a page file to store data that RAM cannot hold when it is full.
Memory compression is better than paging out the data to the disk. It is a much faster way.
But one thing you must remember is that in both compressing and uncompressing memory, you need to use some of the CPU resources.
Windows automatically compresses data whenever it requires space.
Your PC may become a bit slower due to memory compression.
So, if you find that memory compression is affecting the performance, you may need to upgrade your RAM.
How To Check Windows 10 and 11 Memory Compression Details?
To see the compressed memory details on your device, follow the steps given below:
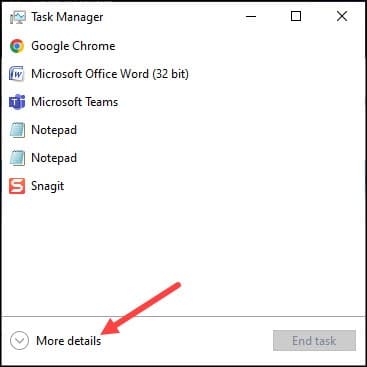
- Right-click on the Windows Start button and select Task Manager. You can also press Shift + Ctrl + Esc keys to open Task Manager.
- Click on More details to expand the Task Manager interface.
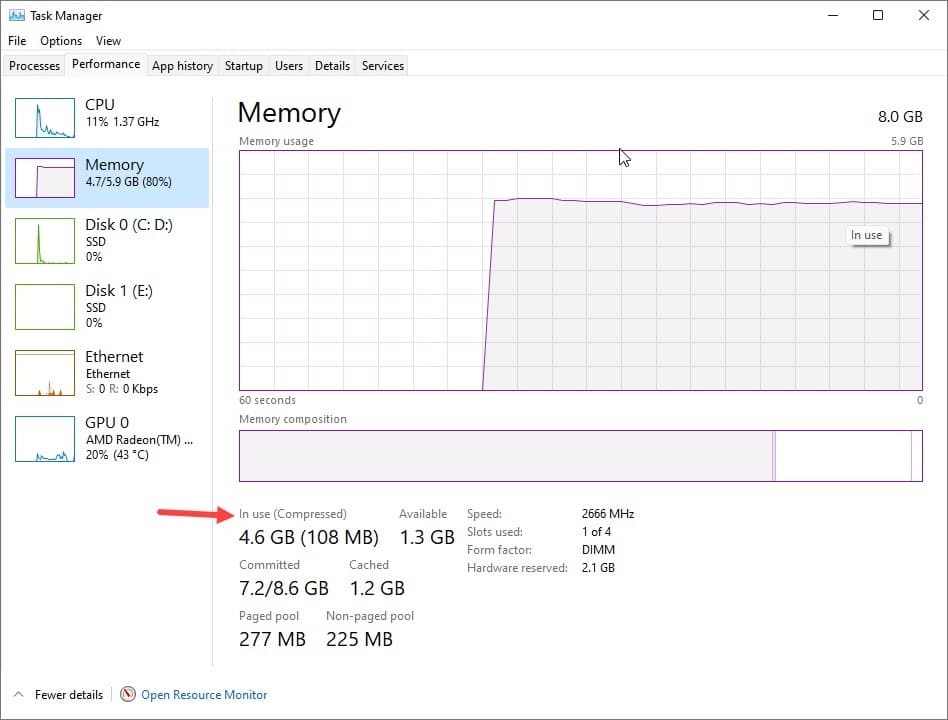
- Now go to the Performance tab and click on Memory from the left side.
- You will get the details of the compressed Windows memory under In-use (compressed) section.
- To get more details about your compressed memory, hover the mouse over the Memory Composition.
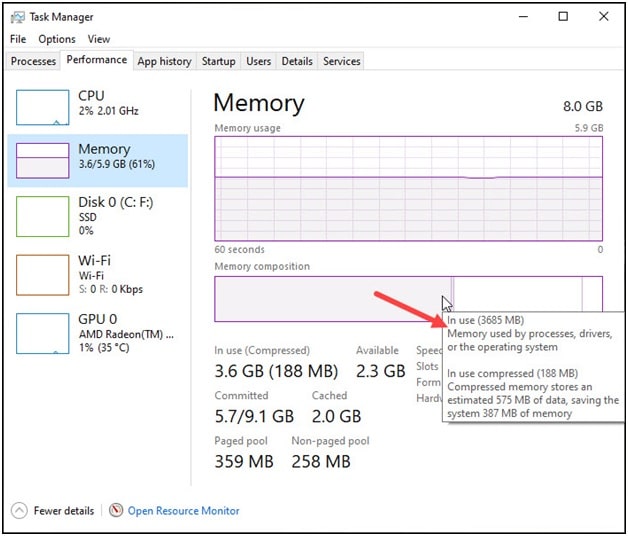
Like here in my device, the system uses 3.7 GB of physical memory.
It has 188 MB of compressed memory and this compressed memory stores about of 575 MB data. So, there are 387 MB of memory savings.
How To Enable Memory Compression On Windows 10/11?
To enable Windows 10 and 11 memory compression, run the Enable-MMAgent –mc command in PowerShell. Here is how you can do it:
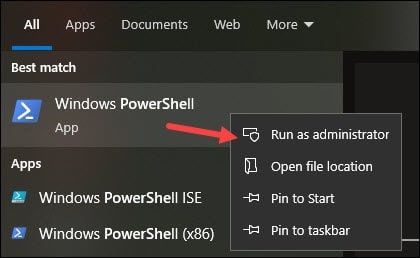
- Enter Windows PowerShell in the search bar. Right-click on Windows PowerShell and choose to run it as administrator.
- Type the following command in the command box and press Enter.
Enable-MMAgent –mc
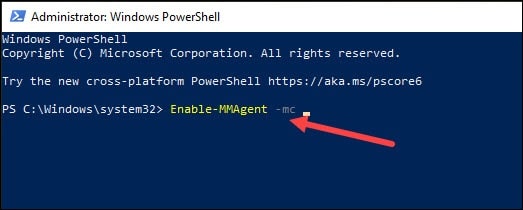
Wait till the process gets completed. Restart your PC to apply the changes.
How To Disable Memory Compression On Windows 10/11?
Sometimes you may need to disable memory compression as it can slow down the performance of your PVC.
To disable Memory Compression on Windows 10 and 11, you have to run the Disable-MMAgent –mc command on Windows PowerShell.
Though I will recommend you to keep the feature on, if you want to disable memory compression then follow the steps given below:
- Run PowerShell as an administrator.
- Type the following command in the command box and press Enter.
Disable-MMAgent –mc
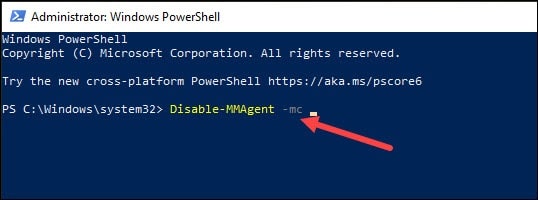
- Wait till the process gets completed. After that restart your computer to apply the changes.
Frequently Asked Questions [FAQs]
Here are answers to some common questions regarding memory compression on Windows 10 and 11.
- Does Windows 10 and 11 Need Memory Compression?
Yes, memory compression is needed on Windows 10 and 11 as it optimizes RAM utilization, speeding up your PC.
- Is Memory Compression Good For Memory?
Yes, as it compresses the data before storing it, saving space for more files and eventually leading to a faster PC.
- Can I Turn Off Memory Compression On Windows 10 and 11?
Yes, you can turn off memory compression on Windows 10 and 11 by running the ‘Disable-MMAgent –mc’ command in Windows PowerShell.
Closing Up
So, Windows 10 and 11 memory compression optimizes RAM by compressing pages.
For further queries, reach us by commenting in the section given below.