Although Microsoft has put the Media Center in the past, it was one of the most popular apps in Windows. One of the most appreciated features in it was the ability to stream videos and music. Although Microsoft does not advertise this feature as such, but you can get the same streaming features using DLNA server in Windows 10.
Check out some cool Media Center replacements here.
What Is DLNA Media Server?
DLNA is actually an acronym for Digital Living Network Alliance, which is a Digital Standards organization that defines guidelines for sharing media across your devices. DLNA uses the Universal Plug and Play standards for the management and control of the media files over the server for easy sharing of your files.
These guidelines make it easier for you to set up a media server, then stream videos, photos and music to other devices that support DLNA.
DLNA Server Windows 10; How To Setup Windows 10 Media Server?
Windows 10 contains all the necessary components required to stream media over a DLNA media server. This means you can use the DLNA server to set up a streaming service from your Windows 10 device, and then use it to stream to your other devices that are on the network.
This feature is hidden neatly in the Control panel, and here are the steps that you need to follow to set up DLNA server in Windows 10:
- Open your control panel.
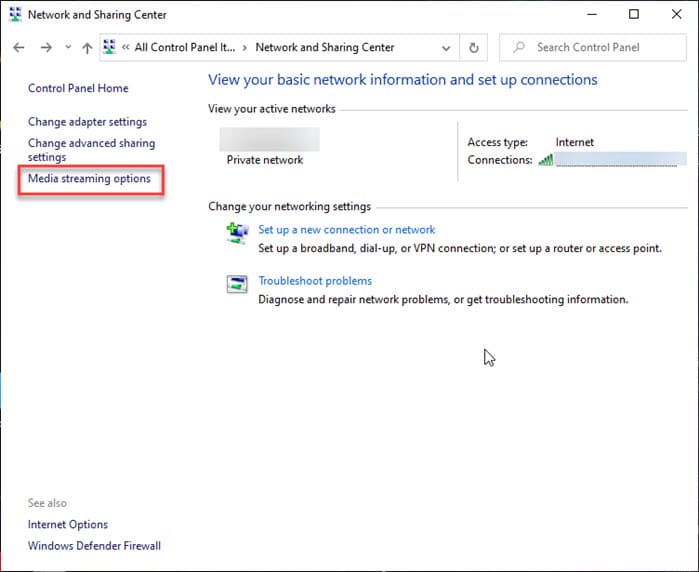
- Confirm if the View by is set to Small or Large icons, then click on Network and Sharing.
- From the additional settings on the left pane, click on Media Streaming options.
Note: If you do not see this option, click on Change advanced sharing settings > Choose media streaming options…
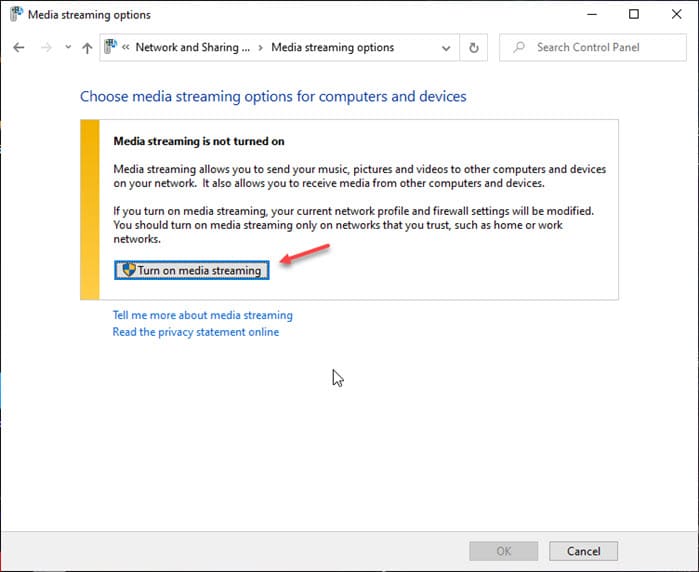
- In the Choose media streaming options, click on the Turn on media streaming options button.
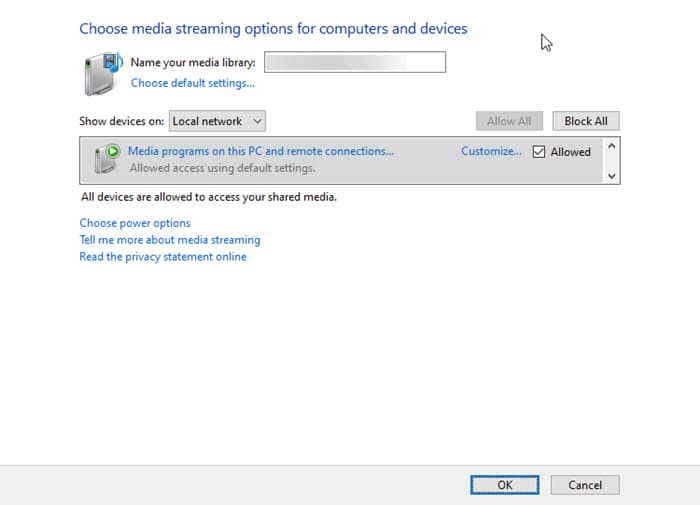
- In the Name your media library section, choose a name for your Windows 10 media server.
- Next, in the Show devices on section, select the devices on your network that will be able to access your media.
- Finally, click on OK to save your settings.
And that is it. You have successfully set up a media server in Windows 10. Any device that has the Universal Plug and Play support will be able to access the files that you have shared on your Windows 10 device. Simply open the media player app on your device, and you should be able to see your library here.
However, this does not tell what files you can access on your devices from the DLNA server. You can actually only share the files that inside the default Libraries folder. By default, this folder is hidden in Windows 10, but you can easily access them by right clicking on any empty space in the left pane of File Explorer.
How To Disable DLNA Windows 10 Media Server?
To disable this media server that you had created, you do not need to access the control panel again. You can simply disable a Windows service to disable the media server. Simply follow these steps for the same:
- Open a Run dialog by pressing Win + R.
- Type services.msc and press Enter to launch the Services console.
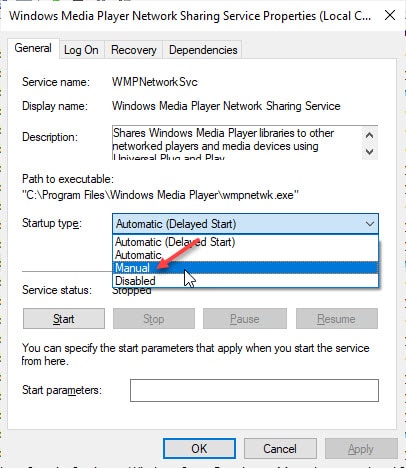
- In the list of available services, locate and double click on Windows Media Player Network Sharing Services.
This will open the Properties window for the service. - Set the startup type as Manual for this service.
- Next, stop the service by clicking on the Stop button.
Wrapping Up
From what it looks like, the DLNA server is a forgotten feature. It may soon be removed from Windows 10 and that is why it is so well hidden inside the operating system despite having the full capabilities. This is probably also because people are now moving away from local streaming towards cloud streaming.
Now you know how to set up a DLNA server in Windows 10 using the method provided above. Comment below and share this if you found this useful.
TY HELPFULL