While traditional hard disks have been the primary storage solution for many users, people are now switching over to the faster Solid-State drivers. This change has been further boosted by the dropping prices of these faster SSDs, which has shifted users from slower mechanical hard disks to optimized data transfer speeds in SSDs.
If you see your SSD running slow, there may be something wrong with the storage device or the operating system that needs to be repaired to regain optimal speeds. Here I shall discuss some simple solutions that you can use to troubleshoot slow SSD speeds.
Fixed SSD Running Slow On Windows 10!
If you see SSD running slow on your computer, follow these solutions to troubleshoot the slow SSD speeds.
Solution 1: Optimize Your SSD
Just like the traditional hard disk drives, your SSD also collects useless junk files over time. You will need to optimize the SSD once in a while to maintain the full functionality of the drive. To optimize your SSD, you can use third party cleaners like CCleaner, or use the built-in Disk Cleanup utility as well.
To use Disk Cleanup, follow these steps:
- Open Windows Search by using the shortcut Win + S.
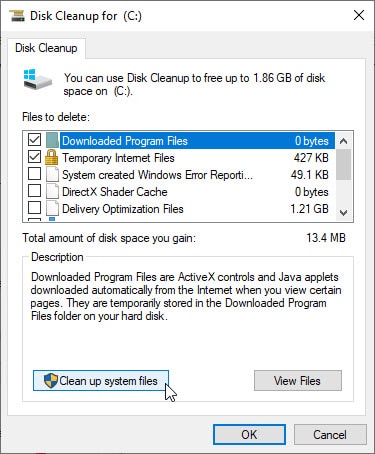
- Type Disk Cleanup and press Enter to launch the Disk Cleanup utility.
- In the Drive selection window, select your SSD from the drop-down menu.
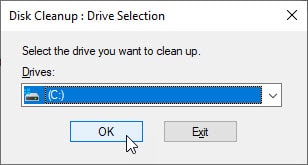
- Delete the junk files from your SSD by following the on-screen instructions.
- Next, open the Windows Search again.
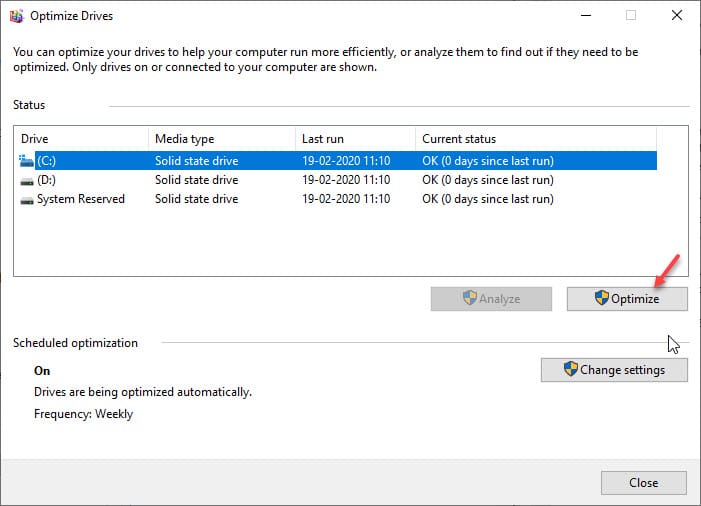
- Type defrag and press Enter to launch the Defragment and Optimize Drives utility.
- Select your SSD partition from the drop-down menu and click on the Optimize button.
Now simply wait for Windows to finish optimizing your SSD. You should see your device functioning fast just as before.
However, if cleaning the junk files failed to repair the speeds of your SSD, there might be something else that needs to be troubleshot. Follow the next solutions to diagnose and fix your error.
Solution 2: Check If The TRIM Command Is Enabled
In Windows 10, the TRIM command is built into the operating system. This command is used by the operating system to clean the unused data blocks in your SSD automatically. This means that you do not need third-party defragmentation utilities for cleaning up your SSD.
To check if the TRIM command is enabled for your SSD, follow these steps:
- Open an elevated command prompt window. You can do so by typing cmd in a Run dialog and pressing Ctrl + Shift + Enter.
- Type the following command and press Enter to check if TRIM is enabled:
fsutil behavior query DisableDeleteNotify
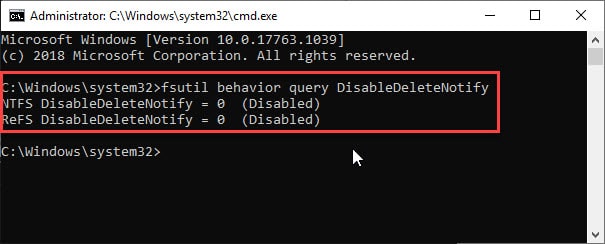
- Check the result. If the result comes as 0, it means the TRIM command is enabled. However, if you get 1 as the result, you need to enable the TRIM command by typing the following command:
fsutil behavior set DisableDeleteNotify 0
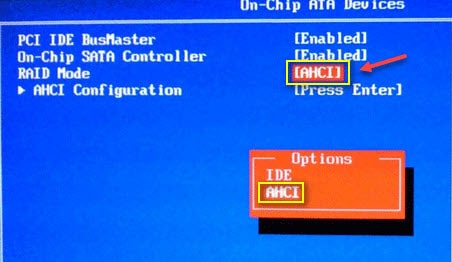
Solution 3: Enable AHCI Mode
AHCI stands for Advanced Host Controller Interface, which is better suited for optimizing your SSD. Since hard disks used the older IDE interface, there is a chance that your SATA controller runs in this mode, therefore, ruining your SSD performance.
You will need to boot into BIOS (repeatedly press the BIOS key like F2 or Delete).
In the SATA controller option, change the controller to enable AHCI mode instead of IDE. Press F10 to save the changes and exit to boot into Windows. You should see the SSD performing optimally.
Solution 4: Enable Cache Writing For SSD
On some computers, by default, the write caching feature is disabled for SSDs. This may be done to prevent data loss in case of a power outage. However, this is a very important feature for SSD optimization, and you can enable it if you see SSD running slow.
To enable Write caching, follow these steps:
- Open the Device Manager console, either from a Run dialog (type devmgmt.msc and press Enter) or from the WinX menu (press Win + X).
- Expand the Disk Drives section.
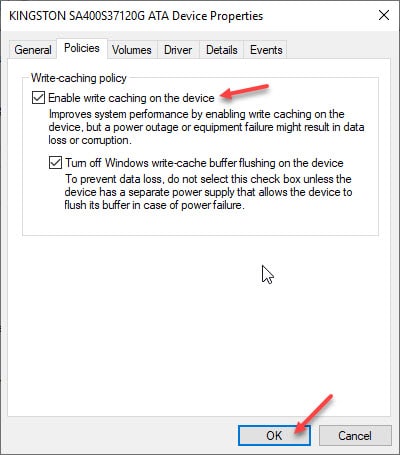
- Right-click on your SSD and select Properties from the revealed context menu.
- Go to the Policies tab.
- Here, enable the checkmark next to the option that says, ‘Enable write caching on the device’.
- Click on OK and restart your computer for the changes to be implemented.
Solution 5: Make Certain Registry Changes
If none of the solutions above helped you to optimize SSD in Windows 10, you can make the following changes to the registry to force the optimization onto your computer. Follow these steps for the same:
- Open a Run dialog and type regedit. Press Enter to launch the Registry Editor.
- Navigate to the following location by pasting the path in the address bar of the Registry Editor:
Computer\HKEY_LOCAL_MACHINE\SYSTEM\CurrentControlSet\Services\iaStorV - In the right pane, locate and double click on the Start DWORD value.
- Change the value data to 0 and save the entry.
- Next, navigate to the following location:
Computer\HKEY_LOCAL_MACHINE\SYSTEM\CurrentControlSet\Services\iaStorAVC\StartOverride - In the right pane, locate and double click on the 0 DWORD value.
- Change the value data to 0 and save the entry.
- Next, navigate to the following location:
Computer\HKEY_LOCAL_MACHINE\SYSTEM\CurrentControlSet\Services\storahci - For the Start DWORD entry, change the value data to 0 and save the entry.
- Next, navigate to the following location:
Computer\HKEY_LOCAL_MACHINE\SYSTEM\CurrentControlSet\Services\storahci\StartOverride - In the right pane, locate and double click on the 0 DWORD value.
- Change the value data to 0 and save the entry.
Finally, restart your computer for the changes to take effect. You should see your SSD performing significantly better.
Solution 6: Check The Hardware
If making the registry changes failed to solve the SSD running slow error, there might be some physical damage that may be causing the slow data transfer speeds to and from your SSD. If this is the problem, you might need to take your storage device to the service center for repairs.
Check the SATA port and the SATA cable for any physical damage. You can also connect your SSD to another computer to diagnose for any damage to the cable and the port. If the device fails to work on the new computer as well, there might be something wrong with the device.
Wrapping Up
So there you have it. Now you know how you can optimize SSD in Windows 10 if you see the SSD running slow on your computer. Comment below if you found this useful, and to discuss further the same.
As far as I’m aware you should not defragment your SSDs. You will see no performance benefit and will only decrease the lifespan of your SSD.
Defragmentation is a tool that should only be used for HDDs.
Nah, Win 10 has ‘optimization’ on the SSD’s now when you go to defrag.
Very concise article and nice and meticulous at the end with the registry overrides, making this a 100% complete optimization article. Well done.