 Disk error can be caused due to bad sectors and improper shutdown. Also, virus attack and file system corruption can influence performance.
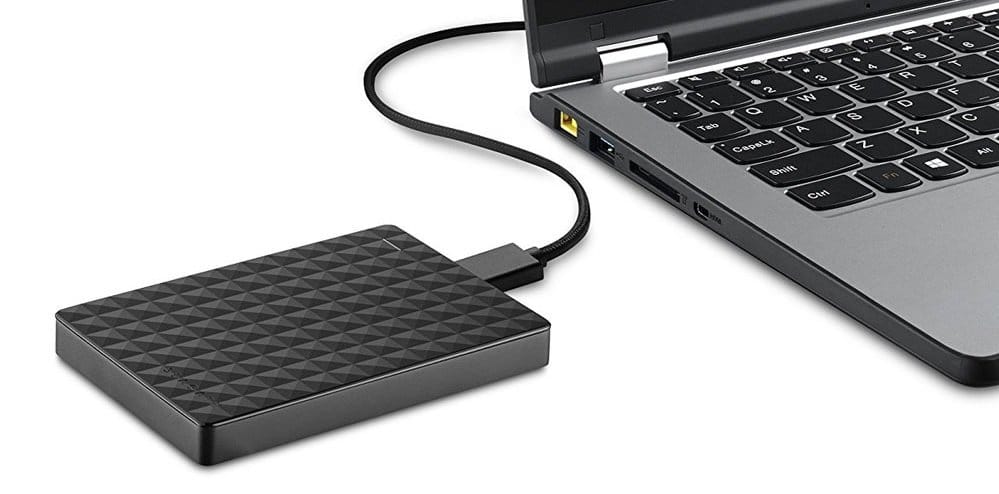
If you are facing trouble with your external disk and want to check it, you can run CHKDSK on external drive.
By running the disk check command, you can find and fix the errors.
Let’s discuss how to use this Microsoft’s disk scanning and repairing utility command in Windows 10 operating system.
How To Test External Hard Drive?
Before explaining the process of how to run check disk on external hard drive, let’s know the command for checking personal/internal disk.
You simply need to follow the step-by-step procedure mentioned below-
- Type ‘cmd’ in the Windows search box on the taskbar
- Right click on ‘Command Prompt’ desktop app
- Select ‘Run as administer
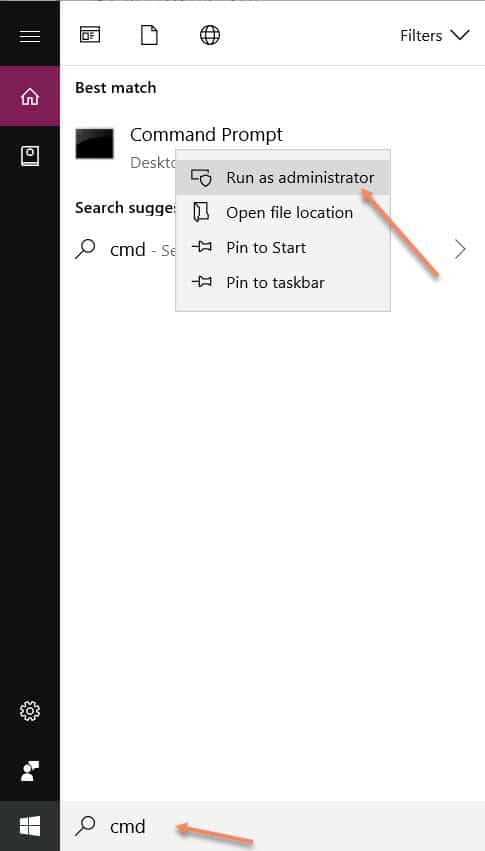
It may ask you to choose ‘Yes’ or ‘No’ where you have to select ‘Yes’ button.
This will open the command prompt window on the main screen.
- Type ‘chkdsk’ and hit the ‘Enter’ key
It will take a little time to complete three stages of checking and highlight a message if there is an error in the drive.
Or else, you will get ‘Windows has scanned the file system and found no problem. No further action is required.
How To Run Disk Check On External Drive?
In this process, the steps will be the same till opening the command prompt on the main screen.
Now, type ‘chkdsk external drive name:’ i.e., ‘chkdsk G:‘
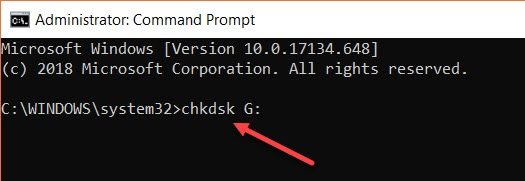
Hit on the ‘Enter’ key to run the command and wait until it gets completed.
If there is an error in the disk, it will be mentioned there and you need to follow these steps-
- Close the command prompt and reopen it-
- Type ‘chkdsk G: /f‘
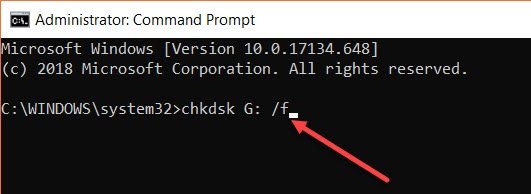
Press the ‘Enter’ to run this command.
The /f will run the file system fixing process. It may take a little time to complete.
Hope it is now cleared how to run CHKDSK on external drive and check the errors.
Some users also use command ‘chkdsk G: /f /r /x’ and hit the ‘Enter’ key.
Here /r will locate the bad sectors and recover readable information. And, /x helps in dismounting the drive before the process starts.
This command might ask you to perform the operation on the next restart. So, you need to press y and hit the ‘Enter’ key to enable the same.
Note:
Suppose you get the external hard disk is CHKDSK write protected, you can use command ‘chkdsk G: /f /r /x’ to clear attributes.
Or else, you need to type ‘diskpart’ followed by ‘list volume’ and select the particular volume with the command ‘select volume G’.
Press the Enter key to clear the attributes and repeat the steps again to check disk.
Additional Method
It is another way to check and repair the issues within simple steps-
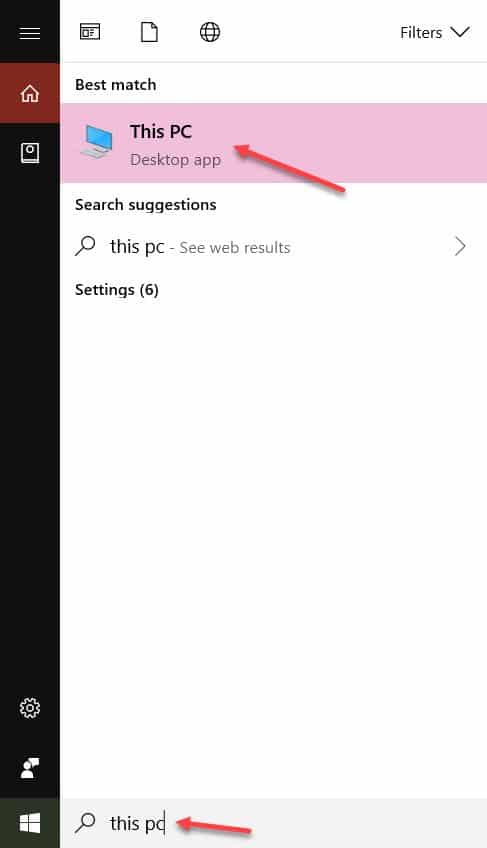
- Type ‘this pc’ in the search box
- Click on ‘This PC’ desktop app
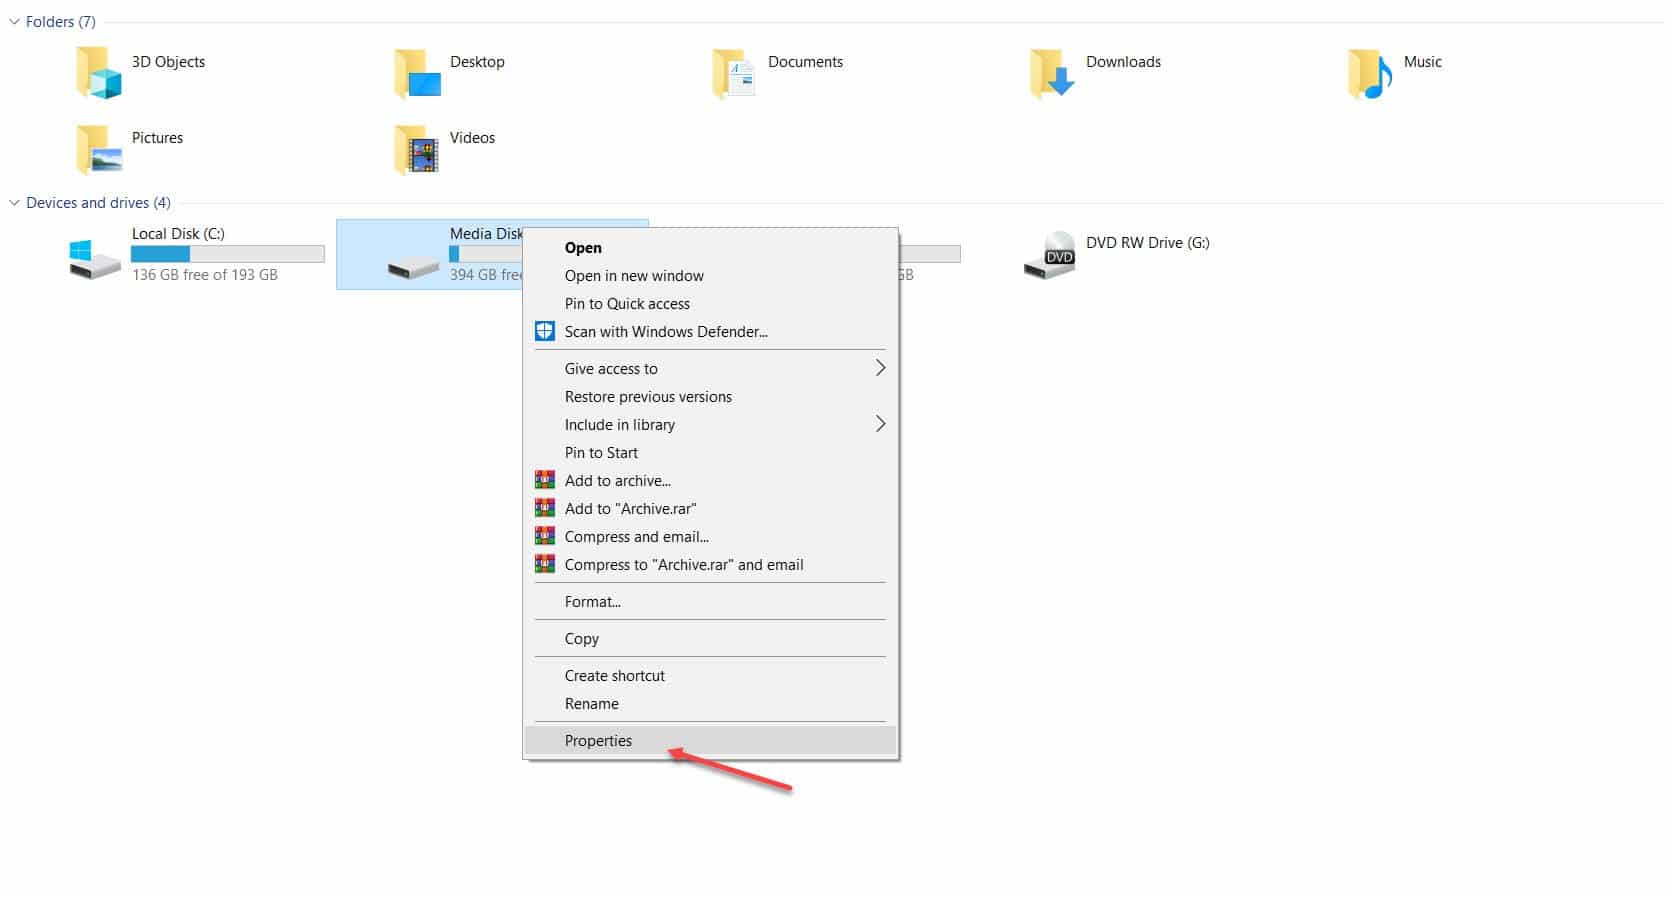
- Right click on ‘External Disk’
- Click on ‘Properties’
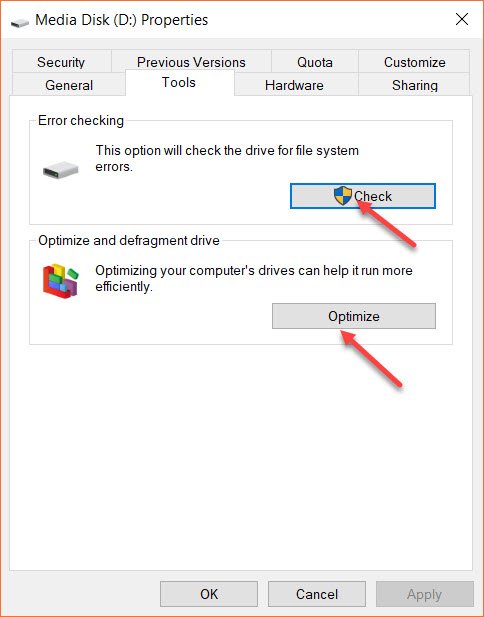
This will open the Properties window on the screen.
- You need to locate ‘Tools’ tab and click on it
- Select ‘Check’ to perform the disk check
- You can also choose ‘Optimize’ to enable the drive running more efficiently
Once done, you need to click on ‘OK’ and close the window. Now, reboot the PC.
Conclusion
Now, you get to know how to run CHKDSK on external drive, fix errors and keep your drive healthy.
It is advised to back up the data whenever you find errors such that you won’t lose them.