While interacting with Windows 10 PC, you may hardly notice the fonts being used. However, those who want to customize their devices know how important the font can be, as they may end up making or breaking a theme. Let us discuss Windows 10 fonts in detail, and how you can restore default fonts Windows 10.
What Is The Default Windows 10 Font?
In Windows 7, you could customize the font face for different elements within the operating system. However, this setting was removed starting Windows 10, as you are stuck with the default system font across all the places within the operating system.
The default Windows 10 font is called Segoe UI. It is a Sans serif font face, that is used extensively for Microsoft products. Apart from this, Windows 10 has many other built in TrueType (TTF) and OpenType (OTF) fonts preinstalled.
Restore Default Fonts Windows 10
Microsoft is probably trying to replace the control panel, and integrate its functions within the Settings app itself. This may be the reason that the Personalization section of the Settings app now has a dedicated Fonts menu. However, here you can only preview and install or remove fonts, as the restore option is still present in the control panel app.
There are two methods to restore the default Windows 10 font. Let us take a look at both of these methods one by one.
Method 1: From Control Panel
You may be familiar with the control panel Fonts applet if you have previously tried to change the default fonts. The option to revert back to Windows 10 default font can also be accessed from here. Follow these steps for the same:
- Open Control panel using the desktop icon or Run dialog.
- Change the View by to Small or Large icons depending on your choice, if you see it set to Category.
- Click on Fonts.
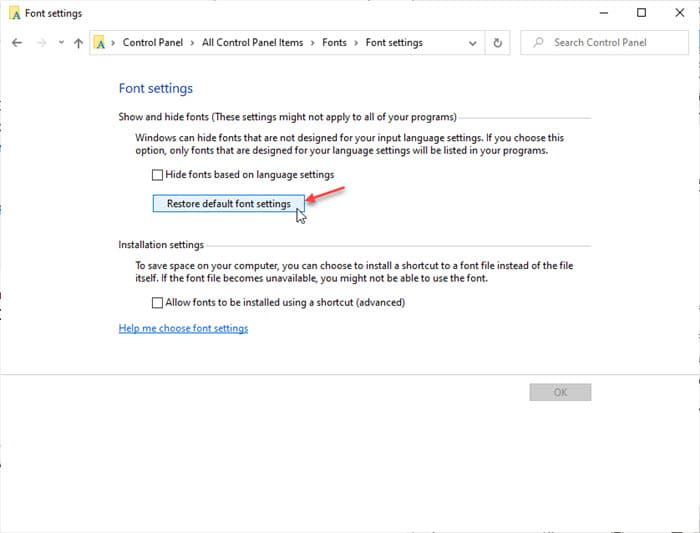
- In the additional menus in the left pane, click on Font settings.
This will take you to the Font Settings page. - Here, locate and click on the Restore default font settings button to restore the default Windows 10 fonts.
- Finally, click on OK to implement the changes.
This is an easier way of restoring the default font settings in Windows 10. You can also make this change from the Registry Editor, which I shall discuss next.
Method 2: From The Registry Editor
This method involves using the registry editor to create a new registry key with the default font. Let us see the detailed steps for the same:
- Open the Settings app using the keyboard shortcut Win + I.
- Go to the Personalize section.
- In the left pane menu, click on Fonts.
- Take a note of the installed fonts, and make sure that the Segoe UI font is installed on your computer.
- Next, open a text editor like Notepad or MS visual Code.
- Enter the following text and save it to defaultfont.reg file:
Windows Registry Editor Version 5.00
[HKEY_CURRENT_USER\Software\Microsoft\Windows NT\CurrentVersion\Font Management]
“Auto Activation Mode”=dword:00000001
“InstallAsLink”=dword:00000000
“Inactive Fonts”=-
“Active Languages”=-
[-HKEY_CURRENT_USER\Software\Microsoft\Windows NT\CurrentVersion\Font Management\Auto Activation Languages]

Once you have saved the file to the mentioned file name, run the file. Upon restart, you should see the fonts restored to the default state.
Precaution
If you notice that the default font is not available in the Settings page, run the system file scanner (SFC) and DISM scans to restore the default system files.
Wrapping Up
So there you have it. Now you know how to restore default fonts Windows 10 using the methods shown above. Comment below if you found this useful, and to discuss further the same.