The Blue Screen of Death errors occurs when your system shuts itself down to protect itself from damage. These blue screen errors usually solve themselves by a simple restart, and a dump file is created which contains the log of the error, and other details.
Looking at your Windows crash dump file can help you determine why your computer crashed.
How To Access DMP Files In Windows 10?
The Windows Memory dump files are the files with .dmp extension. These system files are stored in a binary format and are automatically created in case of a system crash or device failure. When you get one of the Blue screens of death errors in Windows 10, many details about the possible causes are stored in these .dmp files.
Windows 10 Dump File Location
Usually, the Memory.dmp and Crash.dmp files are stored in the root folder in case of a system crash. To find the location of the Windows dump files, follow these steps:
- Open control panel, from either a Run dialog or the desktop icon if you have one.
- Change the view to Small or Large icons, if previously set to Category.
- Click on System.
- From the right pane, click on Advanced system settings.
- Under the Startup and Recovery section, click on Settings.
- Under the Write debugging information section, you will see the location of the system dump files.
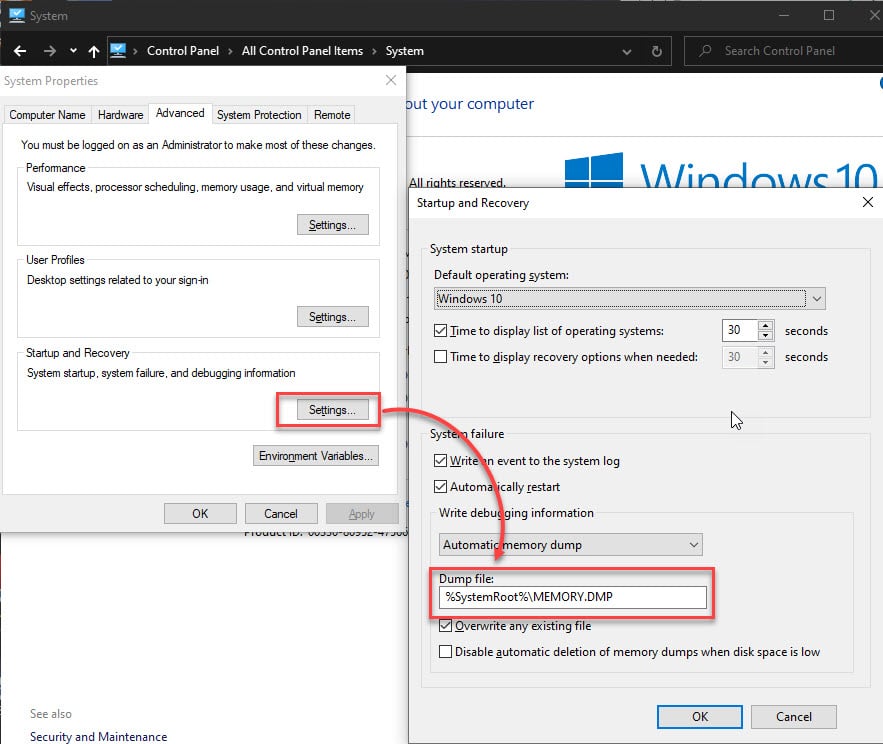
You can use this method to check the Windows 10 dump file location for your computer.
How To Read Dump Files In Windows 10?
A casual Windows user will rarely look for any information in the dump files, as they would prefer the technicians taking a look if something goes wrong with their device. For this reason, Windows did not include a built-in application for reading dump files.
Instead, you need to download and install third-party apps for the same functionality.
The most popular Dump file reader is from Windows itself. The Windows Driver Kit for Windows 10 is one of the text editors that can read and analyze .dmp files. After download, follow these steps:
- Open Windows Driver Kit.
- Click File and select Open Crash Dump.
- Browse to the .dmp file you wish to analyze.
- Click Open.
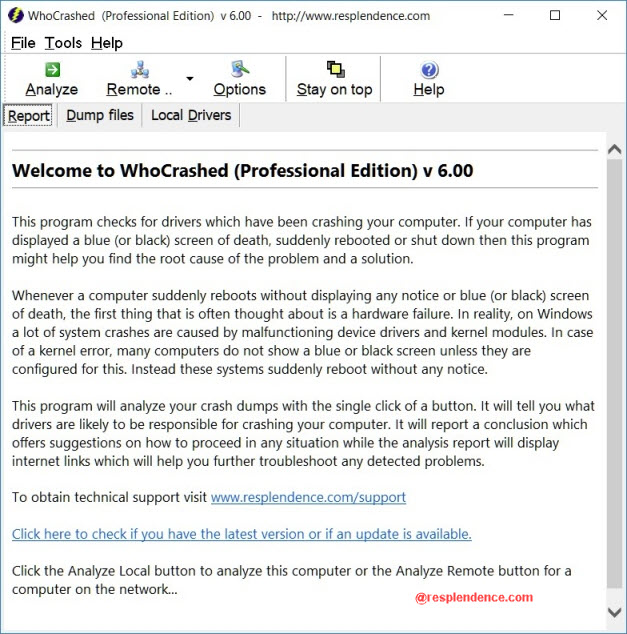
Another popular application is WhoCrashed. You need to install the application on your device for using it. You can also simulate the system crash with certain parameters to know more about your crash.
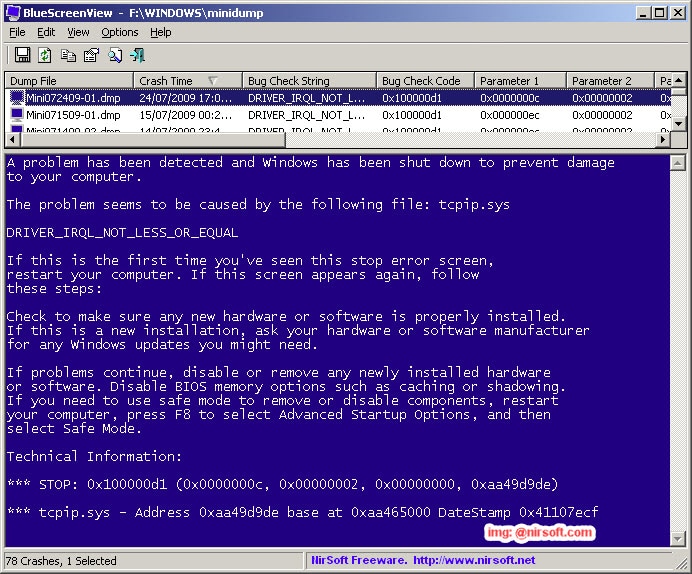
BlueScreenView is one of the older dump files analyzer, which supports every Windows iteration to date. It is a portable application, which can be extracted and run without installation.
Dump File Creation Failed Due To Error During Dump Creation
Some Windows users have reported that they have not been able to access the dump files. Instead, when they try to access the dump files, they get an error that says Dump file creation failed due to error during dump creation. If you get this error while accessing the dump files on your device as well, follow these simple steps to solve this problem.
Solution 1: Run Chkdsk Scan
Usually, the Dump file creation error occurs because of a misbehaving disk partition. Simply follow these steps to solve your win dump file error using the chkdsk command.
- Open an elevated Command Prompt. To do this, press Win + R to launch a Run dialog, type cmd and press Ctrl + Shift + Enter to launch Command Prompt with administrative privileges.
- Type the following command in the command prompt window to run the disk checker command:
chkdsk /f /r Z:
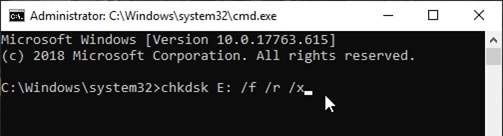
Note: replace Z: with the letter assigned to the drive that you want to scan.
Now you simply need to wait for the disk checker to repair your disk partition.
Solution 2: Run DISM And SFC Scan
Windows has included two command utilities, that you can use to check if there are any components that go missing or corrupt. If you want to know more about how to use these scans, you can check out how to scan for and repair broken system files.
Wait for the scans to be complete, after which your error should be resolved. If the scans found some missing components, the results will be shown in the form of a message.
Solution 3: Uninstall Optimization Applications
There are many third party optimization applications, which can be used for cleaning up junk files in Windows 10. These applications can sometimes delete the created dump files in order to save some storage space and clear your computer. In these situations, your application may have deleted the Windows 10 dump files.
Check the log of your cleaning application, and restore any deleted files if possible. Also, uninstall the application and then attempt reading the dump files using the applications mentioned above.

Solution 4: Update Bios
Many users have reported that the Windows 10 dump file creation failed error can occur if you do not have the latest BIOS version.
Although most of the BIOS updates are provided automatically, if you did not receive a BIOS update, you can begin your troubleshooting by tallying the BIOS version that is installed on your computer, and the one available on your motherboard manufacturer website.
To check the current BIOS version, open a Run dialog and type msinfo32. This will launch the system information window, where you will find most of the information related to your PC.
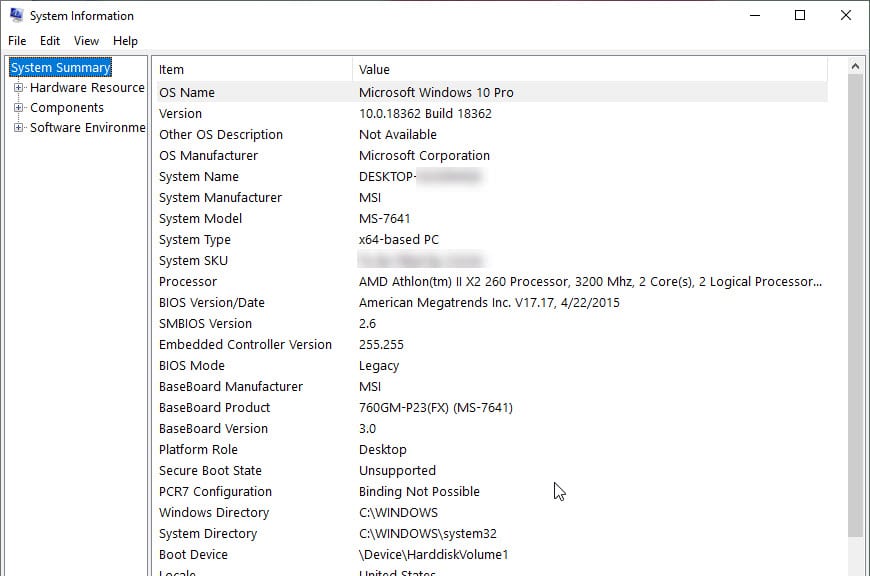
In the System Information window, locate the BIOS version/Date section to find out about the BIOS version that is installed on your device. Next, tally this to the version available online, and download and install any pending BIOS updates.
Wrapping Up
So there you have it. Now you know how to read dump files in Windows 10, and how to solve the ‘dump file creation failed due to error during dump creation’ error using the solutions provided above. Tell us in the comments if you found this useful, and how you solved the error on your device.