Did you ever experience the nightmare of clicking on a file only to have it disappear?
When clicked, some files may suddenly vanish, which is a concerning issue for computer users.
In this case, you will be left with nothing except frustration and confusion.
So, dive deep into this article to know the reasons behind the problem and solutions to fix it.
Also read: How To Recover Deleted Files On Mac Easily
Why Are My Files Getting Deleted Automatically When Clicked On Windows 11?
Windows 11 automatically deletes files that are older than 30-60 days from the Recycle Bin along with the temporary files as per the requirement.
There can be several reasons why files are getting deleted automatically when clicked.
- Malicious Programs Can Be Responsible For Deleting Files Without Your Consent
- System Errors Or Glitches
- A User Accidentally Deletes The File Themselves
- Corrupt System Files
- Issues Related To Hard Drives
- Pending System Updates
- Third-Party Applications
How Can I Stop Windows 11 From Deleting Files Automatically?
If your Windows 11 Operating System is mysteriously deleting your files, then there are a few ways to stop this unwanted behavior.
Here are the steps to prevent an automatic file deletion on Windows 11:
1) Run SFC Scan For Malware
Running an SFC scan will replace any corrupted or missing files with a cached copy from the Windows OS.
Running an SFC scan will help in ensuring the integrity of your Windows Operating System and fix various issues that can arise due to corrupted or missing system files.
Here is how to do an SFC scan:
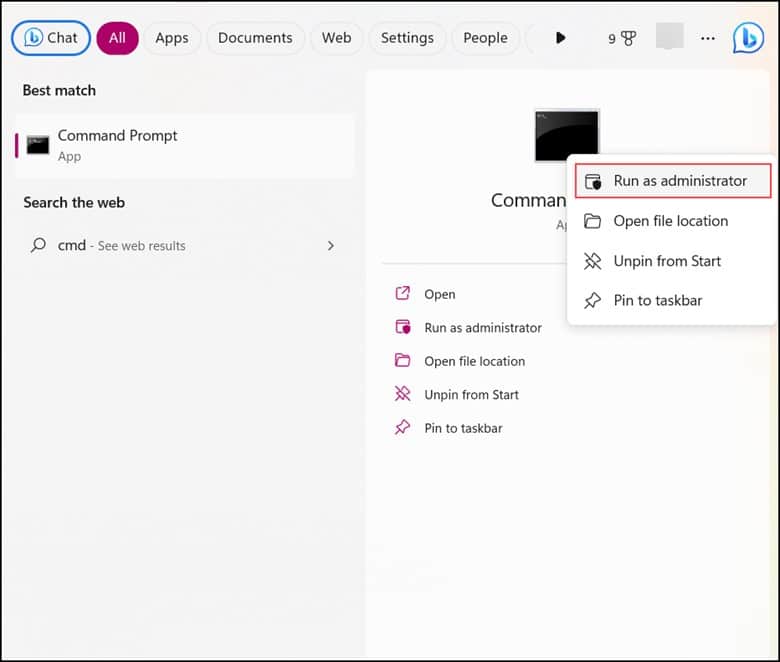
- Type “cmd” on the Search button and then right-click on the Command Prompt and Run as administrator.
- Now, type “sfc /scannow” and press Enter.
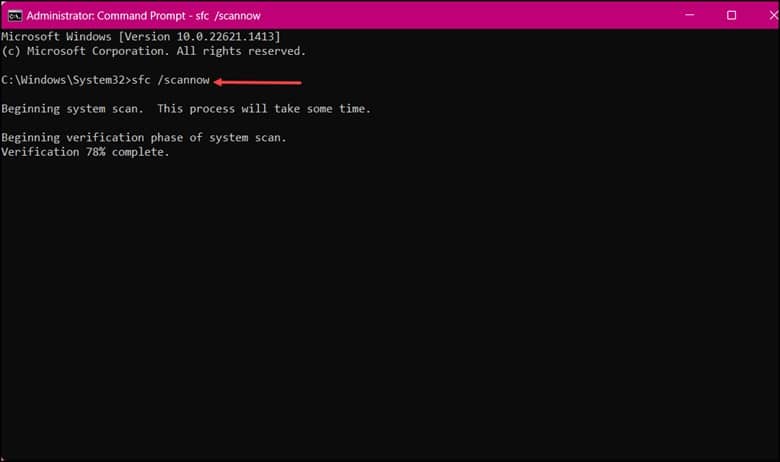
- Then, wait for Windows to scan your system files.
- After you are done with the entire process, reboot your PC to see if the problem persists.
- If it does, then run the DISM scan.
2) Run DISM Scan
Running a DISM scan on Windows 11 helps in preventing the automatic deletion of files.
It is known to identify and repair any issues that are likely to cause an automatic file deletion.
Follow the steps to run DISM scan on your Windows 11 PC:
- First, search for Command Prompt and then click on “Run as administrator” by right-clicking on it.
- Now, in the elevated Command Prompt window, type the following commands one after the other and press Enter.
“DISM /Online /Cleanup-Image /CheckHealth”
“DISM /Online /Cleanup-Image /ScanHealth”
“DISM /Online /Cleanup-Image /RestoreHealth”
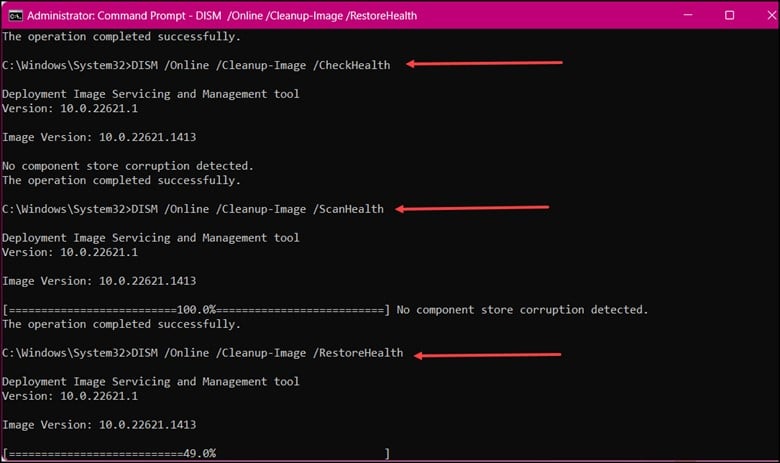
- Finally, restart your device and check for the error message. If the DISM scan didn’t help, then run the CHKDSK scan.
3) Run CHKDSK Scan
Running a CHKDSK scan on your Windows 11 PC will help in identifying and deleting the infected files on your hard drive.
Follow the steps to run a CHKDSK scan:
- First, search for Command Prompt and then click on “Run as administrator” by right-clicking on it.
- Now, type the following command and press Enter:
“CHKDSK C: /f/r/x”
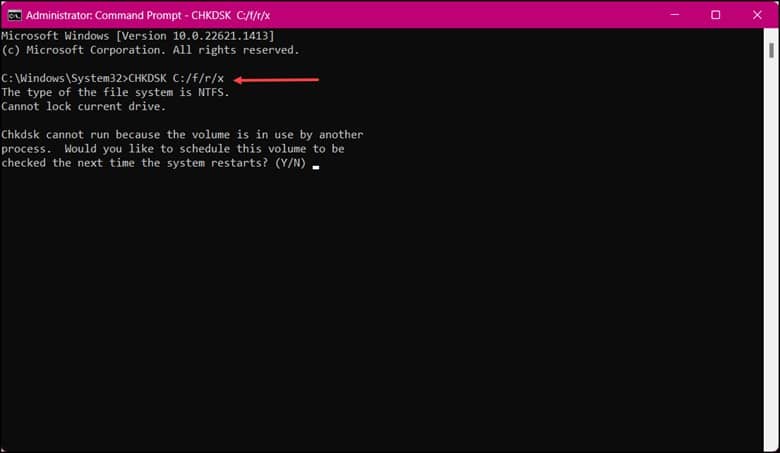
- Since your device’s root is already in use, the Command won’t start. You will be instructed to begin scanning when you restart your PC.
- Type “Y,” press “Enter,” and start rebooting Windows.
- Once done, check whether the file deletion problem is fixed. If it persists, then turn off “Storage Sense.”
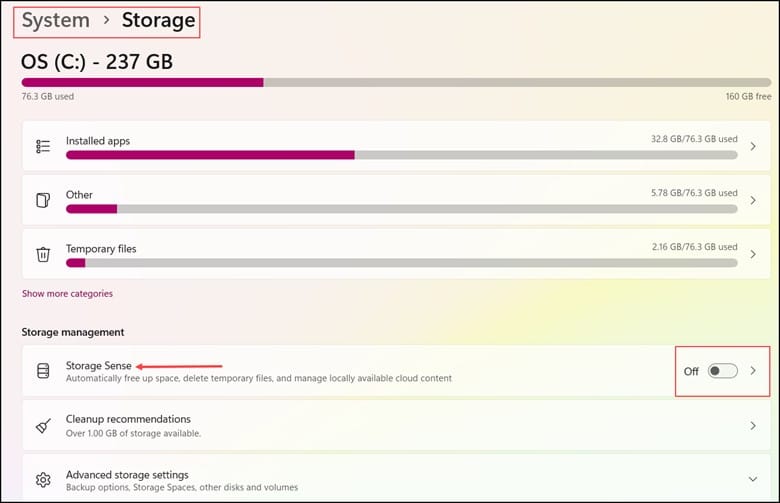
4) Turn Off Storage Sense
Storage sense helps to free up space on your hard drive by automatically deleting temporary files that have been in the Recycle Bin for more than 30 days.
If it is set to run automatically, it may delete files that you will need.
Therefore, turning it off will prevent the automatic file deletion, and this is how you can do it:
- First, click on the Start button and select “Settings.”
- Then, navigate to “System” and select “Storage.”
- Now, click on the toggle switch to turn off Storage Sense.
- If turning off “Storage Sense” didn’t help, then restore files from a previous version.
5) Restore Files From A Previous Version
If you are trying to restore files from the previous version, then it will help you to recover the deleted files accidentally.
This is useful in recovering accidentally deleted files but is not a solution to prevent accidental file deletion.
This is how you can do it:
- First, open File Explorer and go to the folder where you have lost the File.
- Right-click on the folder and then click on “Previous Versions.”
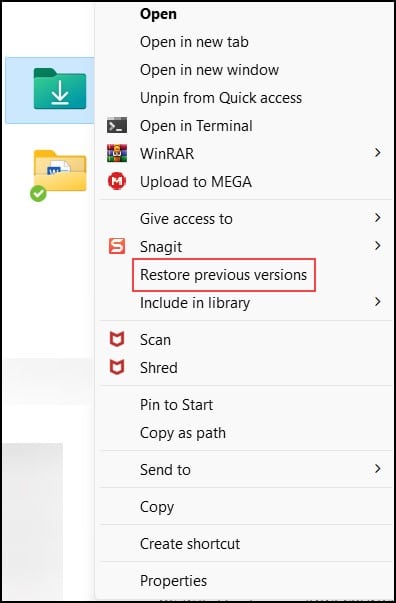
- Finally, from the list of previous versions available, select the files that you need.
- Then click on “Restore” to recover the deleted files from Previous Versions.
- Check if this method helped prevent the files from getting deleted automatically or update the mouse driver.
6) Update The Mouse Driver
An outdated mouse driver is one of the causes of files getting deleted automatically.
In this case, try updating the mouse driver in Device Manager by following the steps mentioned below:
- Press the Windows key + R on your keyboard to open the Run dialogue box.
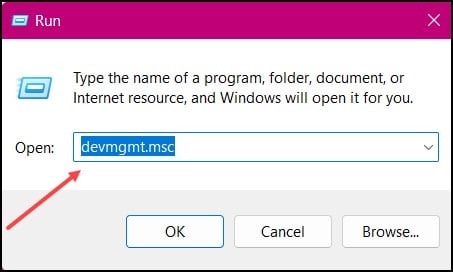
- Then, type “devmgmt. msc” and press Enter.
- Then, expand the “Mice and other Pointing Devices” section.
- Next, right-click on the mouse and select Update driver.
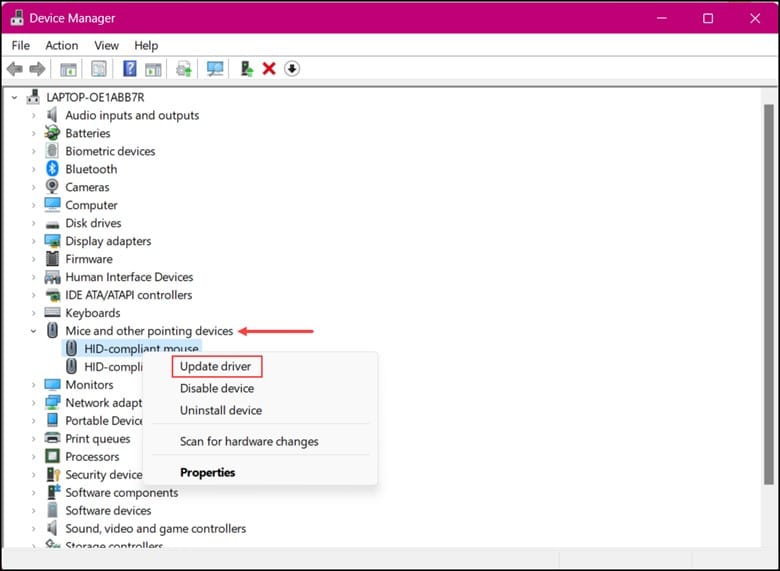
- Click on the “Search automatically for drivers” option in the next window.
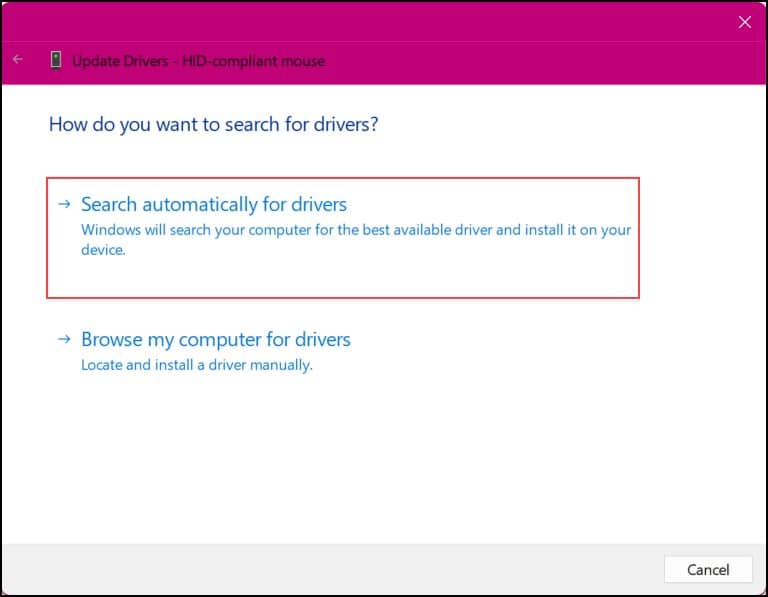
- Windows will search for and download the latest drivers for your mouse. Now this should solve the problem.
Frequently Asked Questions (FAQs)
1. Why Are All My Files Deleted?
Your files can get deleted if your computer hard drives malfunctions.
The malfunctioning results in the disappearance of all files if your login account is correct.
2. Where Do Deleted Files Go In Windows 11?
When a file or a folder gets deleted, it goes into the Recycle bin, where the user gets a chance to restore it.
3. Is An Undeletable File A Virus?
Undeletable files are generally spyware, malware, adware, or Trojan files.
Wrapping Up
Tell us which of the above methods helped you solve the “files getting deleted when clicked automatically” issue.
Write to us in the reply section below for any suggestions or queries.