Some of the users confronted NVidia high-definition audio driver issue immediately after installing Nvidia’s latest available driver.
Some were able to get clear audio within Team speaks but when they jumped into the game, they failed to hear any sound!
This problem may arise when you are streaming audio and video to another display using HDMI. If you are also facing a similar issue, this is awkward, and you need to fix it immediately.
In this article, I am going to demonstrate the solutions for the problem.
Also read:
- How To Update Your Device Drivers Easily Using The Device Manager
- How To Fix Yellow Screen Tint On Windows 10
How To Solve Nvidia High-Definition Audio Driver Issue?
There are several ways to solve the NVidia high-definition audio driver problem. Before moving on to any other solution, first, check whether the drivers are somehow corrupted and need an update.
Besides, you have the option to change the audio output device or roll back the graphics driver.
Sometimes the onboard sound device may get disabled automatically and raise this issue. So here I suggest checking and enabling the option.
The other drivers that are installed in the Device Manager can also be the culprits for initiating this problem so, you can solve it by removing those devices.
Let us now discuss the remedies for this NVIDIA related problem in detail. Have a look!
Solution 1: Update Graphics Drivers
Whenever you encounter NVidia high-definition audio driver problem, always check whether the sound drivers are corrupted, and you need an update.
For quickly updating your sound drivers, follow the steps mentioned below:
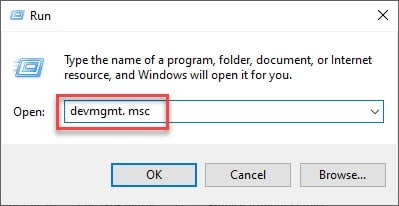
Step 1: Open the Run dialog box. Then input devmgmt. msc in the box. Then hit the OK button to open the Device Manager.

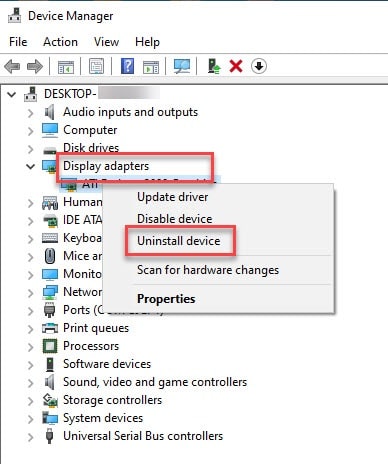
Now in the Device Manager, select the Display adapters column.
Step 2: Now as soon as you find right-click on the graphics and then select the Uninstall Device option.
Minutely follow the onscreen instructions given for accomplishing the process of uninstallation. Wait patiently till the entire process gets completed.
Step 3: Now search on the NVIDIA site whether any graphics card driver is available there. Now input the details required for the graphics card driver.
Step 4: Now go to the Search option. Now a list of drivers will get displayed in front of you. Now proceed to download.
Step 5: Now a menu will get displayed showing the components that are already installed on your device.
Step 6: Now move on to the checkbox beside Perform a clean installation and hit the Next button.
Step 7: The installation process will commence now. After the installation process gets over, check whether this has solved your problem.
If updating the graphics drivers doesn’t help, you can also try restarting the graphics driver. Read this article to learn how to do it.
Solution 2: Change The Audio Output Device
When you find that NVidia audio is not working, you can change the audio output device.
Here I am mentioning the steps in detail. Follow them:
Step 1: First of all, find out the volume knob from the right side of your display. Click right on it.
Step 2: Now choose the playback device. Simultaneously also open your Control Panel. You may go to the search bar and type Control Panel and your control Panel menu will get displayed in front of you.
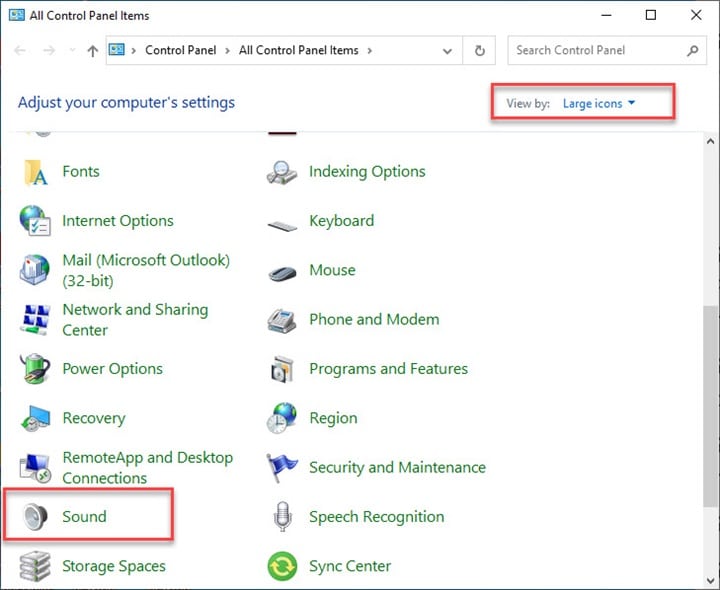
Step 3: Now select the view option and then go to the right side and select the Large icons view.
Step 4: Now locate Sound and then hit the button to select it. You will find a similar menu.
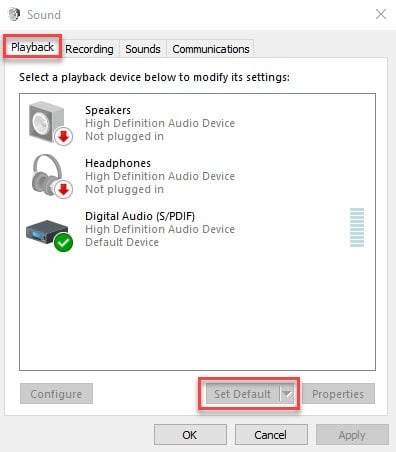
Step 5: Now go to the Playback option. You will find this out from the Sound menu.
Step 6: Now click right at the end of its menu and find the check boxes next to Show Disabled Devices and Show Disconnected Devices.
Step 7: You will have to just left click and then choose to set it to the default option.
Step 8: Now click right on the Digital Audio/Monitor/HDMI and choose to disable it. After performing the entire activity check whether your issue with NVidia audio is solved.
Solution 3: Enable The Onboard Sound Device
Check whether the onboard sound device got disabled somehow as this may be the reason for the NVidia audio not working issue.
If you connect any external sound device, the onboard sound device may get disabled automatically!
Follow the steps properly to enable the option in BIOS:
Step 1: Press the BIOS key after turning on your device to enter its settings. On your boot screen, you will get your BIOS key like Del key, F1 or your F2 keys.
Step 2: For running the set-up press _and with the help of the arrow key search in the Advanced Tab inside the BIOS. You will get an option like Onboard or Device Configuration or similar options.
Step 3: After you have selected the option, go to the Audio Controller option, and find the Sound Settings. Hit the Enter button to enable the option.
Now save your changes and exit. Your system will reboot itself now. After rebooting, check whether your problem got addressed this way.
Solution 4: Roll Back The Graphics Driver
Rolling back the driver is also another way to fix the NVidia high-definition audio no sound problem.
For doing this, choose the uninstallation process for the recently installed graphics driver.
Follow the steps I am mentioning below to do the same:
Step 1: Go to your Device Manager. You can go to the search box and enter Device manager there and your Device manager will get displayed in front of you.
Step 2: Besides, you have another option to press Windows + R key from your keyboard. Then type devmgmt. msc in the provided Run box and press the OK button.
Step 3: Now when you are inside the device manager, locate the Display Adapters column. Next, enlarge the said column.
Step 4: This will give you a clear picture of the adapters which you have installed on the system.
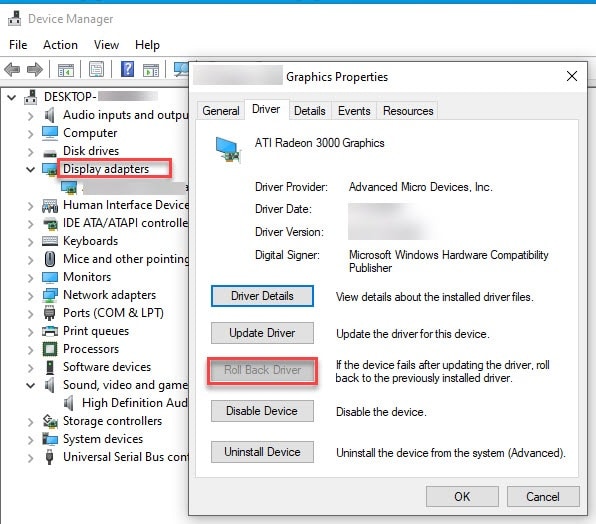
Step 5: Now choose the display and click right on it to rollback. Go to Properties and choose the Driver option from the given options.
Step 6: Now search and find out the Roll Back Driver option and select it. Follow the prompts provided on the screen to accomplish the process.
After the process of rolling back gets completed check whether you have successfully solved the problem.
Solution 5: Use High-Definition Driver
This is comparatively silly, but some users found this quite effective to solve the Nvidia audio-related problem.
You can just switch to choose a High-Definition Audio Driver option while updating. Follow the process mentioned below to commence the process:
Step 1: Open your Run dialog box by pressing Win+R and then type Devmgmt. msc. Press Enter to open your Device Manager.
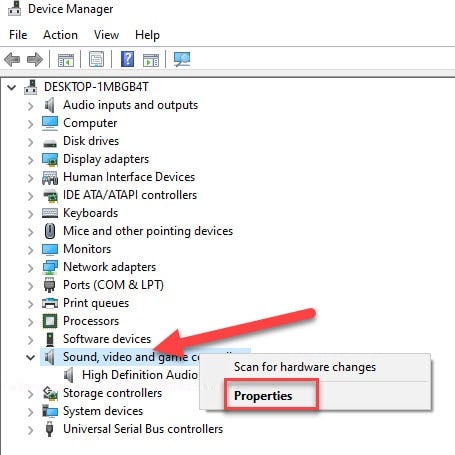
Step 2: Now inside your device manager, find out and select Sound, Video, And Game Controllers option. After that choose to click right on Nvidia High-Definition Audio Device and move on to its Properties.
Step 3: Next go to the Drivers tab and choose to update driver. Now, proceed to browse for driver and then pick up the Audio Device with High Definition.
Step 4: Then hit the Next button. Follow as instructed from the onscreen prompts to proceed. After you have finished the procedure, check for improvements.
Solution 6: Disable Other Drivers
You may have installed any other driver on your system, and this may give you the NVidia high-definition audio no sound issue.
So, to disable any other driver from the device manager follow the steps provided below:
Step 1: Open your Run dialog box by pressing Win+R and then input Devmgmt. msc. Hit Enter and this will lead you to the Device Manager.
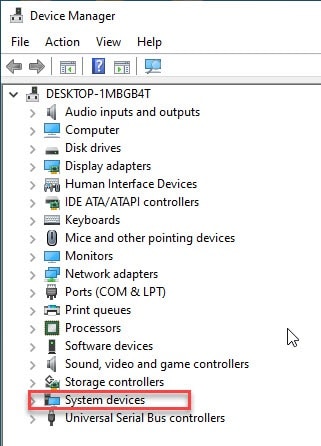
Step 2: Now select System Devices and search for any driver related to the Intel Smart Sound Technology.
Step 3: Then use your right click option and choose to Update. Browse and pick a driver for your Computer from the given list.
Step 4: Now again choose something with high definition and hit the Next button. Remember to follow the on-screen instructions properly.
Final Words
So, I hope this article has helped you with some feasible solutions to solve the annoying NVidia high-definition audio driver issue.
In case you have some queries or suggestions with such topics, please feel free to comment in the section provided below.
You can also shoot us a mail at your convenience. We are always eager to hear from you.