Chromebooks are very popular among users for productivity purposes. Although google has been updating the ChromeOS fairly regularly, its very limiting in nature. In terms of features it does not even come close to Windows or some Linux distros.
Some of you may be wondering is there some way to install Windows 10 on a Chromebook? There is a simple way to do so actually. Here I will tell you how to install Windows 10 on Chromebook.
Before You Install:
There are some things you need to know about before you can install Windows on Chromebook.
1. Compatibility issues
You can only install Windows 10 on Chromebooks if you have an Intel based processor. If you have an ARM based processor, this method wont work, and you may end up bricking your device.
2. Storage space
You need to have ample space on your device in order to install and run Windows on your Chromebook. A 32-bit Windows 10 OS requires a minimum of 16GB of storage space, and the 64-bit OS requires a minimum of 32GB of storage.Make sure you have enough space left after an install to run the device smoothly and install Windows Updates as well.
3. Specifications
Windows 10 has some minimum requirements to work smoothly. Make sure your device has met the minimum requirements to install Windows 10.
4. Device Drivers
During installation, the drivers are not enabled. So, your trackpad and keyboard wont work during the install. Make sure you have an additional USB mouse and keyboard (optional) for input during installation.
5. Warranty issues
To install another OS, you may have to remove a write-protect screw from your motherboard. This will void your warranty, so in case anything goes wrong keep that in mind.
6. Backup
Make sure to backup your firmware and data as your Chromebook will be wiped to factory settings.
Now that you know what may go wrong, here is how you can install Windows 10 on your Chromebook.
How To Install Windows On Chromebook?
To install Windows 10 on Chromebook, you need to follow these steps:
1. Remove the Write Protection screw if your system has one. Check the developer website to check if your system has one and how to remove it.
2. Enable Developer Mode
With your Chromebook switched off, hold the ESC+REFRESH keys and then press the Power button. Wait for the screen to boot up to display “chrome OS is missing or damaged”.
Press Ctrl + D to bypass this screen and press Enter at the next screen.
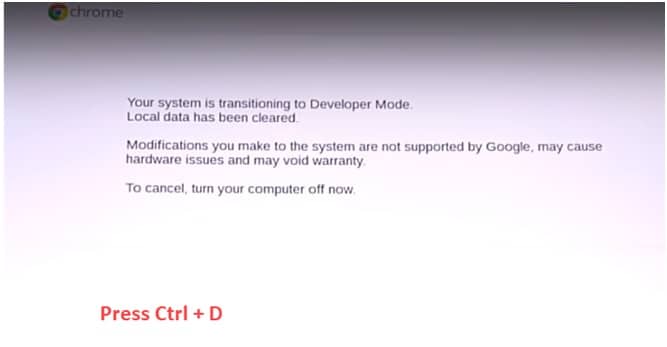
Again, press Ctrl + D to bypass this message. Wait for your system to go into developer mode. You will see a timer on the top right-hand corner. Power off the device once developer mode is enabled.
3. Enable USB Boot
You can go to ChromeOS install when you next power on your device by pressing Ctrl + D. but we need to boot from a USB devise, so we need to enable USB boot.
Power on your device, and press Ctrl + D at the initial startup screen to load Chrome OS.
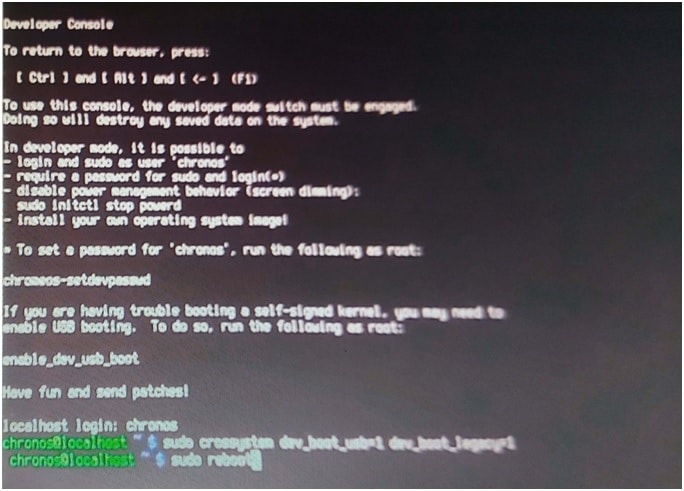
Press Ctrl + Alt + F2 at the ChromeOS login screen.
Login using the password chronos.
In the terminal prompt, enter the following command and press Enter:
sudo crossystemdev_boot_usb=1 dev_boot_legacy=1
Power off your device by typing: sudo poweroff
Now at startup you will get BIOS screen instead on ChromeOS.
4. Create Bootable Media
You need a bootable USB device that contains the Windows 10 you want to install on your Chromebook.
On a separate device, download the Windows .iso Media Creation tool from their website.
Here you can create a bootable USB device using the onscreen instructions.
Alternatively, you can download the .iso file and use an iso burner like Rufus or MiniTool Partition Wizard to create a bootable USB device.
5. Wipe The Preloaded OS Data
Insert the bootable USB device you created into your Chromebook.
Power on your device and press Ctrl + L at the login screen to enter BIOS screen.
At the BIOS screen, press Esc to enter boot media device selection. Choose your flash drive.
Hopefully you should see the Windows logo and the loading circle.
If you don’t see this option, it may be because your BIOS does not support it yet. I will show how to install a different BIOS later in this post.
Also, now is the time to connect an external mouse and keyboard.
Click on Next in the Windows Setup to select the language and architecture.
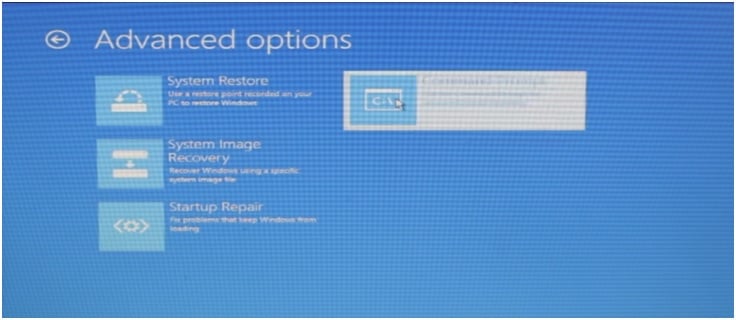
Click on Repair your computer.

Click on Troubleshoot in Choose an Option. Click on Advanced and select Command Prompt.
Here use the diskpart command to open the native disk partition tool.
Enter list disk to show the disk partitions on your device.
Locate the disk number of your internal disk drive by using the command: select disk ####
(Replace #### with your disk number)
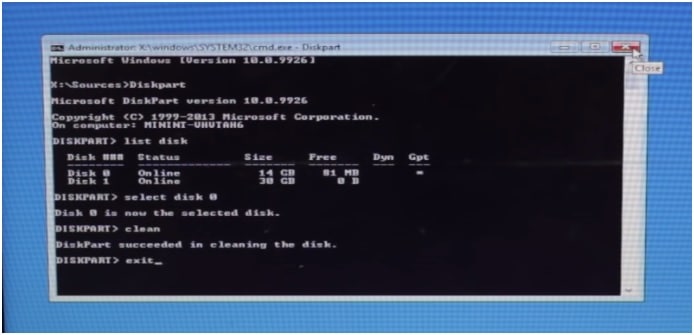
Type exit to close the command prompt and turn off your PC.
5.1) Install BIOS Firmware
If you did not see the Windows Logo, it may be because your BIOS does not support Windows firmware. You need to install a script to run this.
Enter the developer mode as said above.
Press Ctrl + D to boot ChromeOS
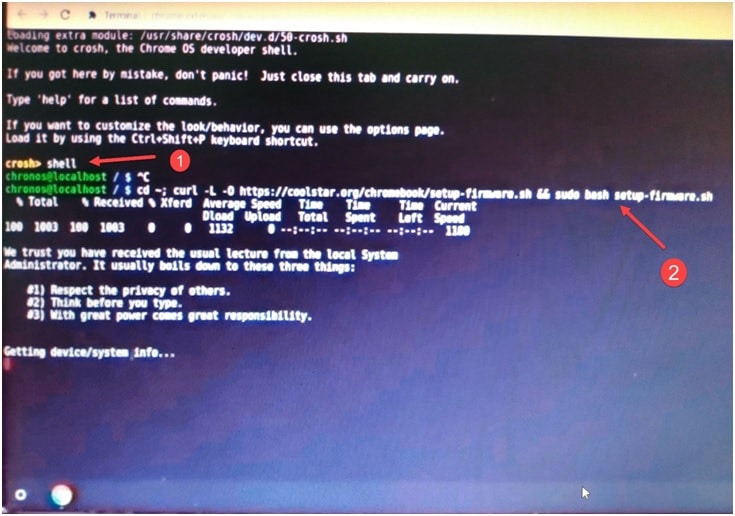
Once logged in, press Ctrl + Alt + T to open a terminal in the new browser tab.
Type shell and press Enter.
Paste the following command into shell and press Enter:
cd ~; curl -L -O https://coolstar.org/chromebook/setup-firmware.sh && sudo bash setup-firmware.sh
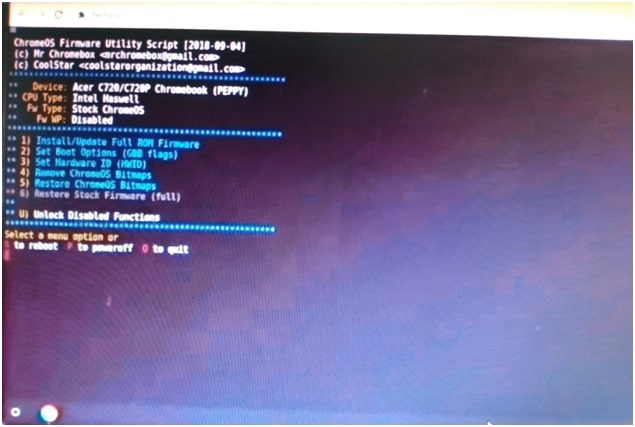
Once the script has run, select Install/Update Full ROM Software.
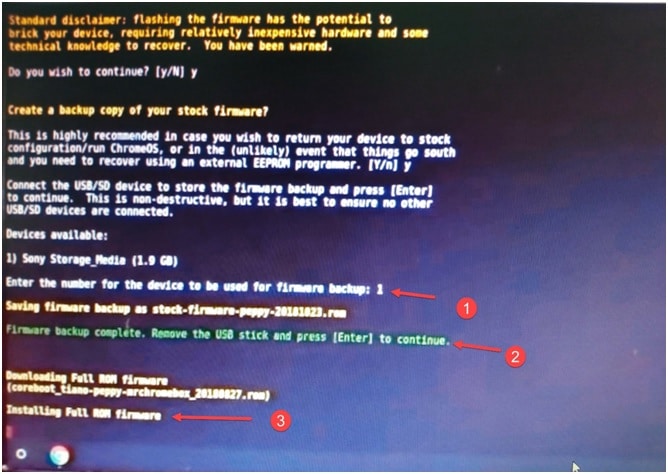
Follow the on-screen instructions to backup your firmware and install the new BIOS.
Power off your PC. Insert your bootable device in now.
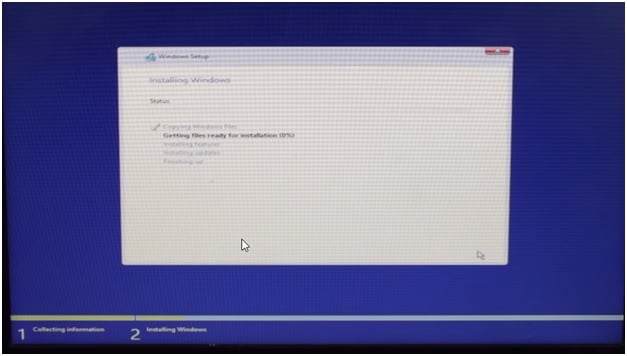
6. Install Windows
Power on your device and press Ctrl + L at the login screen to enter BIOS screen.
At the BIOS screen, press Esc to enter boot media device selection. Choose your flash drive.
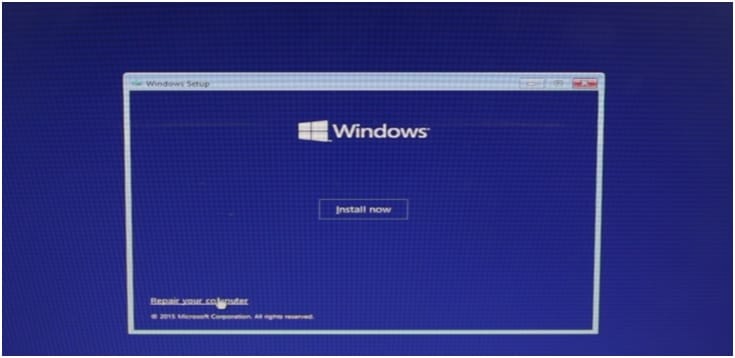
The device should boot from your flash drive. Click on InstallNow to complete a fresh install of Windows on your PC.
7. Run Updates Or Download Drivers
Most of the drivers during install would not be compatible with your device, so download them from your manufacturer’s website or online stores.
Conclusion
Although it is not recommended to do so because of the incompatibility issues, you can still install Windows 10 on Chromebook using the method given below. Do comment below if you have any queries or for further discussion.
Works fine with my Device! Thanks for that Discription!!!