The look of your Desktop reflects what you are! You can spice up your Windows Desktop with a lightweight application like Rainmeter.
You can play with skins and change the entire look of your desktop that works with widgets like email, app launchers, calendars, weather reports, and so on.
Since the windows XP version, Rainmeter is around and gained huge popularity for the high-quality skins.
Today I am going to discuss the usage of it and the know-how in a simple manner. And if you want to find the best Rainmeter Skins.
How Can I Use Rainmeter Skin?
You can explore the exciting world of free, open-source app like Rainmeter for your Windows.
Here, you have an innumerable options to choose from.
They are introduced with plenty of customizable options along with the basic interface.
All the skins, made from the building block called measures are meant to assemble information from a website, text file, or your Computer.
The meters create the backgrounds, frames, borders, images, texts, etc.
Let us now check how to use it and the ways to set up or customize.
1. Finding And Installing Rainmeter
Now let us get into the learning curve of how to install the application properly for your Windows. Follow the steps mentioned below:
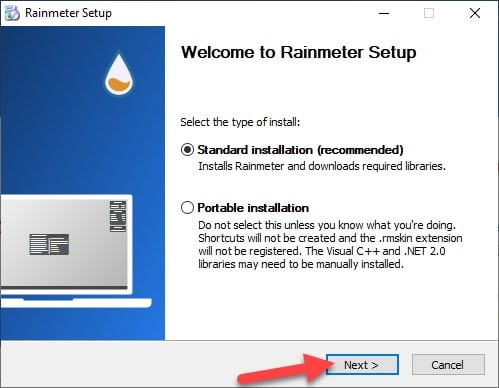
Step 1: You can easily download this open-source program from the official website and make sure that we recommend the standard installation and not the portable one.
The process is pretty simple, and you just need to continue with the Next button.
Step 2: Make sure that you have checked the Launch Rainmeter on set up button else every time you need to manually restart it after you boot your system.
Step 3: When the it gets successfully installed you will have to finally hit the Finish button and that’s all!
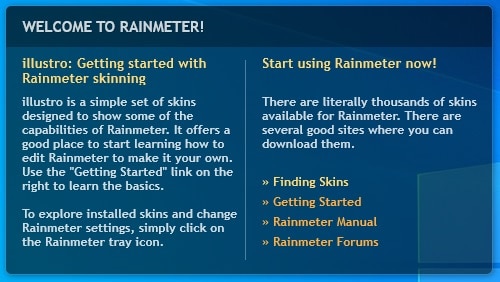
Step 4: After installation, you will get to see some changes on your Desktop.
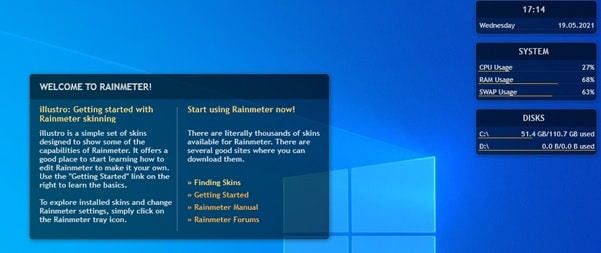
The Rainmeter’s default skin will get displayed like the CPU or disk usage.
2. Setting up Rainmeter
After you have installed it, you can set it up easily. Just a few clicks here & few clicks there and you are ready to go!
Check the options mentioned below to know the process of setting it up:
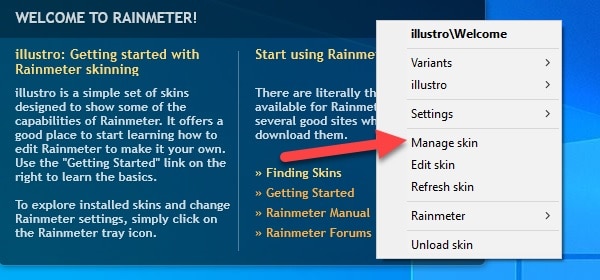
Step 1: Select the first skin and right-click on it & choose to Manage Skins for getting into the Settings.
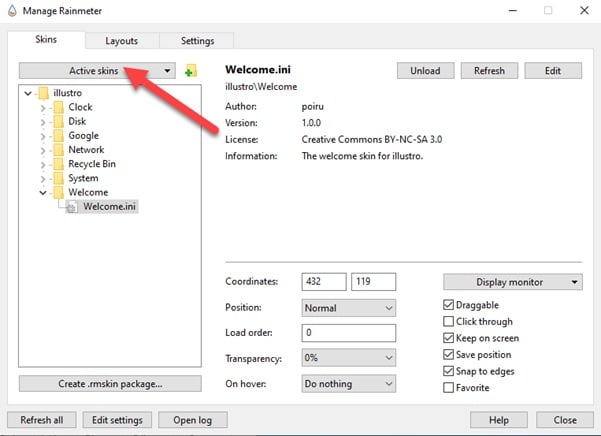
Step 2: A window will get displayed with all the installed Rainmeter skins.
Step 3: Just click on the Active Skins and you will be able to manage and know how to use those skins individually.
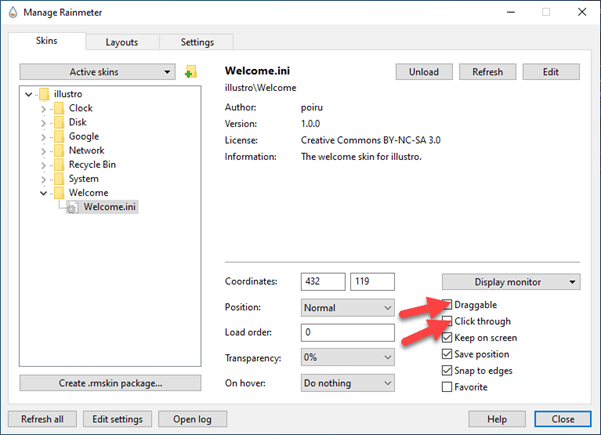
Step 4: The settings and positioning of each skin can be edited. You will get to see various options available that you can easily handle.
You may choose the Draggable option in case you do not want it and then select the Click through option.
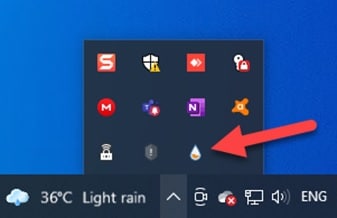
Step 5: You can get access to the menu as Rainmeter adds an icon in your toolbar.
3. Install the Rainmeter Skins
If you do not like the default one, you may choose your preferable one.
You can check the layouts, styles and then choose them according to your choices and preferences.
You can download and then mix and match as per your choice.
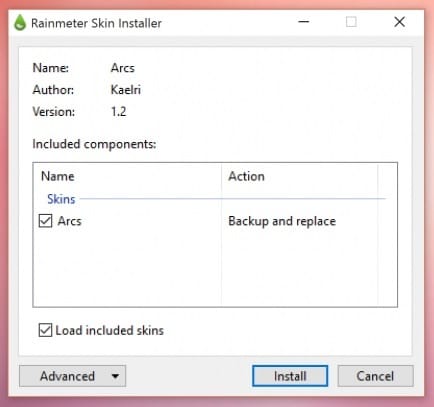
Step 1: For the installation, double click on .rmskin file and you will get a pop-up window.
Step 2: You will have to just click on the particular skin you wish to install and enable. It’s just a single click and you are done!
Step 3: After installation, you will find the application on your Desktop.
Step 4: Each Skin has a distinct feature and in case you wish to load everything at once, click on the Load included skins and uncheck the option.
4. Customize Rainmeter
Now I am going to discuss how to customize the application. There are plenty of options to tweak Rainmeter as per your need.
But you must remember that each skin is different from the other.
Some have more customization tools, options than others. You need to check the documentation provided.
Step 1: Go to the Rainmeter Menu Settings and hit the Edit button.

Step 2: You may also choose to proceed with editing via Notepad. You will find a lot of variable definitions and you may edit as you wish.
Step 3: You may also choose to change the fonts, position, colors in the RGB format. Change the code as per your wish and then hit the Refresh button.
5. Uninstall or Delete Rainmeter Skin
If you do not like a particular skin that you have downloaded, you may delete it from your system as well.
Follow the steps mentioned below:
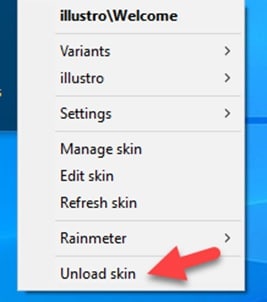
Step 1: Go to the Rainmeter Menu and click on Unload Skin.
Step 2: Hovering the mouse on the widget and right-clicking is also a good option to unload the skin.
Step 2: Hovering the mouse on the widget and right-clicking is also a good option to unload the skin.
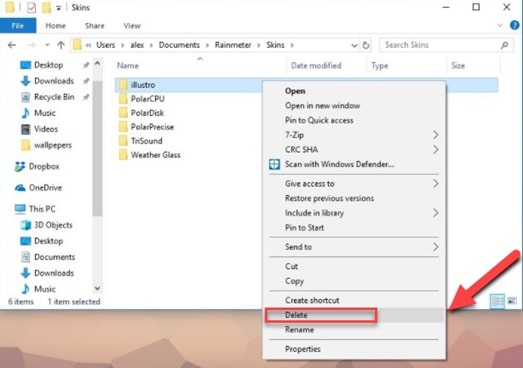
Step 3: You may also remove the entire folder from the drive to delete the Rainmeter.
Step 4: Uninstalling it is quite easy .
For this, you will have to go to the Windows menu and search for the particular Rainmeter app you want to uninstall.
Step 5: Then right-click on the app and hit the Uninstall button.

Now you are done. Check if you could successfully remove it from your system.
Frequently Asked Questions (FAQs)
- What Do You Mean By A Context Menu In Rainmeter Skin?
The context menu on Rainmeter Skin is actually the right-click menu that appears when you right-click on the Rainmeter icon in the Windows notification area.
2. How Can I Tweak A Rainmeter Skin?
If you want to tweak a skin, you can easily edit the skin’s configuration files manually by using a text editor. Also, the built-in tools and options can be used for customizing the appearence and behaviour of the installed skins on your desktop.
3. What Is RMSKIN File In Rainmeter?
An RMSKIN File is a packaged file format used by Rainmeter skin to distribute and install the skins. It consists of all the necessary components and files for a particular skin thereby making it easy to install and manage skins on your desktop.
Epilogue
So, I hope you could clear all doubts about how to use Rainmeter.
Make sure that Rainmeter is not going to replace any of your apps that it interacts with.
If you still have queries related to this issue or any other folder, please communicate with us in the comments section provided below.
Feel free to shoot us a mail with your ideas or suggestions. We always look forward to hearing back from you.