Customizing your Windows device allows users to make their devices feel personal and an extension of themselves. This includes setting up custom wallpapers, themes, icons, and fonts. While setting up the wallpaper and color scheme is pretty straightforward, fonts often tend to create certain discomfort among users.
Also read: 40 best Rainmeter skins 2020
Let us take a deeper look into how to install fonts in Windows 10.
Windows 10 Fonts Folder
Before you wander off looking for the installed fonts on your computer, let me tell you the location where the fonts are installed on your computer. Every font-face is an integral part of Windows, and thus they are stored alongside other critical Windows components.
To find the Windows 10 fonts folder, open a Run dialog using Win + R. Here, type %windir% and press Enter to launch the Windows folder on the operating system partition (usually C:\). Here, you will find the Fonts folder, which contains all the fonts that are installed on your computer.
In Windows 10, this isn’t your only option when it comes to managing your fonts, as there is another location from where you can see and manage your installed fonts. This comes in due to the fact that Microsoft is slowly replacing the control panel with the Settings app.
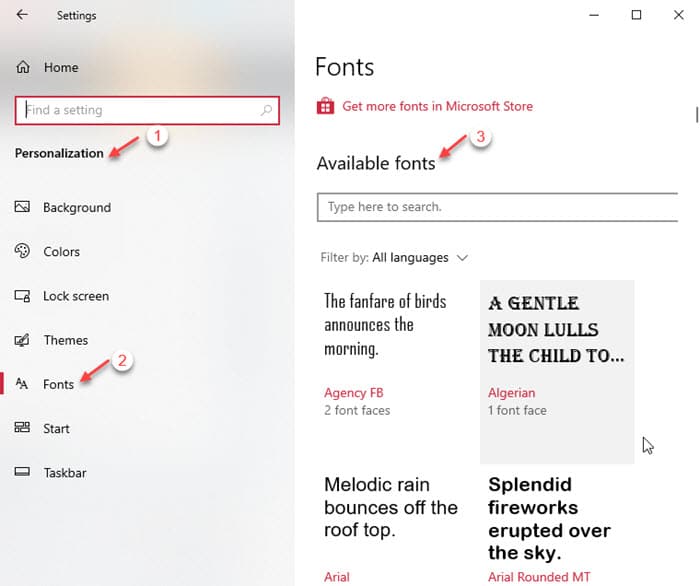
That’s right, you can view the installed fonts in the Settings app as well. You will find this by following this path: Settings > Personalization > Fonts.
Install Truetype Font Windows 10
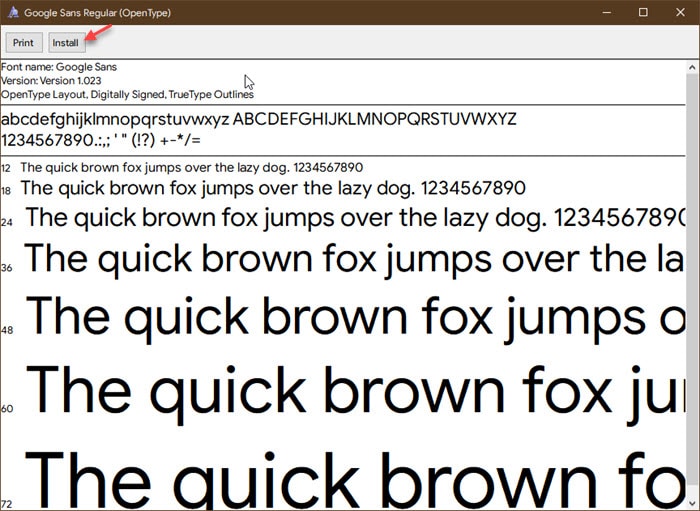
The method of installing TrueType or (OpenText fonts for that matter) hasn’t changed. You can still simply double click on the font you downloaded to begin the installation of the font on your Windows 10 computer.
A new method of installing fonts has been added to the Windows Settings app. This method ensures that all the font faces are installed and integrated into Windows seamlessly. If you are wondering where to install fonts in Windows 10, follow these steps:
- Download the third party font from a trusted source on the internet.
- Extract the files if the download is in .zip format.
- Simply drag and drop the fonts on the Settings app to begin the installation of the fonts.
This is by far one of the easiest ways of installing fonts in Windows 10. Check out the image where I installed Google’s Product sans font on my Microsoft Windows 10.
Managing Your Installed Fonts
Managing your fonts is also a hassle-free task now. You can view all the fonts right from the Settings app section mentioned above. You can also uninstall the fonts from there, using the Uninstall button that comes up when you click on a font face.
Note: Uninstalling a font is not recommended unless you are sure that the font is corrupted or is causing problems on your computer. Fonts are deeply integrated into Windows, and uninstalling them unnecessarily may lead to the system corrupting important system files.
If you changed the default fonts by accident, check out this post on how to restore your default fonts in Windows 10.
Wrapping Up
The internet has a huge repository of resources available, and you can find the font you are interested in easily over the internet. However, you can now get third party fonts from the Microsoft Store and install them directly from there as well. Comment below if you found this useful, and to discuss further the same.