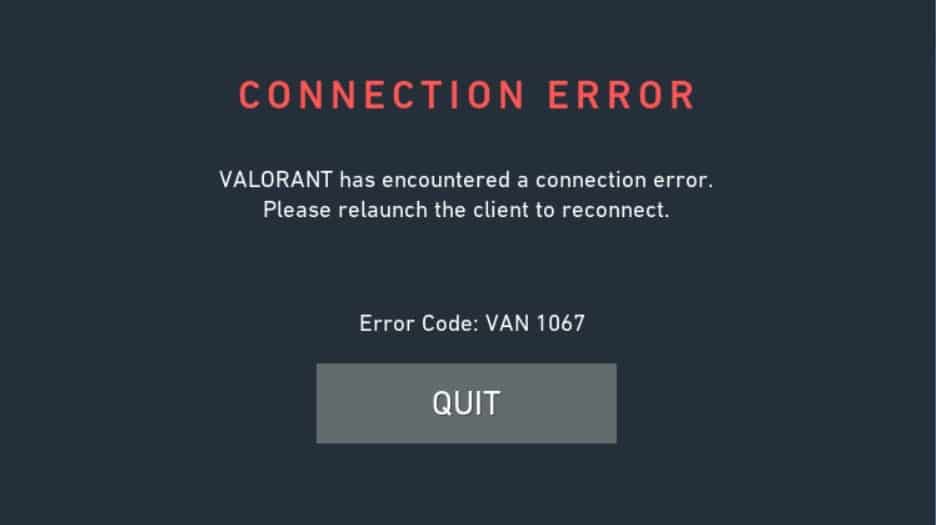
Many PC gamers recently encountered Valorant van error 1067 after a Windows upgrade.
Microsoft released Windows 11 free upgrade for eligible PCs. Soon after the upgrade, the players got a Valorant van error while playing the game.
Related articles:
How To Fix Valorant Van Error 1067?
Follow the methods given below and perform the steps to fix Valorant Van Error Code 1067.
1) Check That VGC Service Is Enabled
Riot Games’ VGC service is part of its anti-cheat System. This VGC s3ervice should be enabled while playing Valorant otherwise, you can receive Van error 1067.
So, check that the service is enabled by following the steps given below:
- Launch the Run utility by pressing the Windows + R keys.
- Type services.msc in the Run command box and press the Enter key.
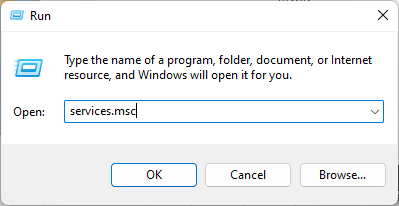
- Find the VGC service and double-click on it. Set the startup type to Automatic.
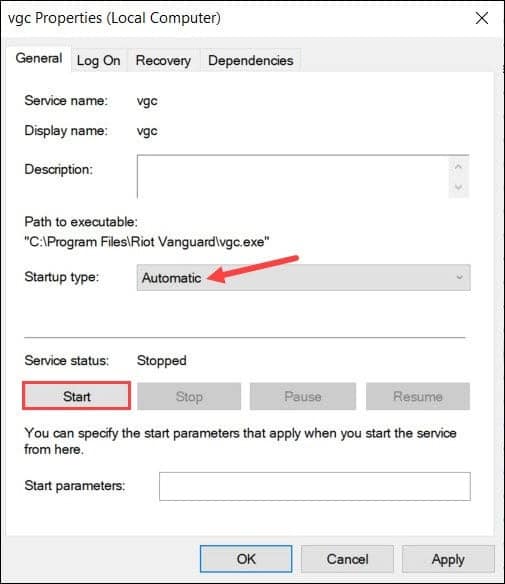
- Next, click on Start to start the service. Save the changes by clicking on Apply > OK.
- Then relaunch the Run utility and type msconfig in the Run command box. Press Enter.
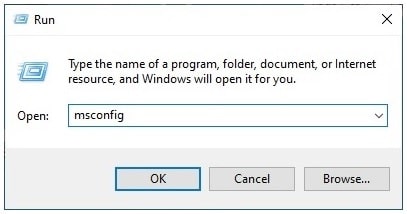
- Go to the Services tab and look for the VGC service. Check the box next to it.
- Click on Apply and then on OK.
- Restart your PC. Once done, open your game. If the Van error persists on Valorant, flush the DNS & reset Winsock.
2) Flush DNS And Reset Winsock
You can also get Valorant Van error 1067 due to connectivity issues. To fix it flush the DNS and reset Winsock.
This will clear all the DNS cache and reset Winsock.
To do so, follow the steps given:
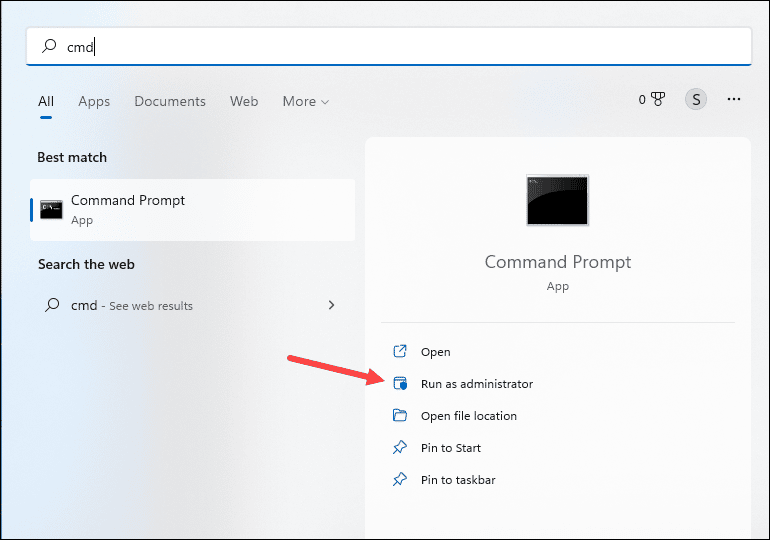
- Type cmd in the Windows Search Menu and right-click on Command Prompt.
- Choose Run as an administrator option.
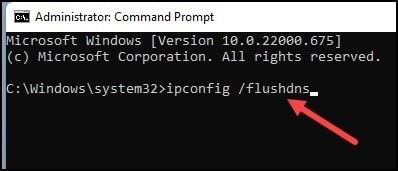
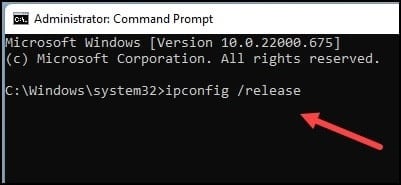
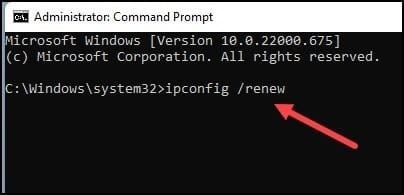
- Type the following commands in the elevated Command Prompt window one by one and hit Enter button after each command:
ipconfig /flushdns
ipconfig /release
ipconfig /renew
netsh int ip reset
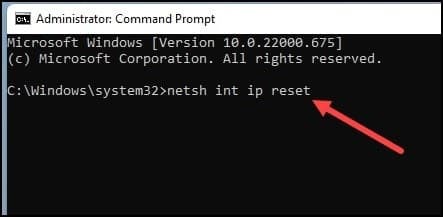
netsh winsock reset

Once finished running all the commands, restart your PC. Re-launch Valorant and see if this could fix the error. If not, update the graphics drivers.
3) Update The Graphics Drivers
Outdated graphics drivers can be the reason why you are getting Valorant Van errors.
So, update the graphics drivers, following the steps as given:
If you have an Nvidia graphics card, then you can use GeForce Experience to update the graphics drivers.
Run GeForce Experience. If you don’t have it installed, download and install it from Nvidia’s website first.
After opening the app, click on Drivers and check if any new drivers are available. If there is any latest available driver, download and install it.
For AMD graphics cards, the process is similar but uses the Radeon software instead of GeForce Experience.
Run the app and check for any available drivers. If any, download and install the latest drivers. Once done, restart your PC.
4) Enable Secure Boot and TPM
If the above methods did not fix Valorant Van error 1067 then enable Secure Boot and Trusted Platform Module or TPM on your Windows.
You should be extra cautious while handling your BIOS. If you are not confident enough to make any changes in your BIOS. You can seek experts’ help.
Each PC has a different BIOS key, but the general BIOS keys are F1, F2, F9, F10, or the Del key, depending upon the motherboard.
You can check the manufacturer’s manual to know your BIOS key.
Now follow the steps given below to enable Secure Boot and TPM on Windows 11:
- Keep pressing the BIOS key till you enter BIOS. You can also enter BIOS from Windows Settings.
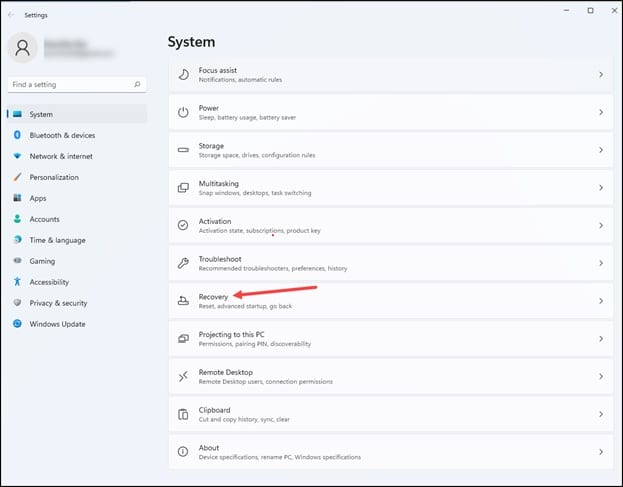
- To do that, press Win + I to open Settings. Click on Recovery.
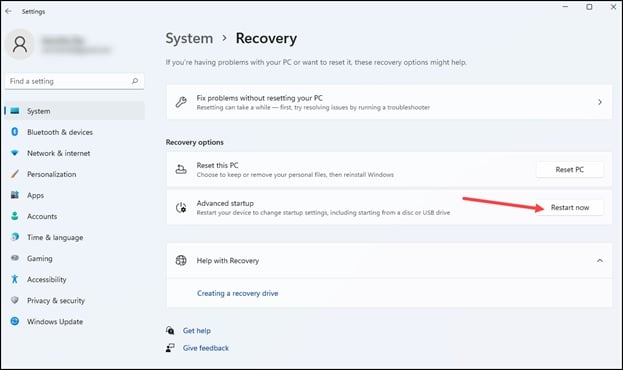
- Next, select the Restart Now button next to Advanced Startup.
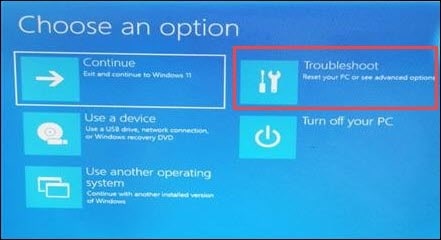
- Once Advanced Options opens, select Troubleshoot.
- Next, navigate to Advanced Options > UEFI Firmware Settings > Restart.
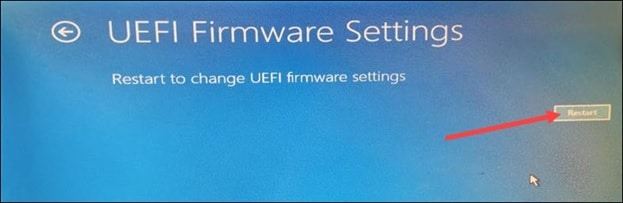
- Now you will enter the UEFI Settings or BIOS.
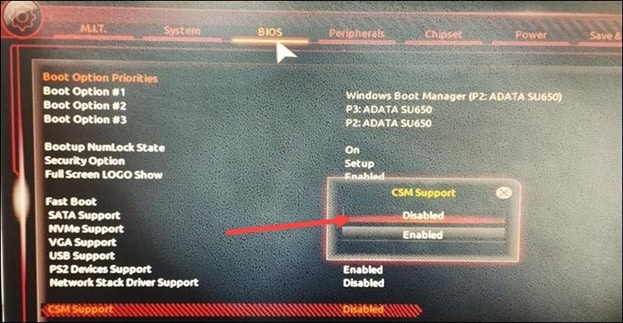
- Click on Boot, System Configuration, or Security option depending upon your BIOS settings. Next, head to the BIOS tab.

- Select the Secure Boot option. If you cannot find Secure Boot, then select CSM Support and disable the option.
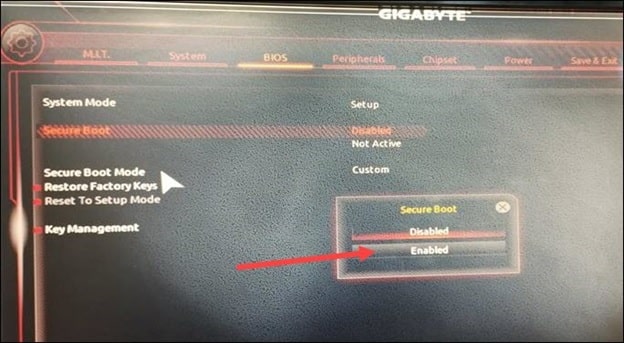
- Then go to the extreme bottom of the screen, and you will find the Secure Boot option there.
- Press the Enter key to enable the option.
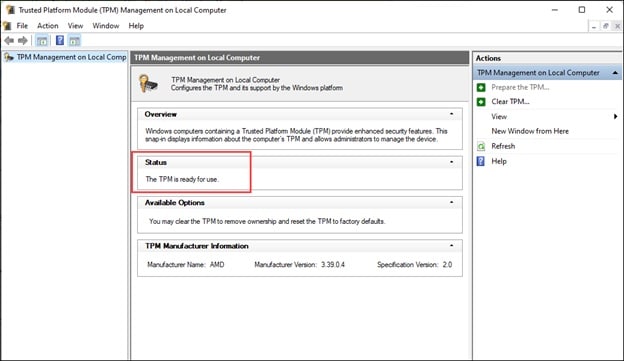
You can also check if the TPM service is enabled from the following steps:
- Type tpm.msc in the Windows search box and select the top option.
- Under status, if ‘The TPM is ready to use’ is written, this means your TPM is enabled.
Final Words
You should not get back a Valorant van error after performing the above methods.
For more related queries, ask us in the comments section provided below.