 Many a time users have to face trouble due to ‘DNS address could not be found’ error message on their computer screen. It prevents them from browsing the internet.
This problem is not an issue for Windows 10 but users having Windows 8.1, Windows 8 and its previous versions also face similar kind of challenges.
After reading this guide, you can solve the issues manually. The best thing is- there are many ways to fix server DNS address could not be found error.
How To Get Rid Of DNS Address Could Not Be Found Error Message?
Usually, this error doesn’t mean you get prevented from visiting all websites. It is possible that you get pop-ups on random sites because it has blocked your access.
Some users restart their web browsers, disable add-ons, restart router and internet connections, update their browsers and even reboot the PC.
After doing all these things, they notice that the error message ‘DNS could not be found’ again gets displayed on the screen. It is really frustrating. Let’s see the methods of fixing it-
1) Flush And Renew DNS (Domain Naming System)
On visiting any website, the operating system automatically stores the respective IP address. It thus helps you in opening the sites faster from the very next time you visit the same.
If these caches become corrupted or outdated, it will prevent you from visiting those sites. And, you get the error message server IP address could not be found.
Simply flush the old DNS and renew the same to avoid causing the problem.
Step-By-Step Procedure
- Type ‘cmd’ in the search box and run Command Prompt as an administrator.
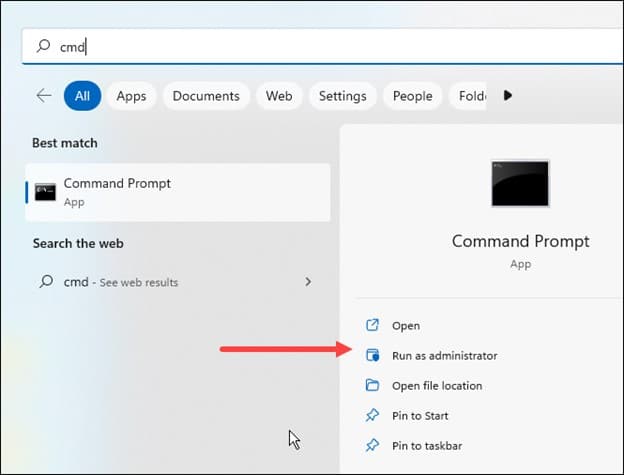
It will take you to the Windows User Account Control dialog box.
- Select ‘Yes’
- Type ipconfig /flushdns and press Enter.
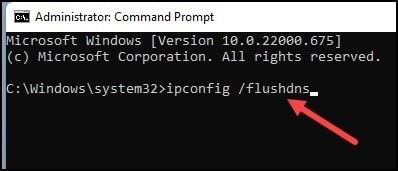
You can see a message ‘Successfully flushed the DNS Resolver Cache’ on the screen.
- Next, type ipconfig /renew and press Enter.
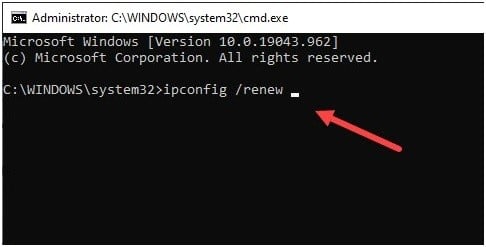
It will display Windows IP Configuration
- Next, type ipconfig /registerdns and press Enter.
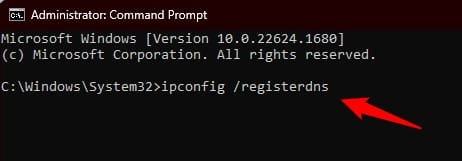
- Now, reboot your computer
In most of the cases, this method is sufficient enough to solve the problems. Or else, you can check other methods of fixing DNS not found error.
2)Change DNS Server Settings On The Computer
If you have incorrect DNS server settings configured on the PC, it is likely that you get an error message. You won’t be able to browse the internet without making it corrected.
Step-By-Step Procedure
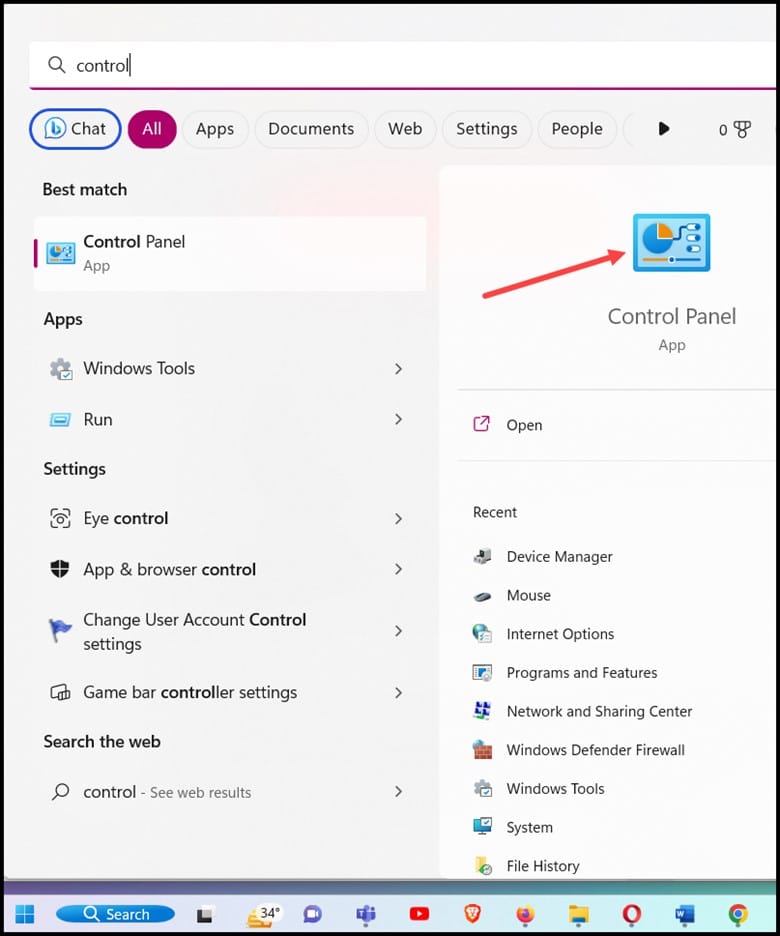
- Type ‘control panel’ in the search box and select the top option.
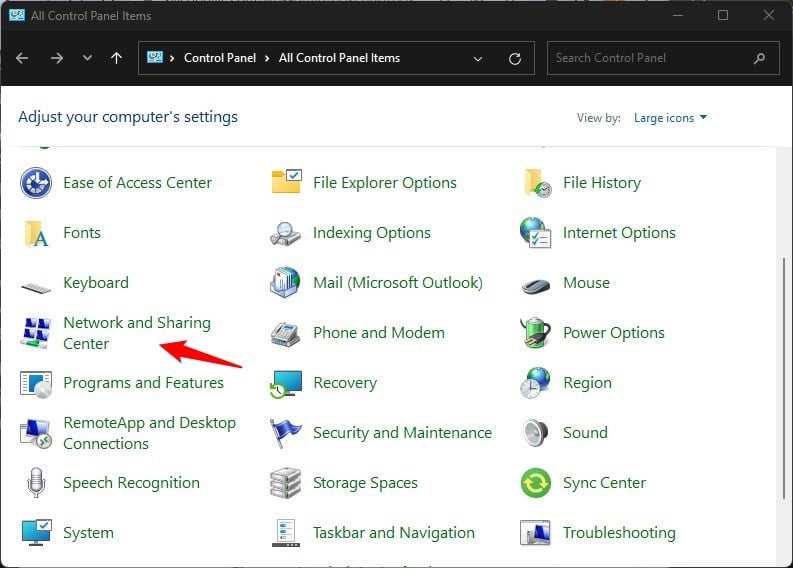
- Change the View By to Large icons and then open ‘Network and Sharing Center’.
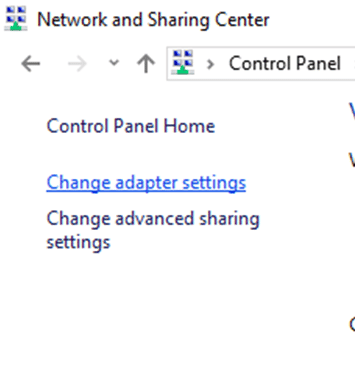
- Click on ‘Change adapter settings’ at the left top corner
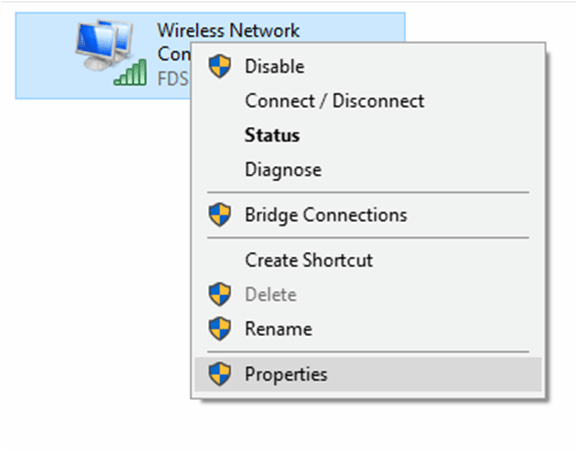
- Now, select your Internet connection, right click on it and select Properties.
- On the ‘Networking’ tab, select Internet Protocol Version 4 (TCP/IPv4) and select Properties.
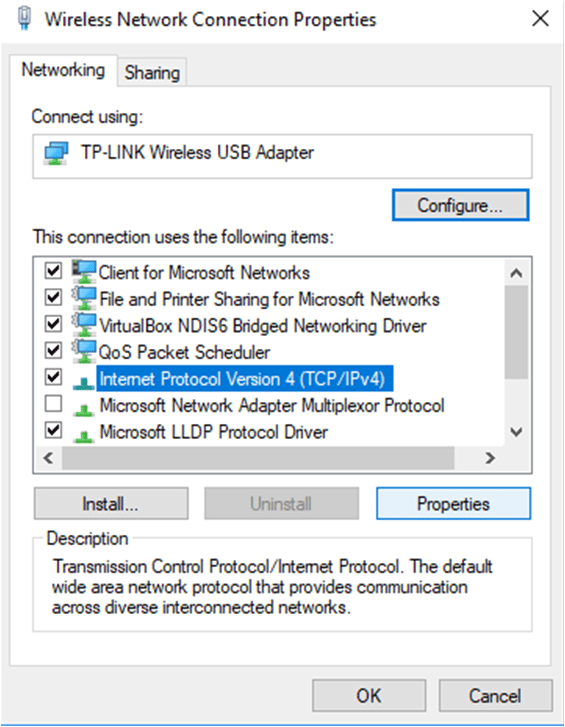
- Click on ‘Properties’
It will open a dialog box on the screen
- In ‘General’ tab, select ‘Obtain an IP address automatically’ in the top section.
- Next to that, select ‘Use the following DNS server addresses’
- For Preferred DNS server, type Google Public DNS: ‘8.8.8.8’
- For Alternate DNS server, type Google Public DNS: ‘8.8.4.4’
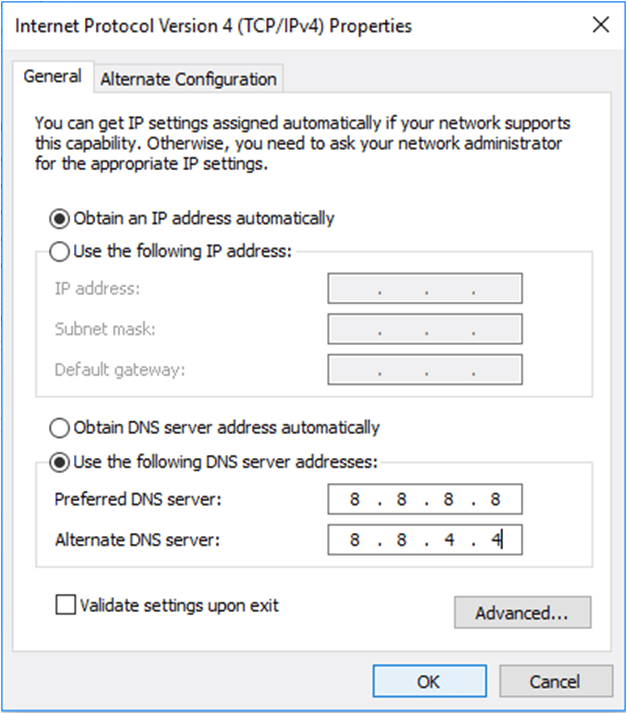
- Click on ‘OK’
Test it by browsing any site. Hope it has solved your problems!
3)Erase Files Present In ‘etc’ Folder
At certain point of time, it has been seen that ‘etc’ folders store a number of unusable files. It may prevent you from accessing the internet.
So, it is imperative to delete them permanently. It is linked to the web browsers like Chrome.
Step-By-Step Procedure
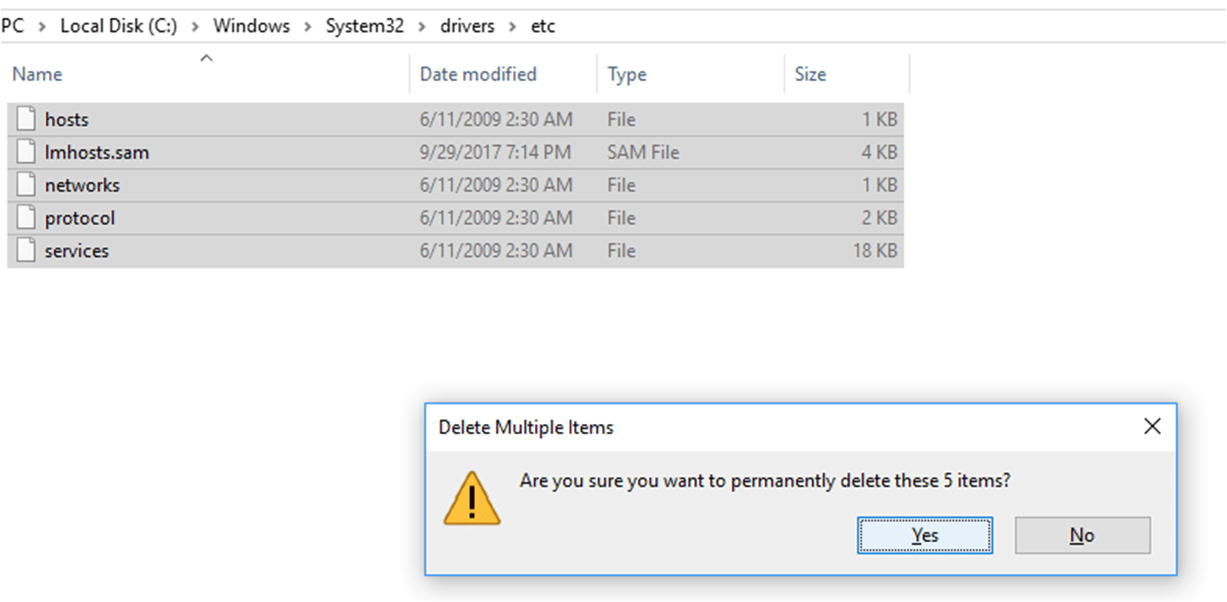
- Go to ‘C:\Windows\System32\drivers\etc’
- Select all the files and delete them
Close the Windows Explorer and start browsing your respective sites.
4)Clear Host Cache Stored In The Browser
Over the course of time, web browsers store DNS host cache to fast the processing speed. If anyone of these files gets corrupted or expired, it will show an error message on the screen.
To avoid such things, you can clear the host cache stored in the browser.
Step-By-Step Procedure For Google Chrome
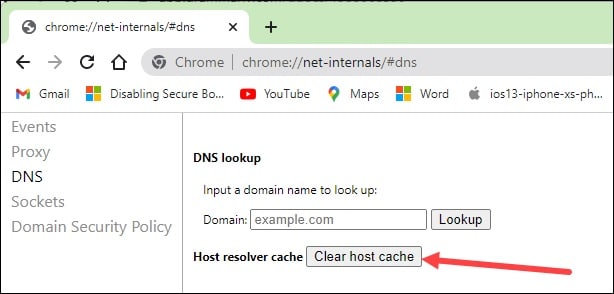
- Open ‘Chrome’ browser.
- Select address bar and type a command ‘chrome://net-internals/#dns’ and press ‘Enter’.
- Click on ‘Clear host cache’.
Restart the browser and open your respective sites to check whether the issue has been solved or not.
Step-By-Step Procedure For Mozilla Firefox
- Open ‘Firefox’ browser
- Select address bar and type ‘about:config’
- Press ‘Enter’
It will show a warning sign and ask for permission. You have to proceed from this administration message.
- Type ‘network.dnsCacheExpiration’ in the search box
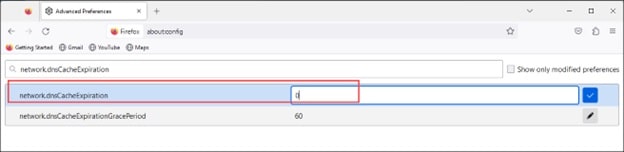
You can see network DNS cache expiration with its status, type and value.
- Double click on it and set the value to ‘0’
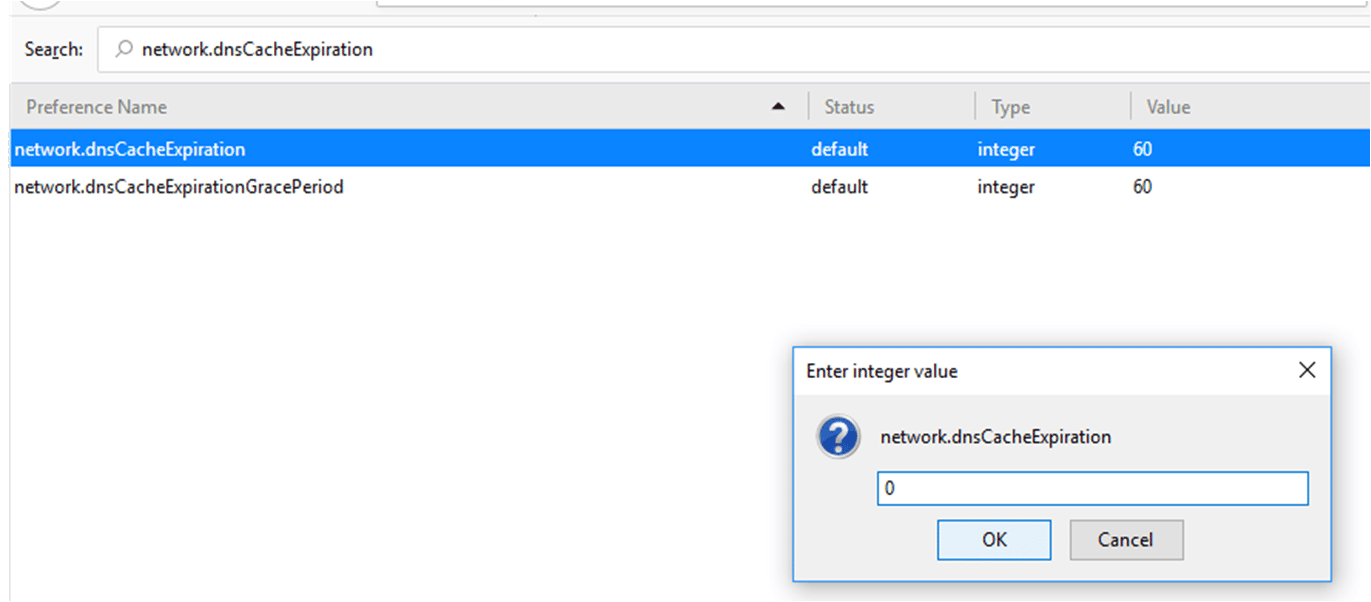
- Click on ‘OK’
- Restart the browser
Since Firefox has now removed all its existing cache files, it will create new files when the next time you visit any site. And, you may experience a little reduction in browsing speed.
5)Update System Drivers
Users also have to experience DNS server cannot be found error message if they have outdated or corrupted system drivers. It temporarily blocks the internet access a few websites.
To get rid of this challenge, you can visit to manufacturer’s website and update them manually.
Once you are done with it, you have to restart your computer. Now, open the web browser and test your browsing.
Apart from this, you can also go for an automatic update of drivers if you have installed a driver update application. It will search the updates online and help you in installing the same.
After the process, it is advised to restart your PC and test the browsing. It will definitely solve the issues.
Final Words
These are some methods to fix DNS address could not be found error message. Hope it helps!
For more details or any query, you are free to comment on the below box. If you found this information helpful, share it with family, friends and colleagues.
Thank you so much this totally worked!