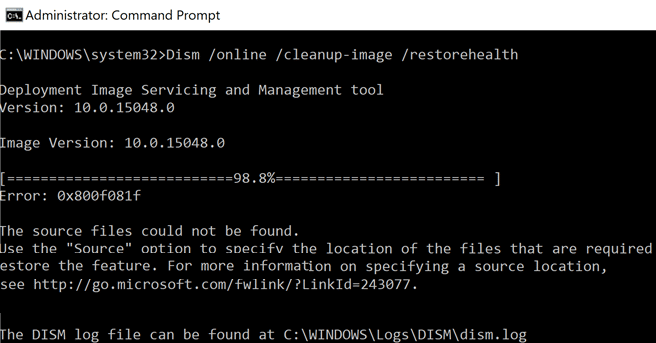
Many Windows 10 error solutions will ask you to check for missing system files using the DISM tool. However, many users are reporting that when they try to run the DISM /Restorehealth scan, they face an error message that says, “Dism source files could not be found”.
Here I will discuss this error and why you may be facing this, along with how you can easily solve this error using the three methods provided.
Why Am I Seeing The ‘The Source Files Could Not Be Found’ Error?
The DISM stands for Deployment Image Servicing and Management tool. It is an built in tool provided for the purpose of scanning the system files and then replacing the corrupt or missing files with their latest version. This can be a very effective tool when run together with the System File Checker (SFC) scan.
There are mainly two reasons why the Dism source files could not be downloaded.
- The system components responsible for running the DISM tool can become corrupted which in turn sends incorrect results, showing the error message.
- The repair source from where the corrupted files will be replaced can be corrupted itself or missing the files necessary to make the repairs.
- If you are downloading the files over the internet, an unstable internet connection may also interfere with your transfer and repair.
How To Fix ‘DISM Source Files Could Not Be Found’?
You can follow the following solutions if the DISM tool failed to find the source files on your device as well. Try diagnosing which reason may be causing the error on your device, making it easier to solve the error.
Solution 1: Check Your Connectivity
Let’s start with one of the easiest solutions. If you are on an unstable network and downloading the repair files from the internet, there is a possibility that a network drop may have caused the DISM tool to fail.
So start by checking your internet connection. You can use our guide on how to check the performance of your Windows 10 system to monitor your system health accurately.
Solution 2: Cleanup The System Image Files
If the component files, which are used as the source, themselves become corrupted, the DISM tool will fail to register the needed files, and hence you will be shown the error message. In these cases, you need to clean the system image components to provide a cleaner source.
This can be achieved by using a cleanup command, the steps to which are as follows:
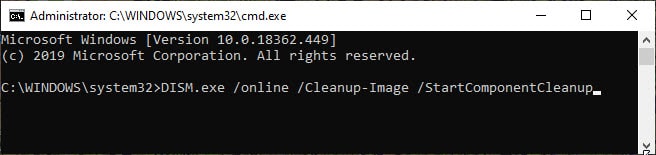
- Open an elevated command prompt. To do so, open a Run window by pressing Win + R. Type cmd and press Ctrl + Shift + Enter to launch Command Prompt with administrative privileges.
- Type the following command to clean the system image files:
DISM.exe /online /Cleanup-Image /StartComponentCleanup
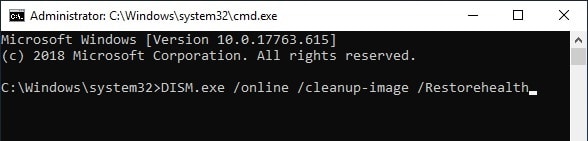
- Once this completes, then try running the restore command using the syntax for the DISM tool
DISM.exe /Online /Cleanup-image /Restorehealth
Cleaning the system image files should clear the missing or corrupt files from your system, and the DISM source files could not be found error should be solved.
However, if this fails to solve your issue, you need to check the other fixes.
Solution 3: Choose Alternate Repair Source
There are two different ways of specifying the Repair source for running the DISM tool. This is actually very easy to do, and requires the use of the Local Group Policy Editor.
Using Local Group Policy Editor
- Open the Local Group Policy editor. For this, open a Run window by pressing Win + R. Type gpedit.msc and press Enter to launch the Group Policy Editor.
- Navigate to the following location by following the left pane locations:
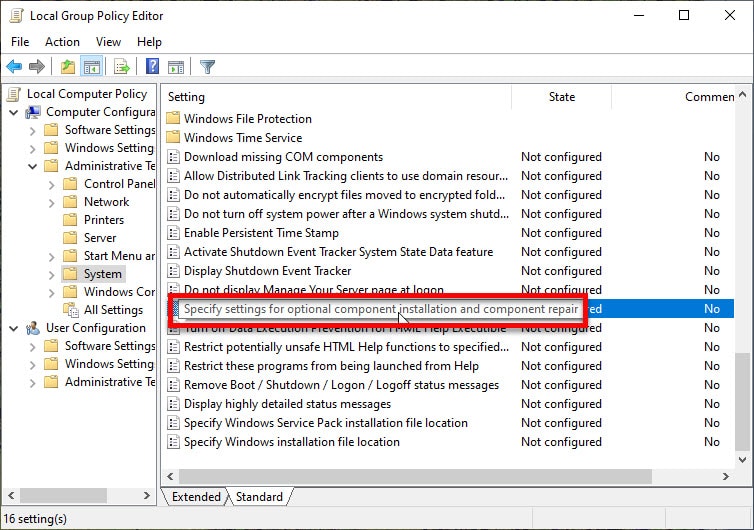
Computer Configuration > Administrative Templates > System - In the right pane, locate and double click on the following entry to modify it:
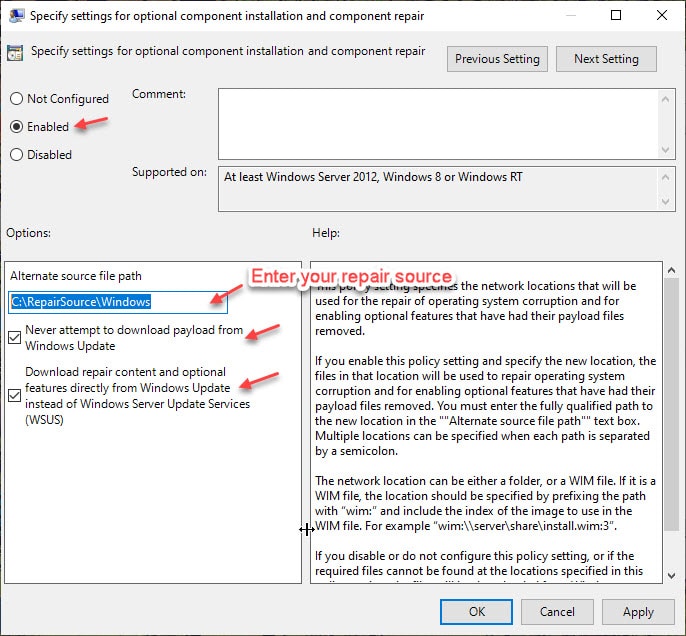
Specify settings for optional component installation and component repair setting
- Select the radio button next to Enabled and enter the Alternate source file path. You may also choose:
- Never attempt to download payload from Windows Update
- Contact Windows Update directly to download repair content instead of Windows Server Update Service (WSUS).
- Click on Apply followed by OK.
Note: remember that you need to keep and maintain a repair source, which has all the latest servicing updates and features, etc. on your network.
Using command Prompt
You can also use a Windows installation as the repair source, or use a Windows side-by-side folder from a network share or use a removable media as the source of the files for the DISM tool. This can be achieved using the command prompt. Simply follow these steps to do so easily.
- Locate the repair source, and make a note of its directory address.
- Use the following command as the syntax for the DISM tool:
DISM.exe /Online /Cleanup-Image /RestoreHealth /Source:C:\RepairSource\Windows /LimitAccess

Note: you have to replace C:\RepairSource\Windows with the location path of your repair source. You can find this path in the address bar of the drive.
Conclusion
If you too were facing the ‘Dism source files could not be found’ error on your device, now you know why you may be facing this error, and how to solve it using the methods provided above. Do comment if you solved your DISM source option error, and tell us which method helped you solve your error.