While using more than one physical printer or software’s like Foxit pdf printer it can be really annoying if the default printer keeps changing in Windows.
Although there have been some added features in Windows 11 which causes this issue, it is also the easiest to solve if you are on Windows 11.
Some of the users reported the below issues in some popular tech forums check out if they sound similar to yours:
- Default Printer Changes Automatically After Log Off or Reboot: As per the users their default printers got switched randomly when they log off or reboot their computer. This issue is generally caused by a faulty driver and can be easily resolved by updating the printer driver to the latest version. You should be able to find the latest driver on the manufacturer website, in the download section.
- Default Printer Keeps Changing To Adobe PDF in Windows 7: This problem happens when Windows toggles the hardware printer with software pdf file printer. This issue can be easily resolved by setting the default hardware printer. For setting the default hardware printer have a look in the below section.
- Default Printer Keeps Changing In Windows 11, 10, 8.1 and 7: This is the most widely found issue and can be resolved by using the below methods we are going to describe in the below section.
Resolution 1: Change the option “Let Windows Manage Your Default Printer”
Windows 11 ships with the settings which enables it to automatically manage the default printer by itself. Now it keeps on changing the default printer to the last used one by itself and this can be a real issue at times.
It can be easily resolved by toggling the switch to off position. You can do that in the below shown way.
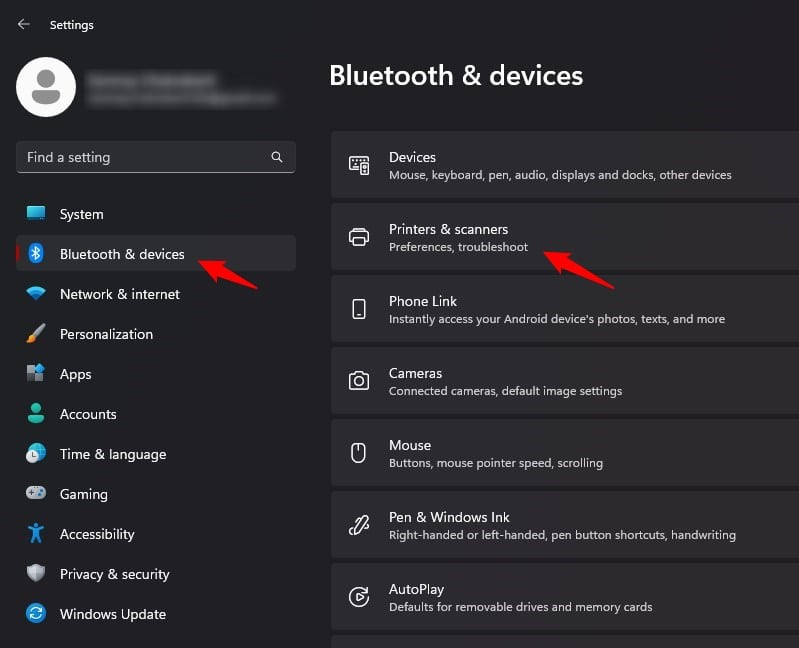
Step 1: Press Windows + X and click on Settings, it will take you to the settings page.
Step 2: Click on Bluetooth and Devices, it will show you the list of Devices.
Step 3: Click on Printers and Scanners and this will show you the list of Printers.
Step 4: Disable the option “Let Windows Manage My Default Printer ”.
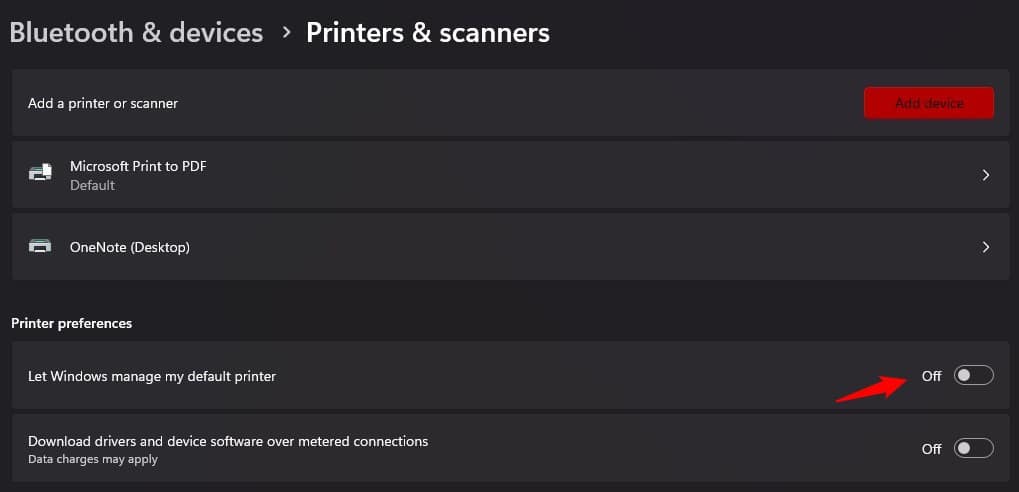
This will ensure Windows does not automatically change the default printer by itself and keeps the one you selected.
Resolution 2: Modify Settings Of Printer From Registry Values
If the default printer settings keeps on changing frequently it might be a issue related to the Windows Registry. To resolve the issue we will need to edit the value of a registry as shown below. To perform the edit follow the mentioned steps below:
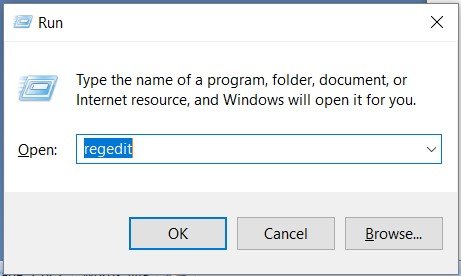
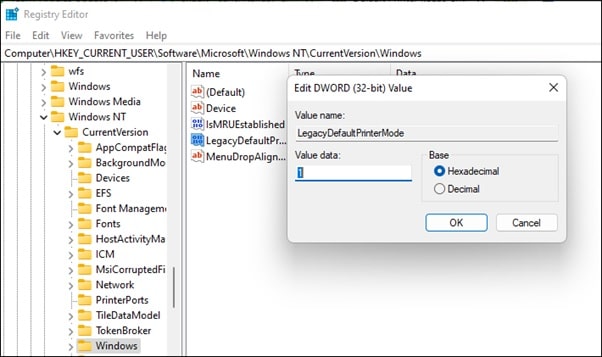
Step 1: Press Windows + R and type regedit. Press Enter to open Registry Editor.
Step 2: Navigate To
HKEY_CURRENT_USER\SOFTWARE\Microsoft\Windows NT\CurrentVersion\Windows
Step 3: Double click on LegacyDefaultPrinterMode on the right side and change its value to 1.
This will ensure that you set your default printer and it does not keep on changing from time to time.
Resolution 3: Delete Old Printer Connections From Registry
If several printers were used with your PC it’s possible that data of those printers are still available in the registry, and is conflicting with the current printer settings. You will need to delete the old registry values to resolve the issue.
You will need to follow the below steps:
Step 1: Open registry editor through regedit.
Step 2: Navigate to
HKEY_USERS\USERS_SID_HERE\Printers\Connections
Make sure to select your own SID after the HKEY_USERS key. Your SID will usually be the longest one.
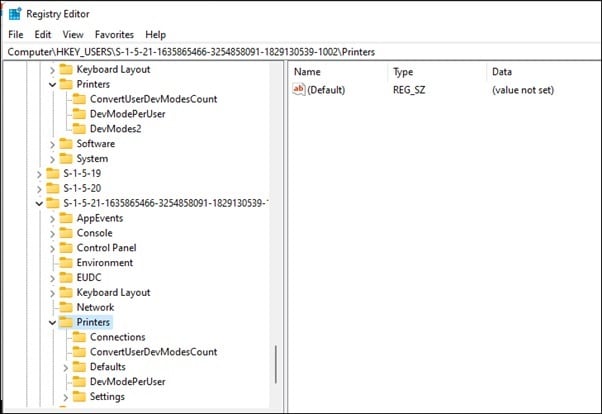
Step 3: If you get old printer connections there make sure you delete them.
Step 4: Now navigate to
HKEY_USERS\USERS_SID_HERE\Printers\Settings
And delete the old printer settings from there too.
Step 5: Close regedit and check if the issue with the default printer settings is resolved.
Resolution 4: Set The Default Printer Manually
The best and effective way to set your default printer is to do it manually. This can be pretty easily done in the following below steps.
Step 1: Press Windows + X and then click on Settings
Step 2: Click on Bluetooth & Devices and then click on Printers and Scanners.
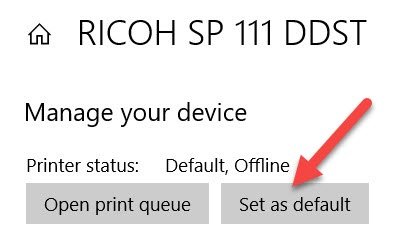
Step 3: Select the printer you want to keep as default and click on Manage.
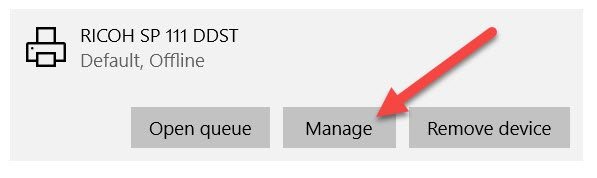
Step 4: Click on Set As Default.
Resolution 5: Reinstall The Printer Driver
If all the above solution does not work you will need to uninstall the printer drivers and reinstall it again to do that follow the below steps.
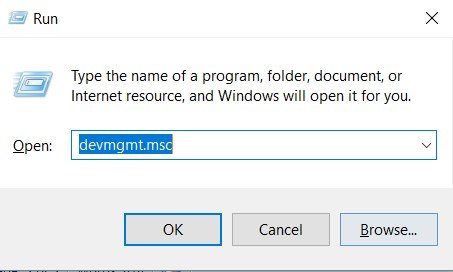
Step 1: Press Windows + R and type devmgmt.msc and press enter.
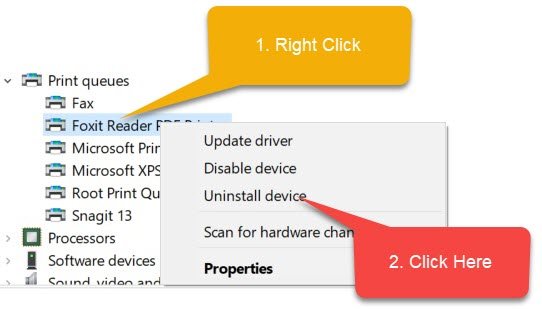
Step 2: Locate Printer/Print Queues and select the printer you have installed
Step 3: Right Click and Click on Uninstall device.
Now the printer driver will be uninstalled. Once done restart the PC and Windows will automatically take the default printer drivers. If Windows is unable to install the drivers, you will need to download the latest driver from the manufacturer website and install it. Once done check if the issue of default printer keeps changing is resolved.
Wrapping Up
So, that’s it. If the issue still persist let us know in the comment section and we will try to help you out.
Under Resolution 2, the name of the DWORD setting is obscured. I’m guessing it is “LegacyDefaultPrinter”, but that setting key was not present on my Windows 7 system.