A new Windows 10 device is usually empty and runs super crisp with virtually no lag. The performance seems nice, and you don’t see any stutters that would make you feel the device is sluggish. The real test of the device begins once you load some applications onto it and run it for quite some time. Here I will discuss how to clear cache on Windows 10.
What Is Cache And What Is The Need To Clear It?
When you load some application, or run some other command, or load a website on your browser, some temporary files are saved on your device. These temporary files are later used to load the pages faster the next time you run the same application or command.
These files are known as cache and are very useful in reducing the loading time of your applications and websites. The device feels snappier for a longer time and the startup times are faster because of these files.
However, a lot of caches can be harmful to your device. The cache will take up a lot of space and eventually you will run out of space. Mismatched cache data can also cause conflicts with the application itself, preventing proper functioning of the application as a whole.
How To Clear Cache On Windows 10?
Now that we have discussed why you may find the need to clear cache, here I will discuss how to clear cache on Windows 10.
# Solution 1: Clean Temp Files Manually
The temporary files are stored in the temp folder. These files are used by applications to load them quicker. If you see a lag in your device, you can safely remove these files from your computer to save some disk space.
- Open a Run dialog box by pressing Win + R
- Here, type %temp% in the input field and press Enter.

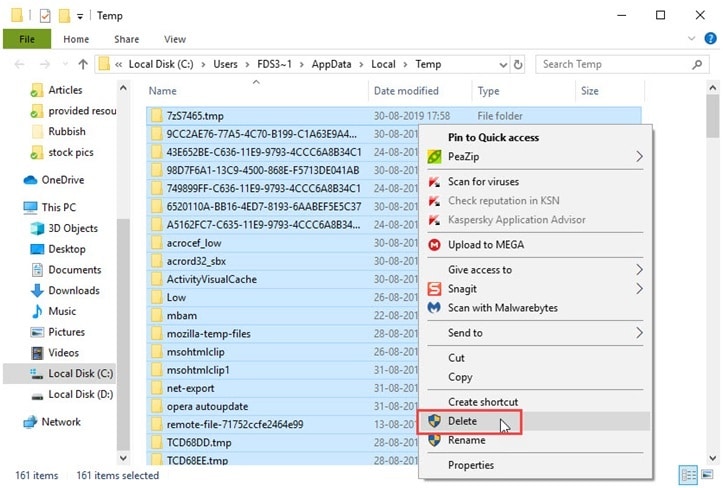
3. This will open the C:\Users\<username>~1\AppData\Local\Temp here, press Ctrl + A to select all the files, and right-click and select Delete from the context menu.
4. Close this window.
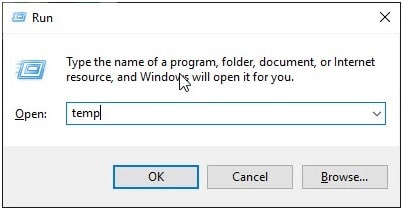
5. Again, open a Run dialog by pressing Win + R
6. Here, type temp and press Enter.
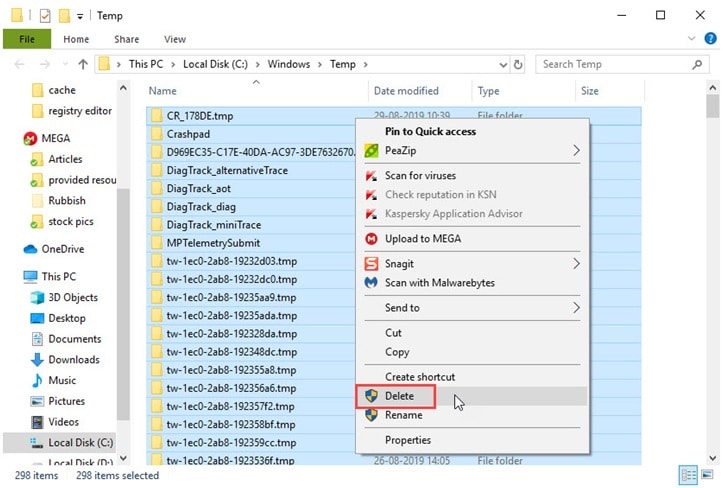
7. This will open the C:\Windows\Temp Here, press Ctrl + A to select all the files and right-click and select Delete from the context menu.
Using this method, you can clear the temporary files on your system manually.
# Solution 2: Clean Prefetch Files
The prefetch folder is a folder within the Windows operating system that contains the small database files detailing the startup activities and frequently used applications.
The prefetch folder is self-maintaining as it cannot contain more than 128 entries. Hence it cleans itself and does not pull data if not needed. However, sometimes a mismatch or wrong entry can lead to some errors that leave your system slow. Deleting the contents of this folder will make Windows collect the Prefetch data again, potentially resetting any error you may be facing with your software.
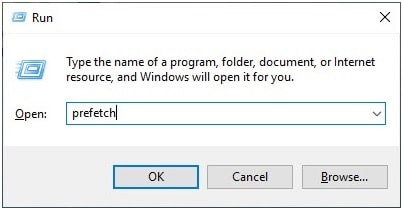
- Open a Run dialog box by pressing Win + R
- Here, type prefetch in the input field and press Enter.
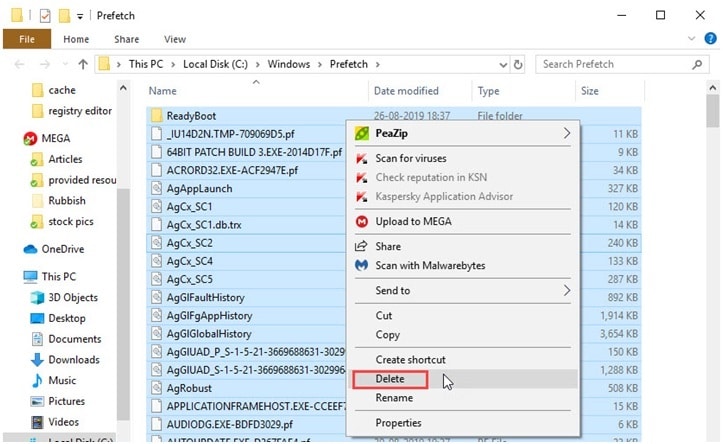
3. Here, press Ctrl + A to select all the files and right-click and select Delete from the context menu.
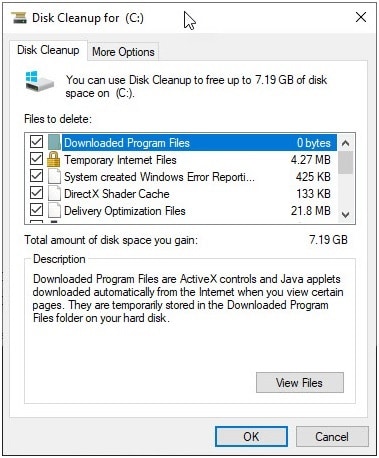
# Solution 3: Use Disk Cleanup
Over time, a lot of unnecessary files are stored on your computer. These files can be removed safely as there is no need for them in the running of your operating system. You can also clean temporary files and clear cache on Windows 10 using disk cleanup.
To clear cache using disk clean up, follow these steps:
- In the search box on the taskbar, type disk cleanup, and select Disk Cleanup from the list of results.
- Select the drive you want to clean up, and then select OK.
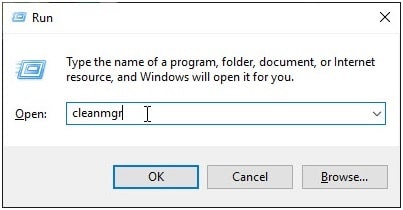
Alternatively, you can open a Run dialog and type cleanmgr and press Enter to directly open Disk Cleanup.
3. Under Files to delete, select the file types to get rid of. To get a description of the file type, select it.
If you still need more space, you can select the checkbox next to Clean up system files.
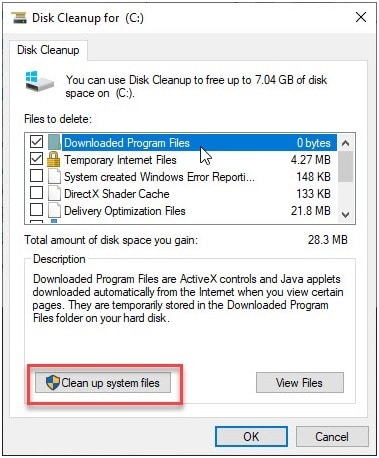
4. Select OK. Repeat this for all the drives that you want to clean.
Note: After running disk cleanup, if you see the temp folder filling up quickly, follow this:
Select Start >Settings > Update & Security > Troubleshoot. Then scroll down and select Windows Store Apps from the list and select Run the troubleshooter.
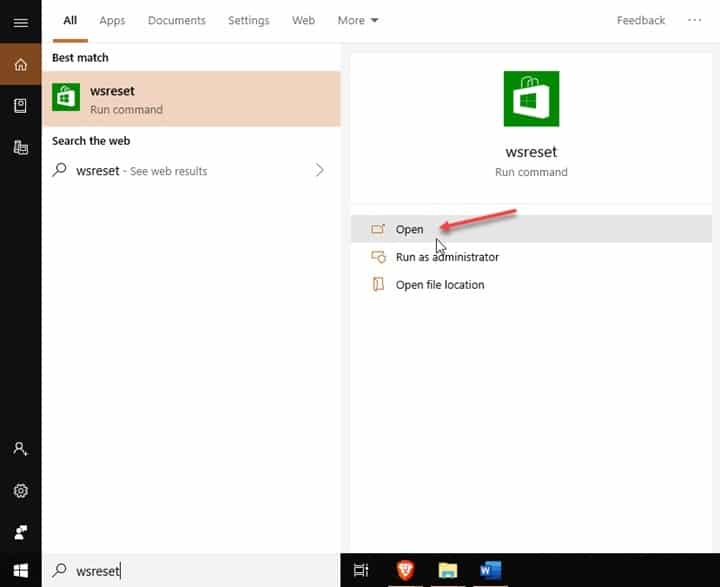
# Solution 4: Clear Microsoft Store Cache
The Microsoft Store also stores some temporary data onto your system. If you see any metro apps misbehaving or the Microsoft Store itself not opening, you can reset the Microsoft Store that will remove all the cache data as well.
In the search box on your taskbar, type wsreset. When the wsreset command loads up, press Enter to run the command.
# Solution 5: Clear Browser Cache
Your browser also regularly stores some data from the websites you visit. These caches are used to load the webpages faster the next time you open them.
However mismatched cache data can also cause trouble, and hence you can clear app cache in Windows 10 after regular time intervals to maintain the optimum performance.
In Google Chrome, Brave browser, Mozilla Firefox, and Microsoft Edge, you can use the keyboard shortcuts Ctrl + Shift + Delete key combination to quickly open the Delete history dialog box.
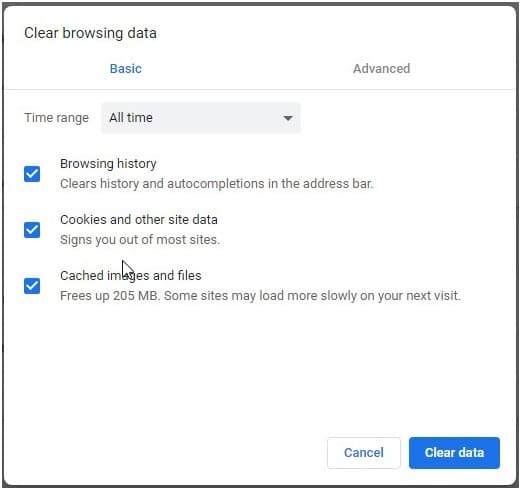
From here, select the files that you want to delete, and then click on Clear Data to remove the temporary files from your system.
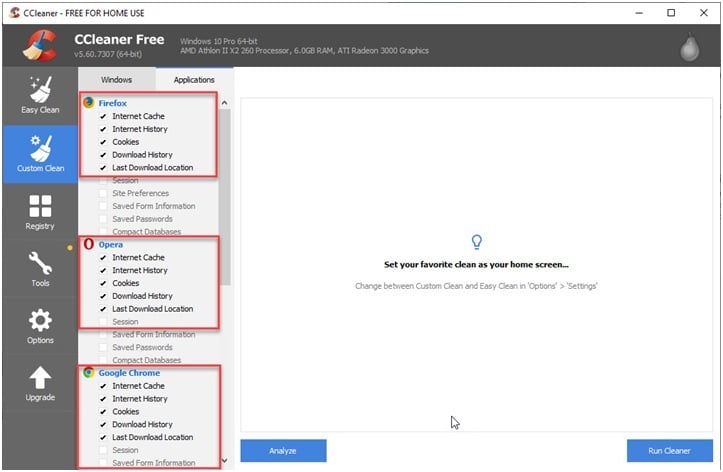
# Solution 6: Use Third-Party Apps
If you don’t want to look for the temporary files manually, installing a third-party application can manage the workflow for you.
You can install a third-party junk file cleaner like CCleaner to automatically search for temporary files and cache stored on your device. Click on Clean All to remove the junk files from your system.
Wrapping Up
To maintain the optimum performance of your device, its maintenance is necessary. Cleaning junk files regularly keep your device fresh and prevents you from running out of space. Now you know how to clear cache on Windows 10. Comment below if you found this useful, and to discuss further the same.