Printers are devices that convert text and graphic outputs from a computer to paper. We frequently use printers to print documents, reports, images, etc. for various purposes. However, some Windows 10 users have reported an error where they ‘cannot remove printer Windows 10’.
Here I shall discuss how you can solve this error on your device using six simple methods.
How To Remove Printers From Windows 10?
You may want to remove a printer for many reasons, like removing an old printer, or to solve problems with your printer. However, if you face ‘Windows 10 cannot remove printer’ error on your device, here are some of the tested solutions that can help you solve this error.
Solution 1: Check Print Server Properties
If you cannot remove your printer from Windows 10, there might be some driver error which is making you unable to delete your printer. You might be able to fix this by deleting the printer driver from the Print Server Properties window in Windows 10.
To remove the printer from the Printer server, follow these steps:
- Open Control panel. You can do this either from a Run dialog or from the control panel.
- Change the view to Large or Small icons depending on your preferences, if you see it set to Categories.
- Click on Devices and Printers.
- Select your printer from the list of available printers.
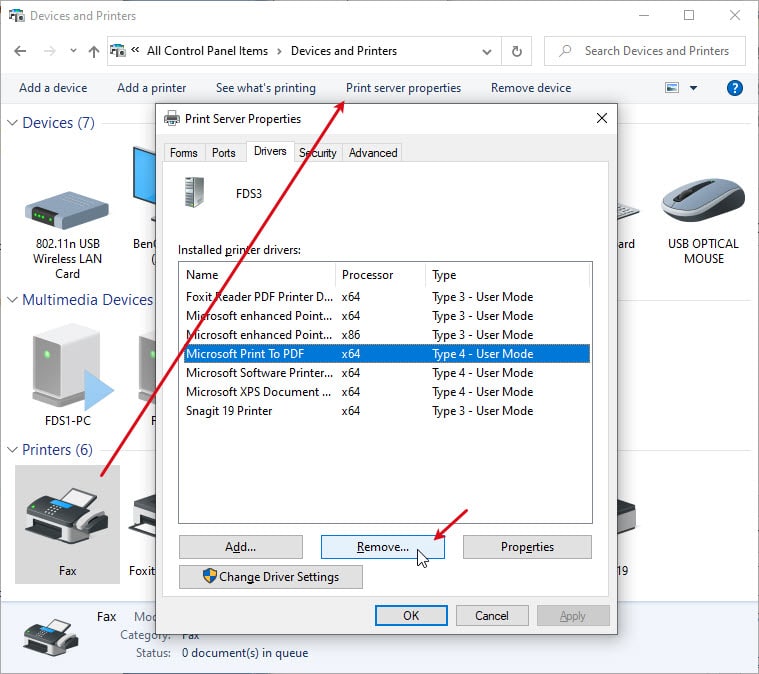
- In the top ribbon, you will see a new Print server properties tab appear. Click on that to open the Print Server Properties
- Go to the Drivers
- Select your printer from the list of installer printers.
- Click on the Remove… button at the bottom of the printers list.
- Click on the Apply button followed by OK to save your changes.
- Now go to Settings > Devices > Printers & scanners.
- Remove your printer driver and software from the Windows Settings app.
If you see that this method fails and you cannot remove printer in Windows 10, you need to stop the print spooler service.
Solution 2: Stop The Print Spooler Service
The print spooler handles the print jobs sent to your printer and any error to the spooler service can lead to you getting the Windows 10 cannot remove printer error on your device.
- Open a Run dialog by pressing Win + R.
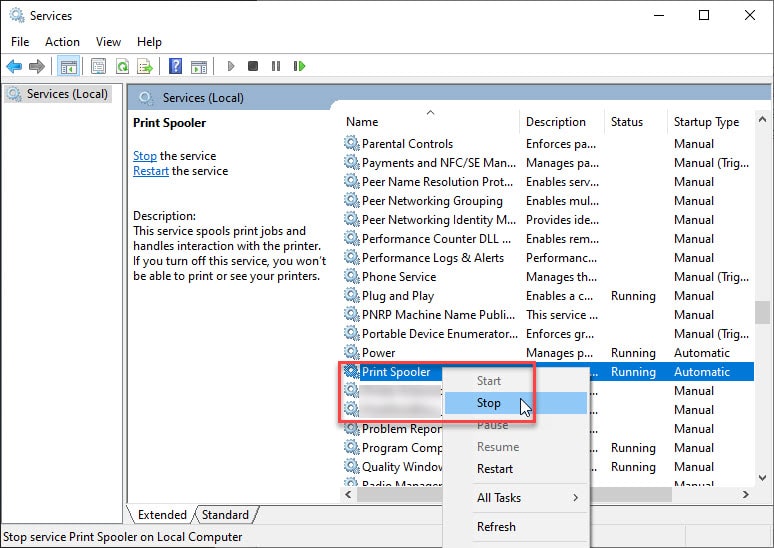
- Type services.msc and press Enter to launch the Services console.
- Locate the Print Spooler service and double click on it to open its Properties.
- Check the status of the service. If you see that it is already running, first stop the service using the Stop button.
- Open a Run dialog again using the Win + R keys.
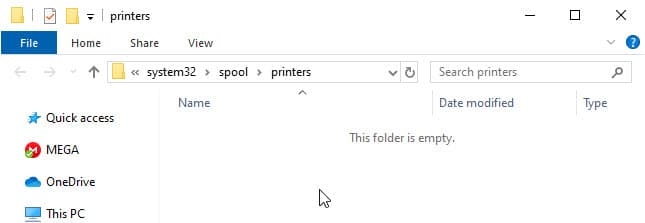
- Type %WINDIR%\system32\spool\printers and press Enter to open the printer spool.
- Delete all the files in the folder that opens.
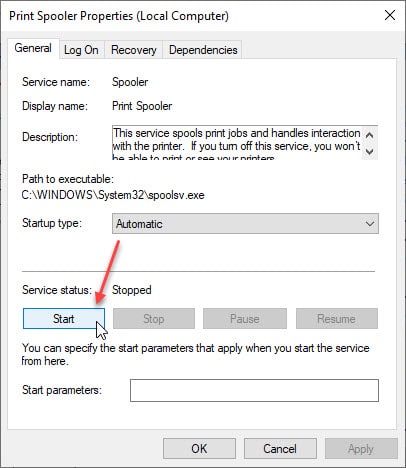
- Go back to the Services console, and open Print Spooler properties again.
- Click on the Start button, and make sure that the Automatic option is selected from the startup type drop-down menu.
- Close the Services console and re-attempt removing the device from your computer.
Now you should be able to remove the printer easily from your device.
Solution 3: Remove Printer From Registry
If you cannot remove a printer from your Windows 10 device, there might be some registry changes that you need to make before you are able to remove the printer itself.
To remove printer from registry, follow these steps:
- Open a Run dialog by pressing Win + R.
- Type regedit and press Enter to launch the Registry editor. Click on Yes in the user account control prompt.
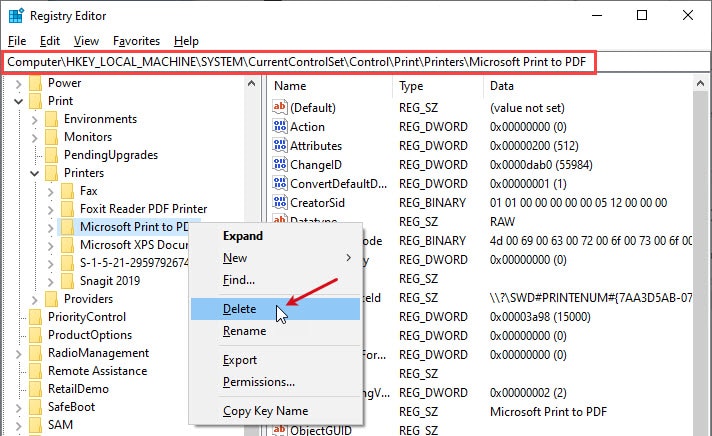
- Navigate to the following location by pasting the path in the address bar of the Registry Editor:
Computer\HKEY_LOCAL_MACHINE\SYSTEM\CurrentControlSet\Control\Print\Printers - You will see that the Printers key in the left pane is expanded.
- Here, locate your printer and right-click on it.
- Choose Delete from the right-click context menu.
- Restart your PC once you have deleted the key.
Once you have deleted the registry keys for your printer, try removing your printer from the Devices section of the Windows 10 settings app. You should be able to remove the printer without any trouble.
Solution 4: Remove From Print Management
Many users have reported that they were able to remove the misbehaving printer from the Print management application tool. This seems fairly simple to do, and you need to follow these steps to remove your printer using the Print management tool.
- Open the Windows Search by using the keyboard combination Win + S.
- Type Print Management, and select the first result from the list.
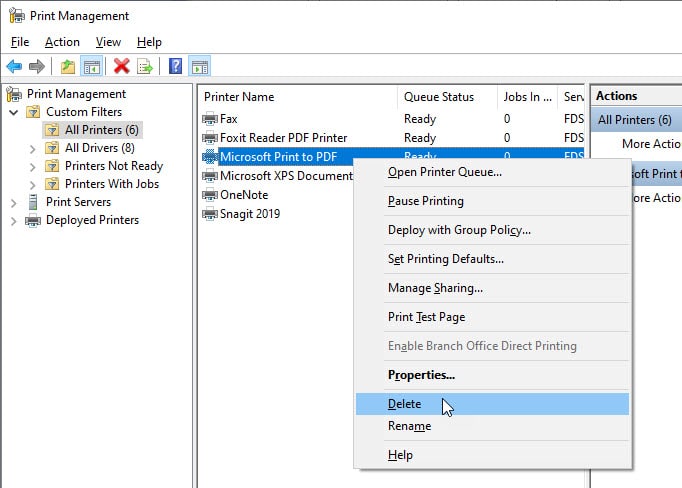
- Expand the Custom Filters section from the left pane. Click on All Printers.
- In the middle pane, locate your printer from the list of available printers.
- Right-click on your printer and select Delete from the right-click context menu.
This should allow you to delete your printer from your Windows 10 device.
Solution 5: Uninstall Printer From Command Prompt
If you prefer using command line interpreter tools, you can also use Command Prompt to delete your printer. You need to follow these steps to delete your printer:
- Open an elevated command prompt window. To do this, open a Run window by pressing Win + R, type cmd and press Ctrl + Shift + Enter to launch the Command Prompt with administrative privileges.
- Type the following command and press Enter to fetch the list of all available printers on your device:
wmic printer get name - Locate the name of your printer.
- Type the following command to uninstall your printer:
printui.exe /dl /n “<YOUR-PRINTER-NAME>”
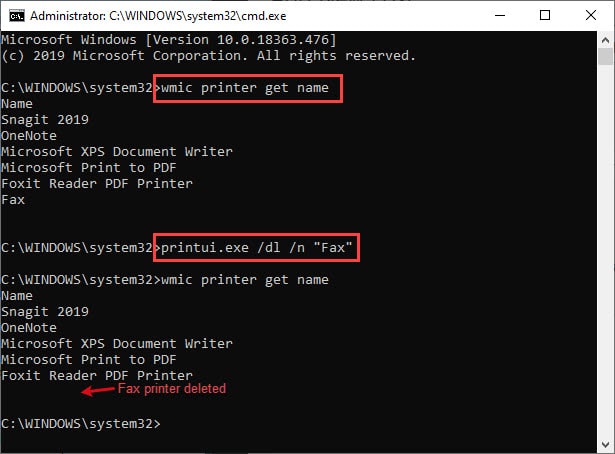
The printer that you specified in the command should be deleted from your computer.
Solution 6: Delete The Driver Entries From The Registry
Upon uninstalling the printers from your device, you also need to remove the registry entries for the drivers corresponding to your printer. Follow these steps to delete the driver entries from your device.
- Open an elevated command prompt window. To do this, open a Run window by pressing Win + R, type cmd and press Ctrl + Shift + Enter to launch the command prompt with administrative privileges.
- Type the following command to stop the print spooler:
net stop spooler - Open a Run dialog by pressing Win + R.
- Type regedit and press Enter to launch the Registry editor. Click on Yes in the user account control prompt.
- Navigate to the following locations by pasting the path in the address bar of the Registry Editor:
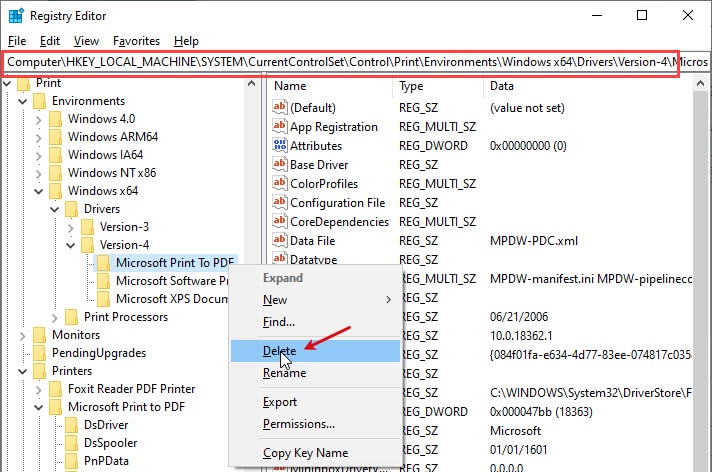
For 32bit devices:- Computer\HKEY_LOCAL_MACHINE\SYSTEM\CurrentControlSet\Control\Print\Environments\Windows NT x86\Drivers\Version-4
For 64bit devices:- Computer\HKEY_LOCAL_MACHINE\SYSTEM\CurrentControlSet\Control\Print\Environments\Windows x64\Drivers\Version-4 - Locate your printer here, and right click on it.
- Select Delete from the right-click context menu.
- Now open File Explorer. You can use the keyboard shortcut Win + E.
- Delete all files from C:\Windows\System32\spool\drivers\w32x863 If you have C:\Windows\System32\spool\drivers\w32x861 or C:\Windows\System32\spool\drivers\w32x862 folders on your PC, make sure to delete all files from those folders as well.
- Open an elevated command prompt again. Type the following command to start the print spooler:
net start spooler.
Wrapping Up
So there you have it. Now you know how to resolve the ‘cannot remove printer Windows 10’ error on your device using the solutions provided above. Comment below if you found this useful, and to discuss further the same.